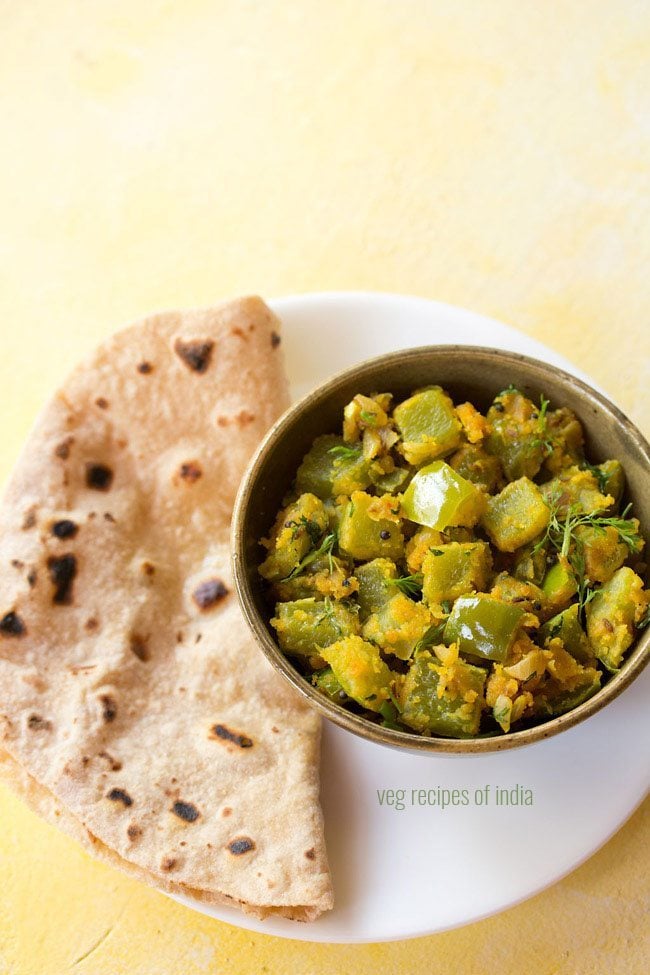
In the Marathi language this recipe is also known as Bhopla mirch chi peeth perun bhaji, where bhopla mirch means capsicum and peeth means flour. In this case, peeth means gram flour. There are many variations of preparing this recipe. Here is how I prepare this bhaji. This shimla mirch besan recipe is very easy to prepare and gets done within 20 to 25 minutes. So good for those days when you do not have much time for cooking. It goes well in a tiffin box. As the bhaji has a sweeter taste due to the capsicum and besan, it is liked by kids. You can pack this shimla mirch besan bhaji with some chapatis or paratha. It also can be served as a side dish with dal-rice or varan-bhaat.
How to make Capsicum Besan Bhaji
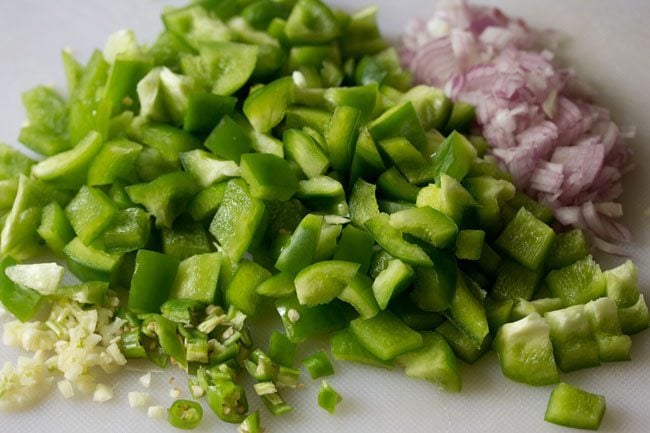
- First rinse, halve, remove the seeds and then chop 2 large capsicums (300 grams) in 1.5 cm cubes or squares. Also chop 1 medium onion, 3 to 4 medium garlic cloves and 1 to 2 green chillies. Keep aside.
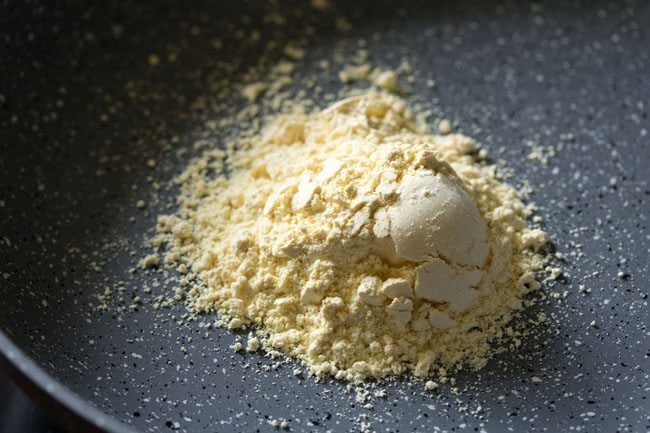
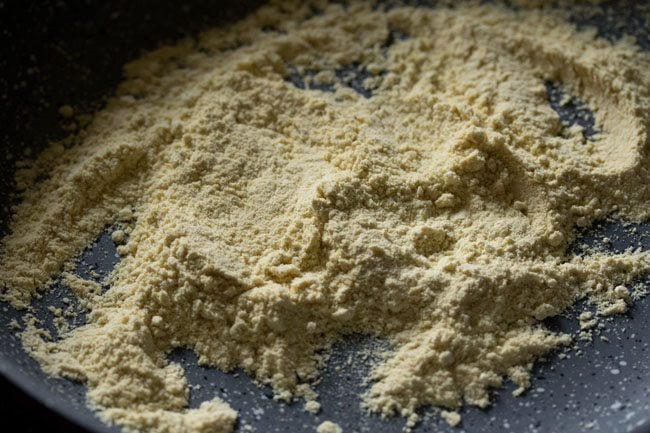
- Heat a thick bottomed shallow frying pan or kadai. Keep the heat to a low and add ¼ cup besan. Make sure that the besan is fresh and within its shelf life.
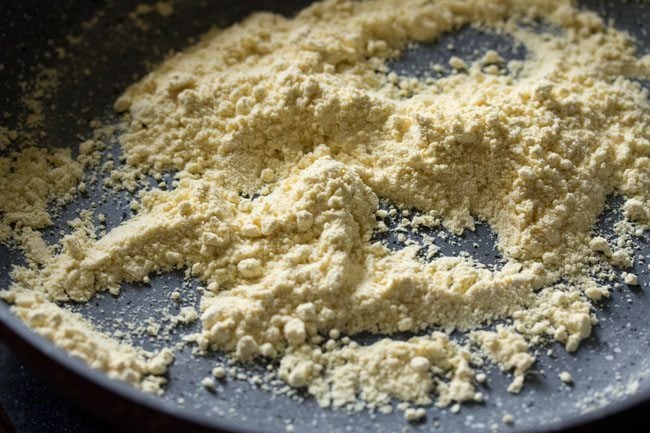
- Roast the besan on low heat stirring often till it becomes aromatic and changes color.
- The besan has to be roasted well and should not be raw as we are not going to cook it much further.
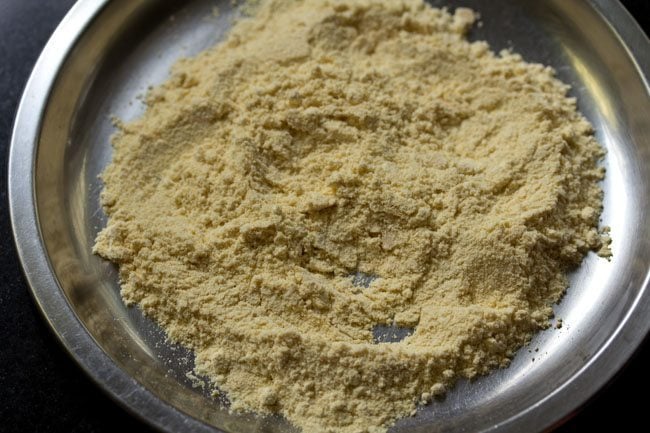
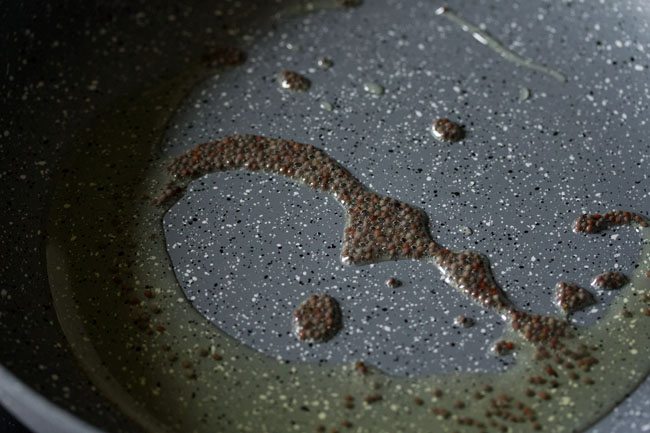
- Roasting besan will take about 5 to 6 minutes on a low heat. Once the besan has got roasted well, remove it to a separate plate. 6. In the same pan, add 2 tablespoons of peanut oil (You can also use sunflower oil). When the oil becomes hot, add ½ teaspoon of mustard seeds. Lower the heat.
- When the mustard seeds crackle, add ½ teaspoon of cumin seeds. Saute till the cumin seeds also splutter and change color.
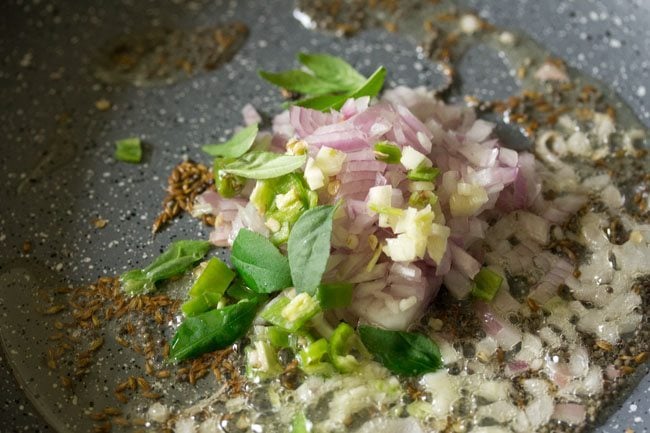
- Next add the following ingredients:
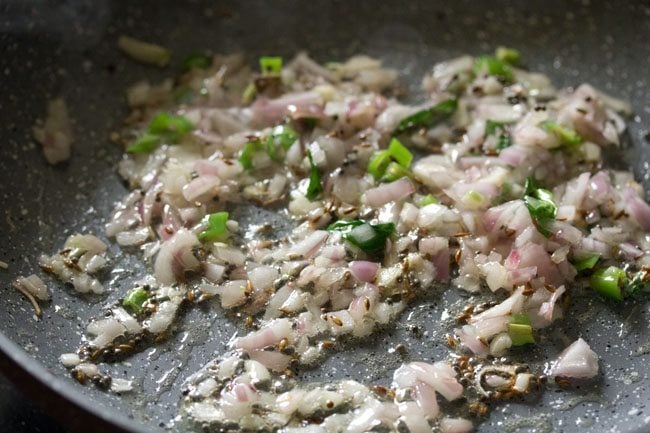
⅓ cup chopped onions1 teaspoon chopped garlic1 or 2 chopped green chillies 8 to 10 curry leaves
- Stir well and sauté till the onions turn translucent stirring often.
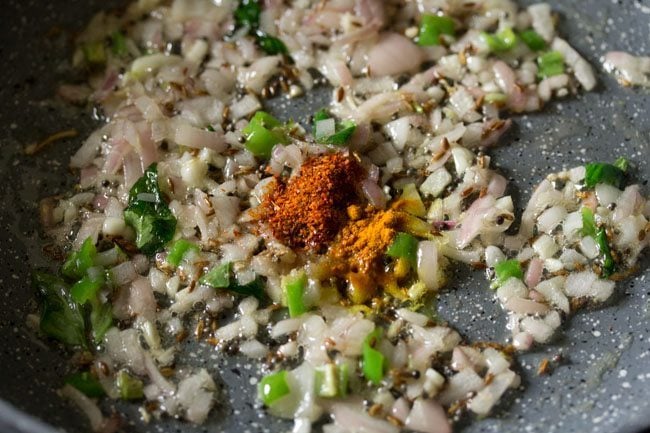
- Then add the following:
¼ teaspoon turmeric powder¼ teaspoon red chilli powder 1 pinch asafoetida (hing)
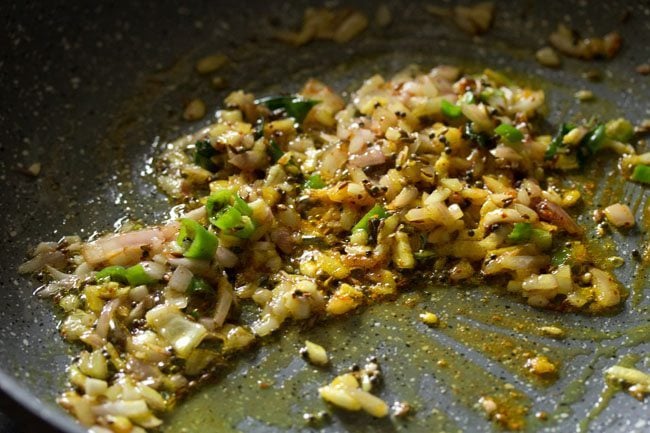
- On a low heat, mix both the spice powders very well ensuring that they do not get burnt.
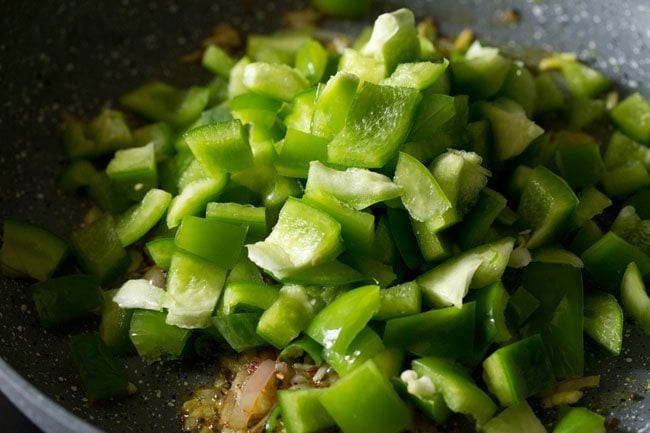
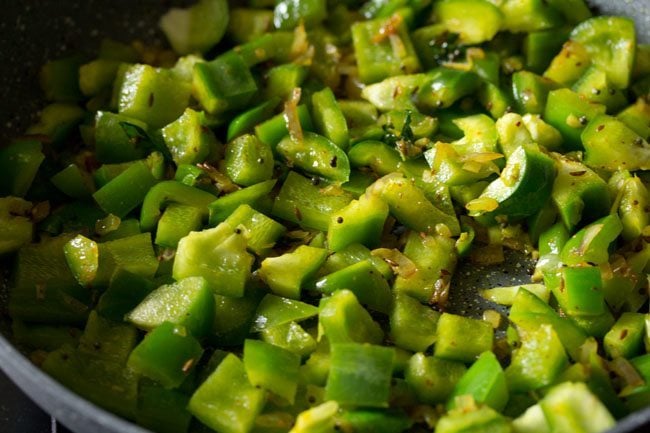
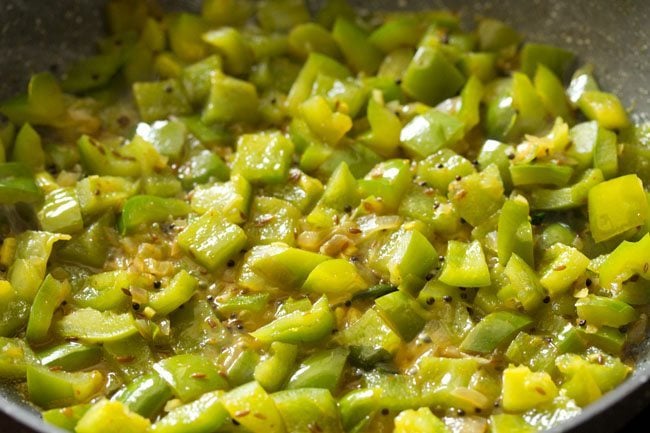
- Now add the capsicum cubes. You can use any color capsicum – green, red or yellow.
- Stir and mix very well with the rest of the ingredients.
- Add salt as required. Stir and mix again.
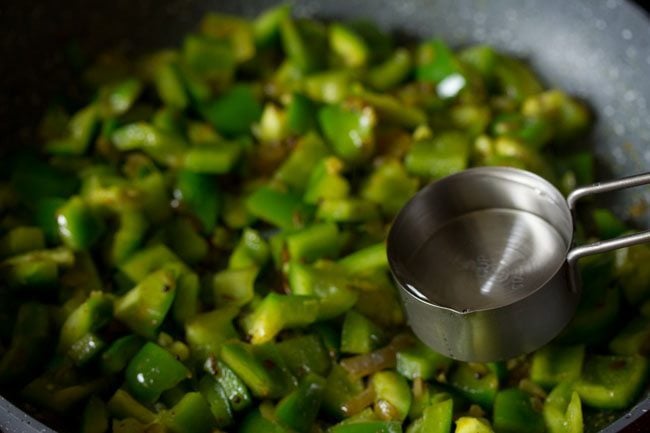
- Pour ¼ cup water and stir.
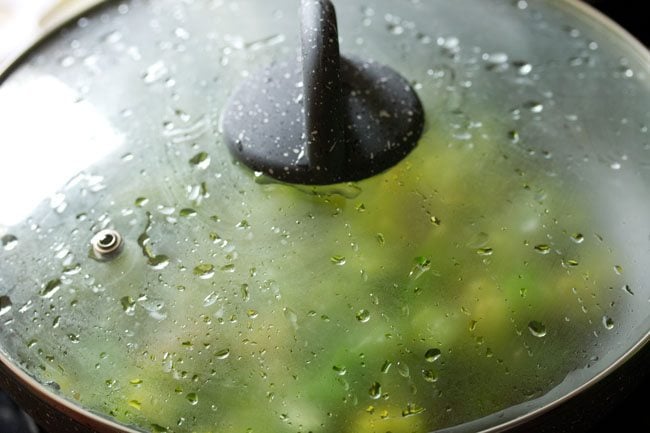
- Cover the pan with a lid and cook the capsicum on a low heat.
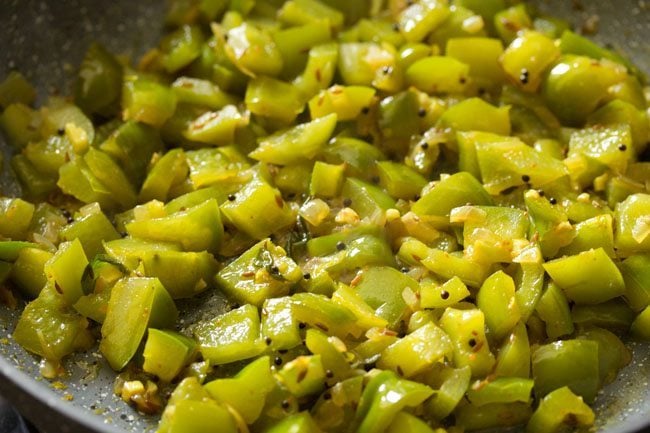
- Do check the capsicum a couple of times when its cooking and stir. If the water dries up, you can add more water.
- The capsicum has to be tender and done. Some water will also be there when the capsicum gets cooked.
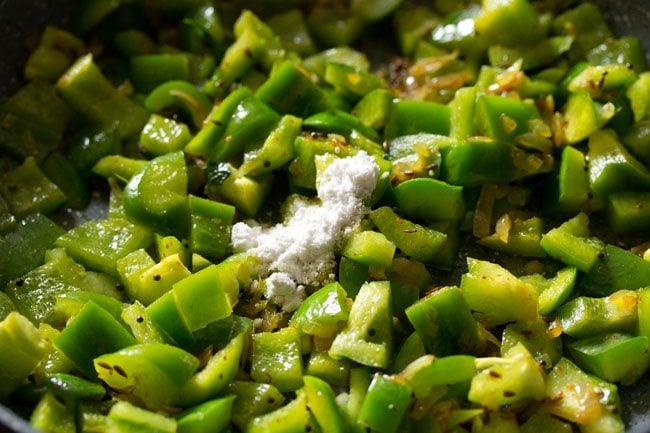
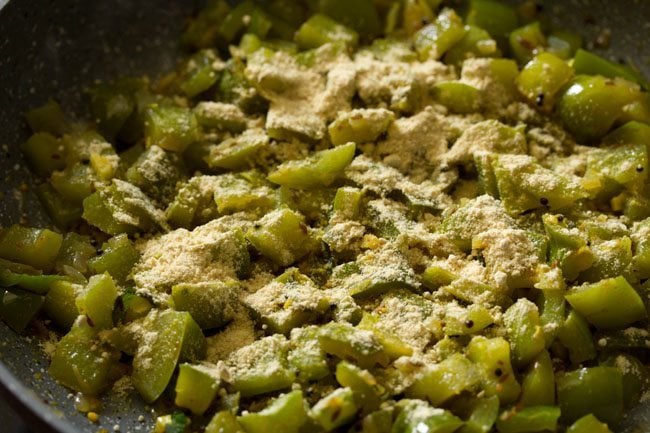
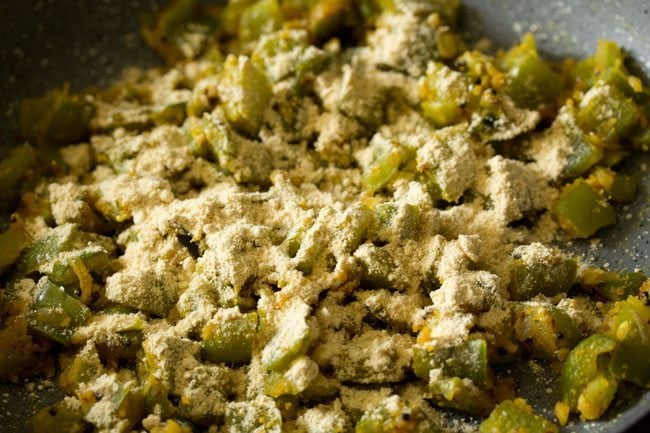
- Then add the roasted besan in batches. First, sprinkle add 1 tablespoon besan all over the capsicum sabzi.
- Stir and mix very well.
- This way keep on adding roasted besan in batches and mixing.
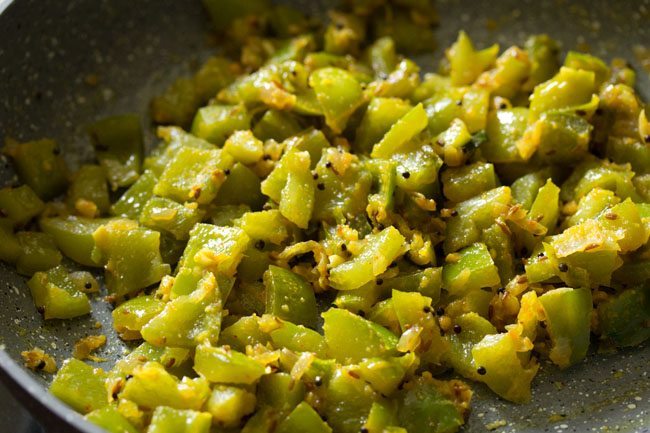
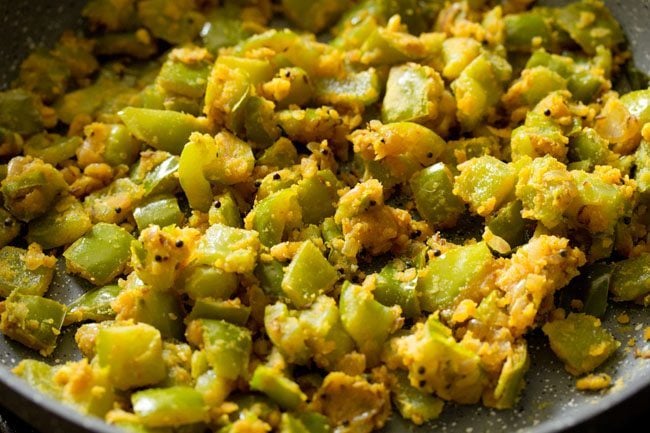
- Mix the besan very well with the capsicum bhaji. If the bhaji looks very dry, then you can sprinkle some water. You can saute further for 1 to 2 minutes or more if you prefer.
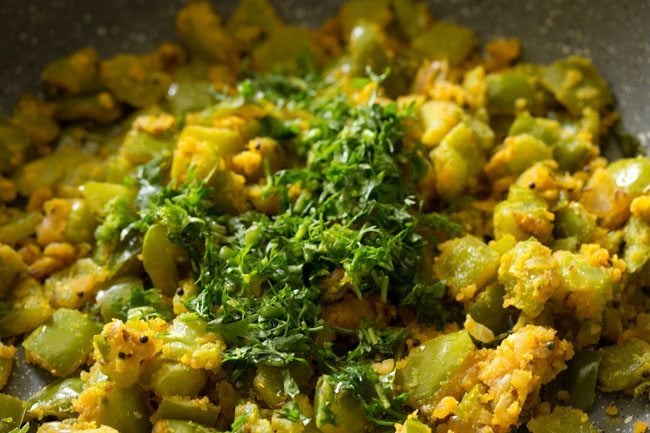
- Lastly switch off the heat and add 2 tablespoons chopped coriander leaves. Also, drizzle ½ to 1 teaspoon of lemon juice. Adding lemon juice is optional. You can also serve lemon wedges while serving the bhaji, instead of adding lemon juice at this step. I prefer to serve lemon wedges separately while serving the capsicum besan bhaji.
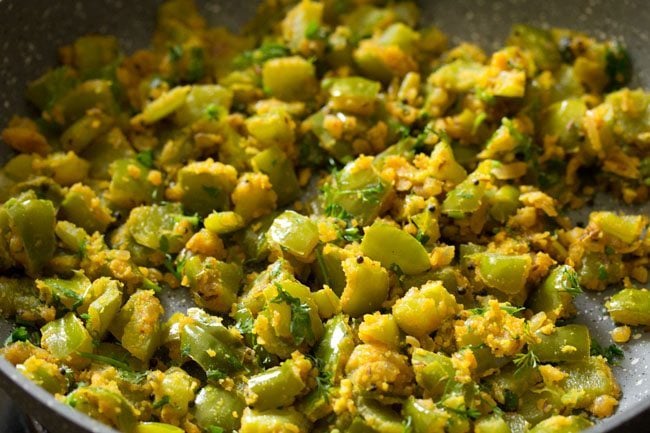
- Stir and mix very well.
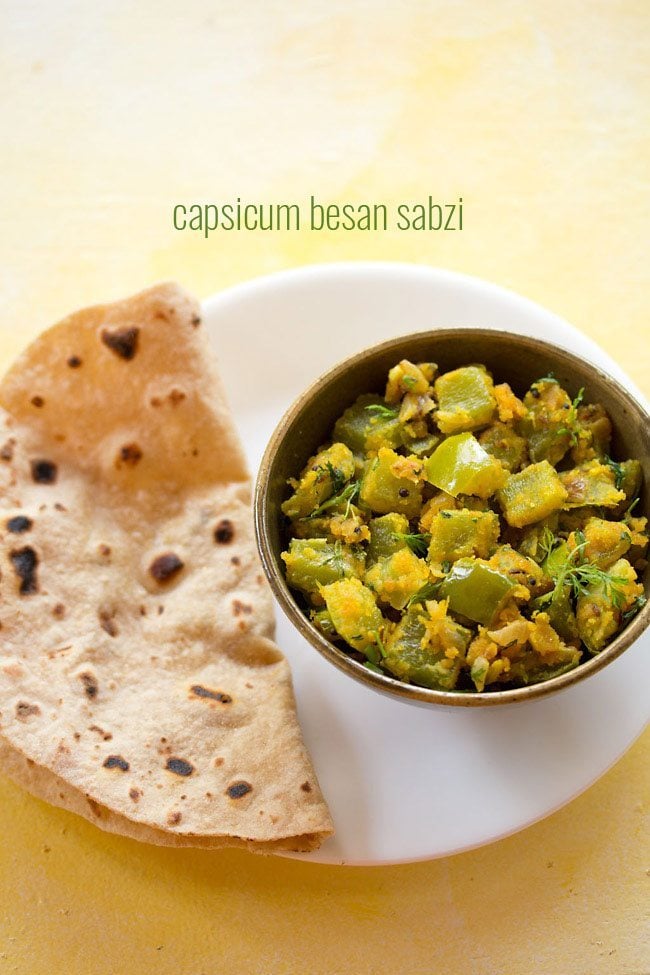
- Serve capsicum besan hot or warm with some chapatis or paratha or as a side dish with dal-rice or varan-bhaat or with your dinner or lunch. It can also be packed in the lunch box with a side of roti or paratha. For more capsicum recipes, you can check this link – Capsicum recipes. If you are looking for more Veggie recipes then do check:
Capsicum fryAloo gobiBhindi ki sabjiKathal ki sabjiStuffed capsicum
Please be sure to rate the recipe in the recipe card or leave a comment below if you have made it. For more vegetarian inspirations, Sign Up for my emails or follow me on Instagram, Youtube, Facebook, Pinterest or Twitter. This Capsicum Besan post from the blog archives first published in September 2016 has been republished and updated on 1 July 2022.

title: “Capsicum Besan Bhaji Shimla Mirch Besan” ShowToc: true date: “2024-10-24” author: “Ann Williams”
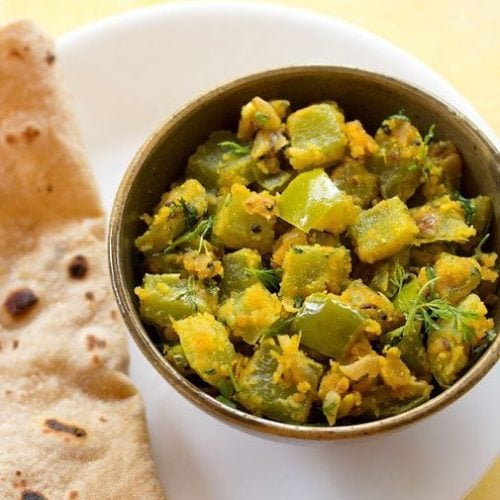
In the Marathi language this recipe is also known as Bhopla mirch chi peeth perun bhaji, where bhopla mirch means capsicum and peeth means flour. In this case, peeth means gram flour. There are many variations of preparing this recipe. Here is how I prepare this bhaji. This shimla mirch besan recipe is very easy to prepare and gets done within 20 to 25 minutes. So good for those days when you do not have much time for cooking. It goes well in a tiffin box. As the bhaji has a sweeter taste due to the capsicum and besan, it is liked by kids. You can pack this shimla mirch besan bhaji with some chapatis or paratha. It also can be served as a side dish with dal-rice or varan-bhaat.
How to make Capsicum Besan Bhaji
- First rinse, halve, remove the seeds and then chop 2 large capsicums (300 grams) in 1.5 cm cubes or squares. Also chop 1 medium onion, 3 to 4 medium garlic cloves and 1 to 2 green chillies. Keep aside.
- Heat a thick bottomed shallow frying pan or kadai. Keep the heat to a low and add ¼ cup besan. Make sure that the besan is fresh and within its shelf life.
- Roast the besan on low heat stirring often till it becomes aromatic and changes color.
- The besan has to be roasted well and should not be raw as we are not going to cook it much further.
- Roasting besan will take about 5 to 6 minutes on a low heat. Once the besan has got roasted well, remove it to a separate plate. 6. In the same pan, add 2 tablespoons of peanut oil (You can also use sunflower oil). When the oil becomes hot, add ½ teaspoon of mustard seeds. Lower the heat.
- When the mustard seeds crackle, add ½ teaspoon of cumin seeds. Saute till the cumin seeds also splutter and change color.
- Next add the following ingredients:
⅓ cup chopped onions1 teaspoon chopped garlic1 or 2 chopped green chillies 8 to 10 curry leaves
- Stir well and sauté till the onions turn translucent stirring often.
- Then add the following:
¼ teaspoon turmeric powder¼ teaspoon red chilli powder 1 pinch asafoetida (hing)
- On a low heat, mix both the spice powders very well ensuring that they do not get burnt.
- Now add the capsicum cubes. You can use any color capsicum – green, red or yellow.
- Stir and mix very well with the rest of the ingredients.
- Add salt as required. Stir and mix again.
- Pour ¼ cup water and stir.
- Cover the pan with a lid and cook the capsicum on a low heat.
- Do check the capsicum a couple of times when its cooking and stir. If the water dries up, you can add more water.
- The capsicum has to be tender and done. Some water will also be there when the capsicum gets cooked.
- Then add the roasted besan in batches. First, sprinkle add 1 tablespoon besan all over the capsicum sabzi.
- Stir and mix very well.
- This way keep on adding roasted besan in batches and mixing.
- Mix the besan very well with the capsicum bhaji. If the bhaji looks very dry, then you can sprinkle some water. You can saute further for 1 to 2 minutes or more if you prefer.
- Lastly switch off the heat and add 2 tablespoons chopped coriander leaves. Also, drizzle ½ to 1 teaspoon of lemon juice. Adding lemon juice is optional. You can also serve lemon wedges while serving the bhaji, instead of adding lemon juice at this step. I prefer to serve lemon wedges separately while serving the capsicum besan bhaji.
- Stir and mix very well.
- Serve capsicum besan hot or warm with some chapatis or paratha or as a side dish with dal-rice or varan-bhaat or with your dinner or lunch. It can also be packed in the lunch box with a side of roti or paratha. For more capsicum recipes, you can check this link – Capsicum recipes. If you are looking for more Veggie recipes then do check:
Capsicum fryAloo gobiBhindi ki sabjiKathal ki sabjiStuffed capsicum
Please be sure to rate the recipe in the recipe card or leave a comment below if you have made it. For more vegetarian inspirations, Sign Up for my emails or follow me on Instagram, Youtube, Facebook, Pinterest or Twitter. This Capsicum Besan post from the blog archives first published in September 2016 has been republished and updated on 1 July 2022.
