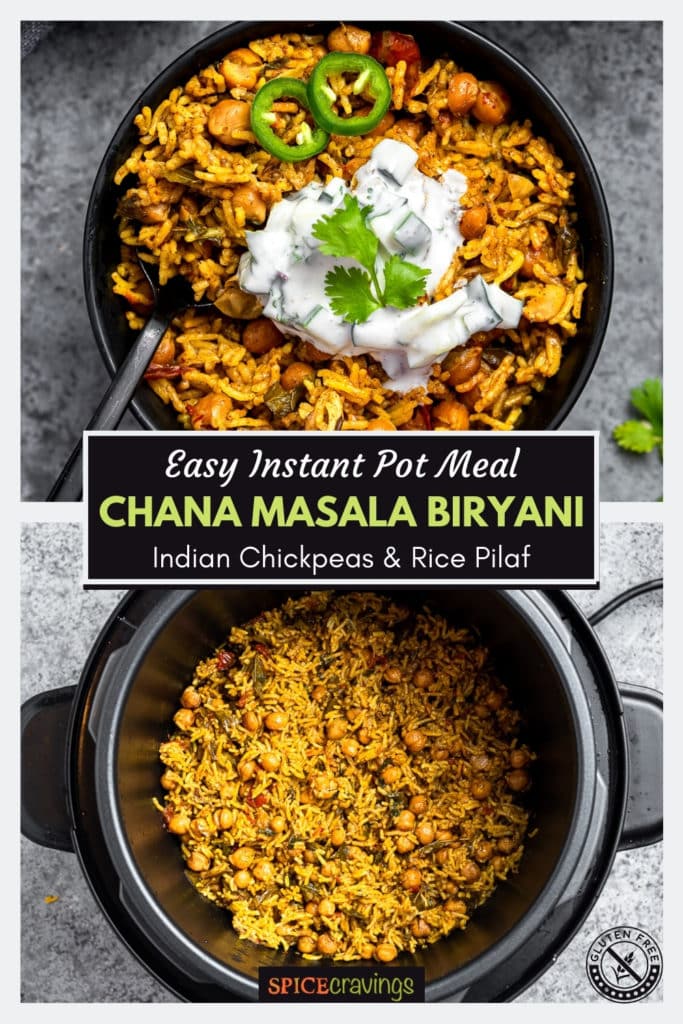
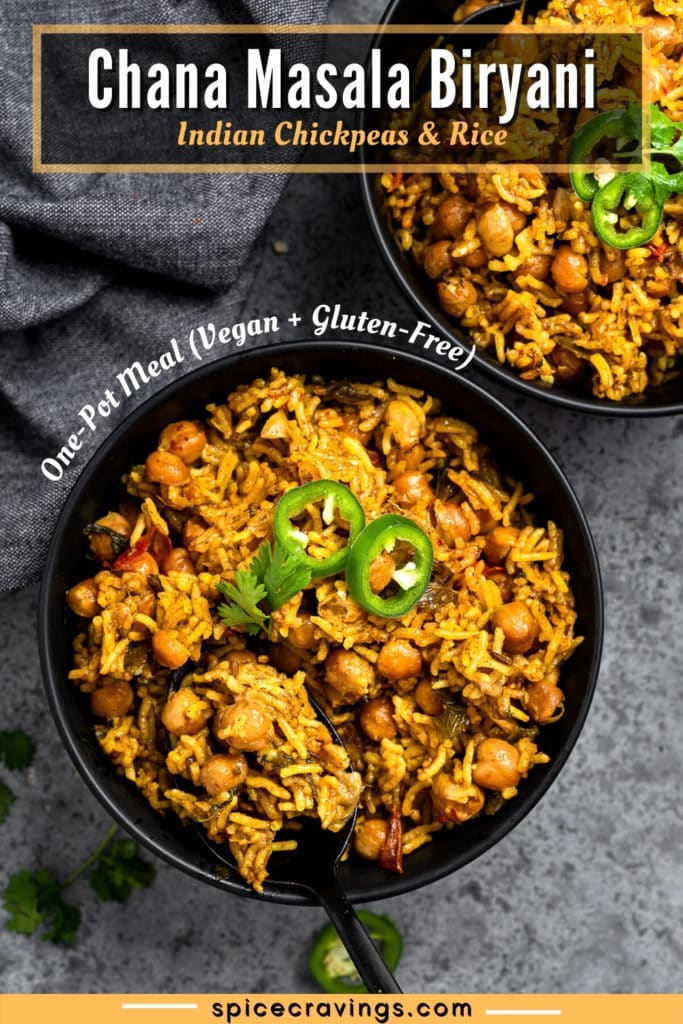
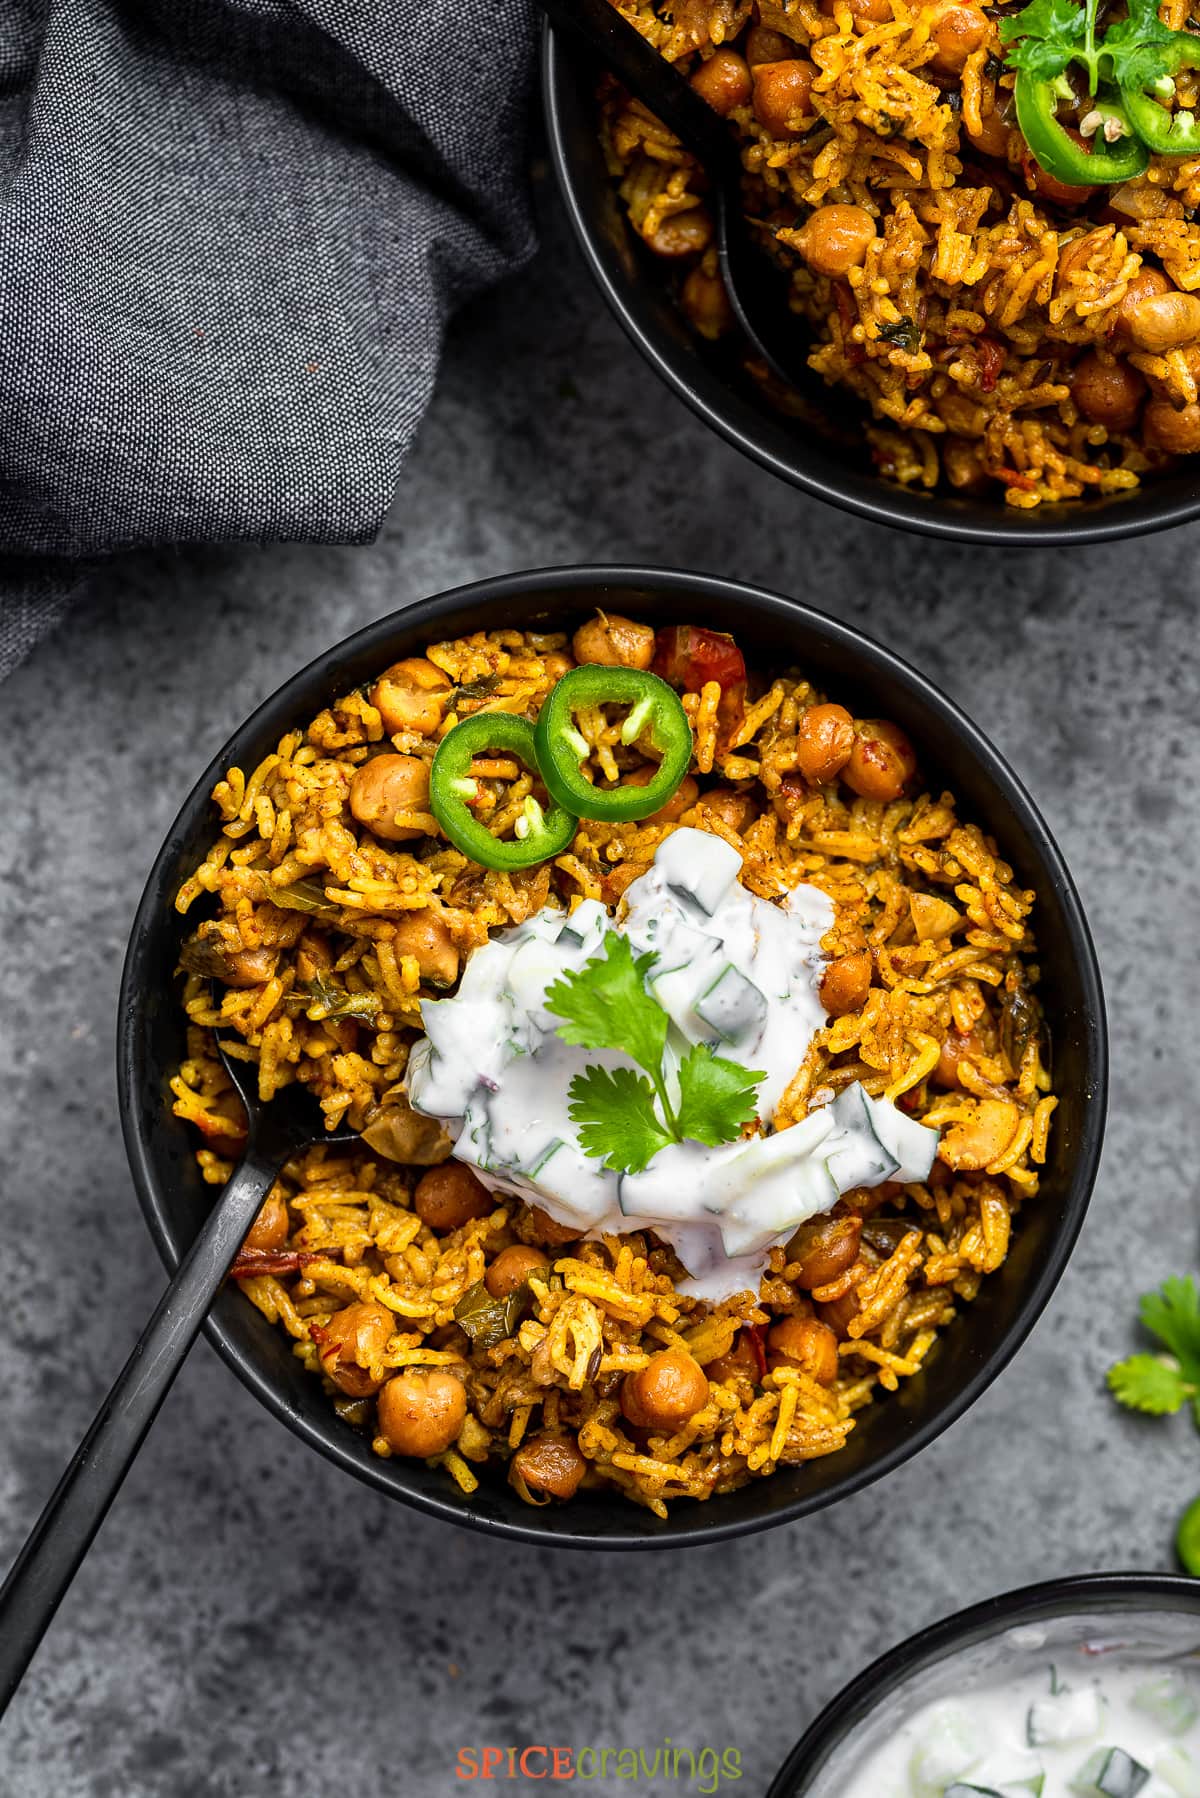
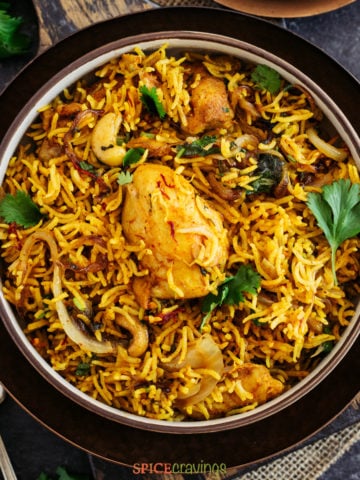
Pair it with refreshing cucumber raita and enjoy a hearty and nutritious meal. This dish is a combination of two delicious recipes rolled into one- Chana Masala and Biryani!
Chana Masala is a vegetarian Indian curry, in which chickpeas or garbanzo beans are cooked in an onion-tomato gravy, seasoned with toasted Indian spices. Biryani is a popular rice-pilaf, in which rice is cooked with seasoned meats or vegetables. In this dish, I have brought the two recipes together, all in one pot- the Instant pot of course! It’s a pleasant change from the routine menu. I start by preparing chana masala and then cook basmati rice in that curry. The result is a perfect blend of infused flavors that is unbelievably delicious. Unlike most other Biryani recipes on the blog, I don’t use any yogurt in this one, which makes it perfect for a vegan diet. It is also naturally gluten-free.
Ingredients- Notes & Substitutions
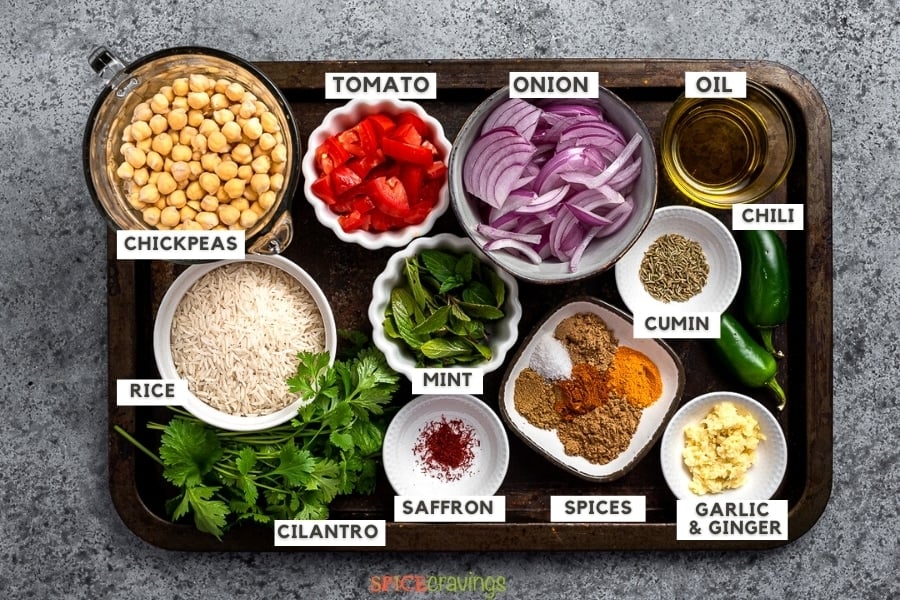
Let’s take a look at what we need to make this Indian chickpeas and rice. Scroll to the recipe card for a detailed list of ingredients and quantities.
Chickpeas: I use raw chickpeas that have soaked overnight. If using canned chickpeas instead, use 1 (15oz) can, and rinse and drain the chickpeas.Rice: Use Indian basmati rice or any long grain rice variety. Soak rice for 15-20 minutes for fluffy results.Onion, Ginger & Garlic: Use red, white or yellow onion. As for ginger and garlic, prepare a homemade ginger garlic paste, or use store-bought, frozen ginger paste and garlic paste. Tomato: Roma or plum tomato are the best choices for this dish since they have less seeds. If using canned diced tomatoes, drain the juice.Spices: We’ll use classic Indian spices including, turmeric, garam masala, coriander powder, cumin powder, and Kashmiri red chili powder.Cilantro: Chopped cilantro adds a colorful fresh finish to this dish.
30-Minute Recipe Tip: Turn this into a 30-minute meal by using canned or cooked chickpeas instead. Scroll down for detailed instructions.
How to Make Chana Masala Biryani
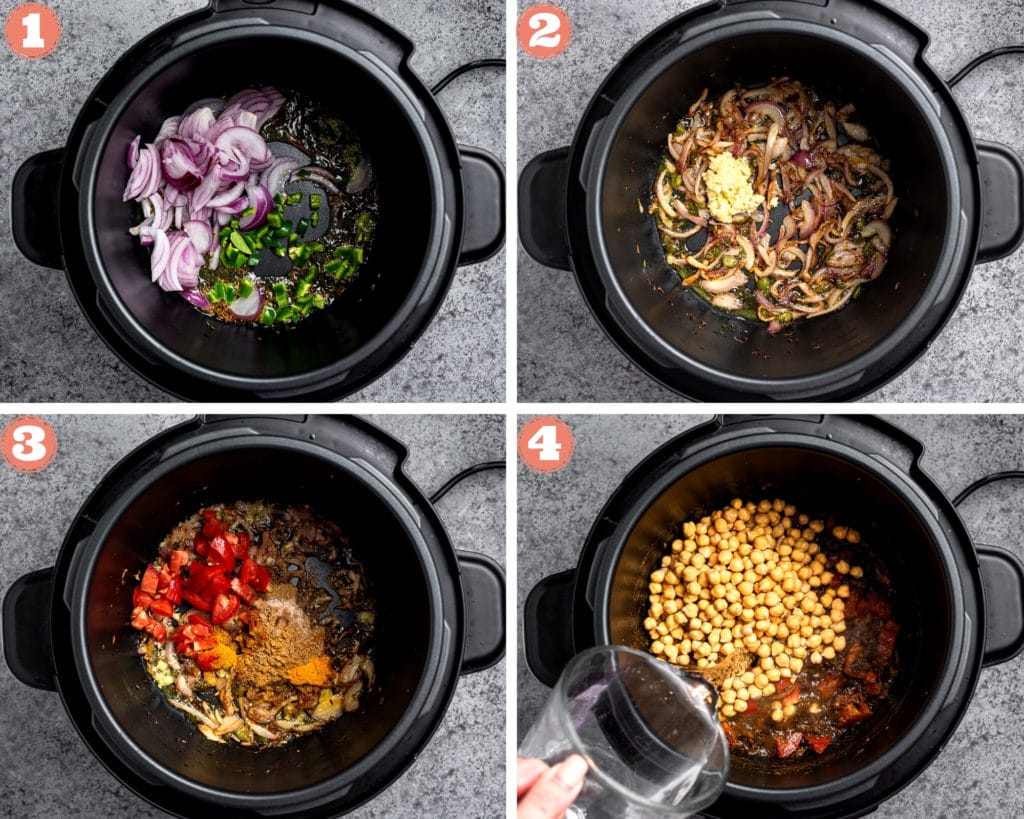
Even though this recipe is a two-step process, all the magic happens in the same pot. Here are the step-by-step directions. Start by rinsing and soaking basmati rice for 15-20 minutes, while you start on the curry. Step 1: Make Chana Masala curry
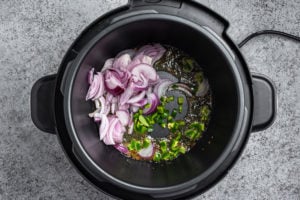
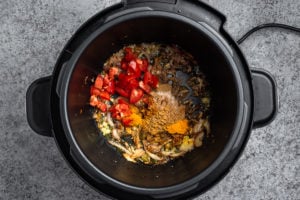
Fry Onions: Turn on Saute mode and adjust it to high or ‘more’. Add 1 tablespoon oil along with thinly sliced onions, serrano and ¼ teaspoon salt. Cook for 10-12 minutes until the onions are caramelized, stirring regularly. Remove and reserve half the caramelized onions for garnish. (pic 1)Saute aromatics: Add the remaining oil and cumin seeds. When cumin seeds begin to sizzle, add ginger and garlic paste, and sauté for a minute. (pic 2)Add tomatoes and spices: Stir in chopped tomatoes along with the spices and ¼ cup water. Stir well and cook for 1-2 minutes. (pic 3)Add chickpeas, pressure cook: Add rinsed and drained chickpeas and water. Stir well and close the lid. Set the vent to sealing position. Select Pressure cook or Bean/Chili mode 35 minutes. Once time is up wait for 10 minutes, then manually release pressure. Open the lid after the pin drops. (pic 4)
If using canned chickpeas instead: If you are using cooked chickpeas, you can skip this pressure cooking step. Instead, add ½ cup water, cover the pot with a glass lid and cook the chickpeas curry for 5-6 minutes.
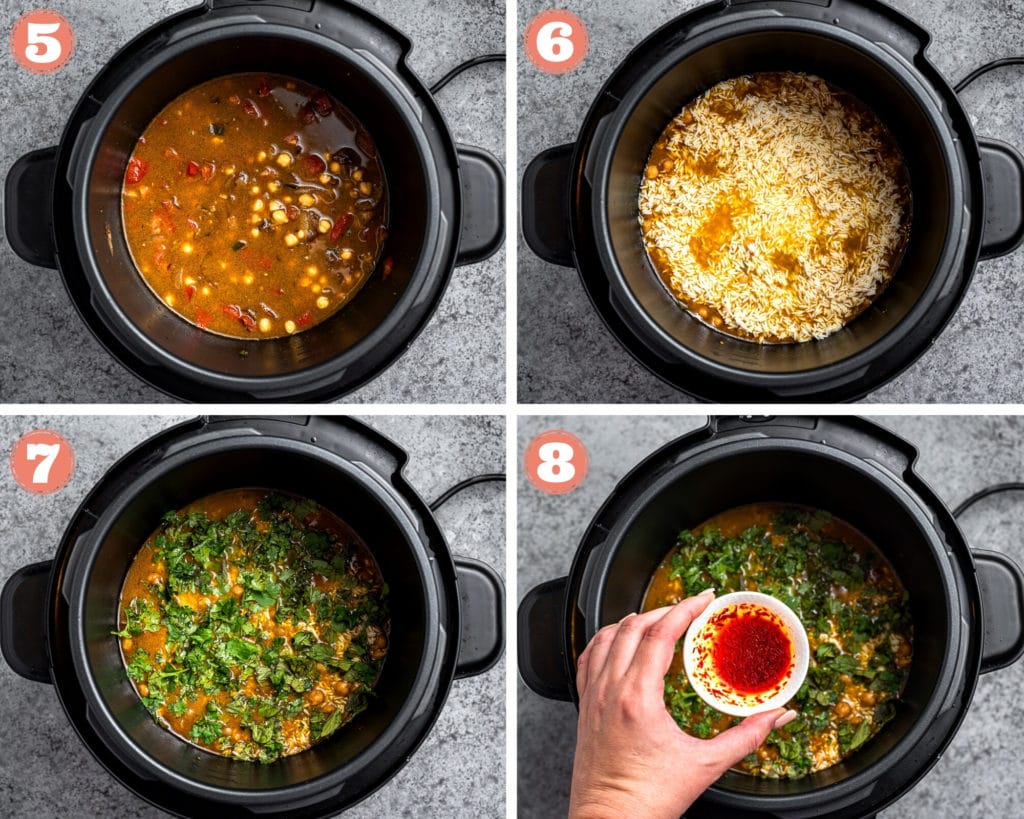
Step 2: Assemble and Cook Biryani
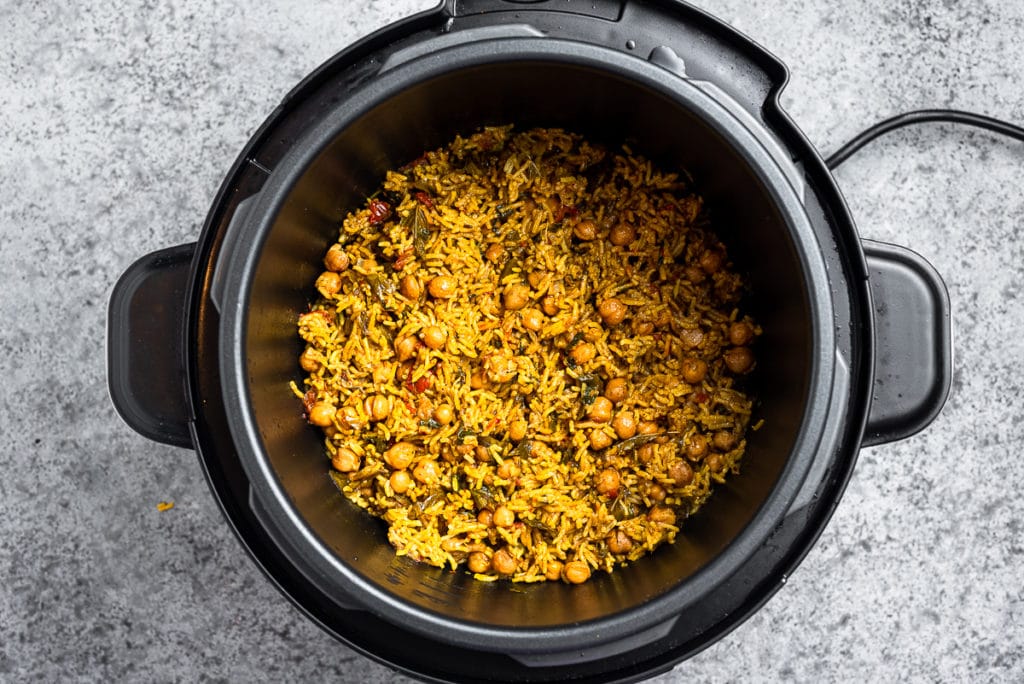
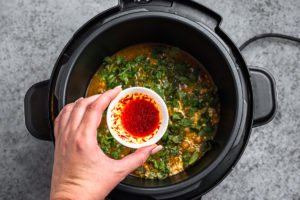
Stir the curry to ensure nothing is stuck to the bottom. Now spread the drained rice evenly over the curry. Gently push the rice under the liquid. Sprinkle the reserved salt and . (pic 5 & 6)Top with chopped cilantro & mint followed by soaked saffron (with liquid) and fried onions. Press down with a spatula gently. Close lid. Set valve to Sealing mode. Cook on Manual (high) for 6 minutes. (pic 7 & 8)Let the pressure release naturally for at least 5 minutes. After that release remaining pressure manually and open the lid after the pin drops. Using a fork, fluff the rice and let the pot sit, uncovered, for 5-10 minutes. This allows for the extra moisture to evaporate.
Serving Suggestion
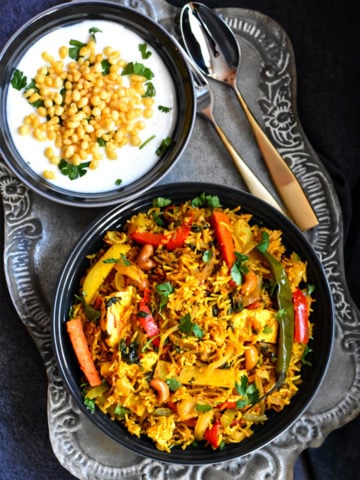
I always serve this biryani with Cucumber Raita, a popular Indian cucumber and yogurt dip. The cool yogurt and crunchy cucumber contrast and balance the earthy flavors of the Indian spices really well. For a vegan option, serve it with a fresh garden salad with cucumbers, tomatoes, onions, and lettuce, and dress it with a simple lemon vinaigrette.
How to Store
Store any leftover biryani in an airtight container in the fridge for 3-4 days, or in the freezer for up to 2 months. To reheat, sprinkle a few drops of water and heat in the microwave for 1 minute. If frozen, thaw it in the refrigerator overnight and follow the reheating instructions.
Recipe Tips
Soak rice: Soaking helps get rid of excess starch in the rice. This helps the rice turn fluffy after cooking.Add veggies: You can make this biryani more hearty by adding 1 cup of assorted vegetables like peas, carrots and potatoes, or frozen vegetables. Use cooked chickpeas to save time: You can make this biryani in 30 minutes by using cooked chickpeas or canned chickpeas instead of dried beans.Make it with brown rice: If making this biryani with brown basmati rice instead, assemble the chana masala as per instructions, but reduce the pressure cooking time to 15 minutes. After layering the brown rice, pressure cook for another 22 minutes.
More Indian Biryani Recipes
Check out the full variety of Instant Pot Rice Recipes.
📖 Recipe
This recipe has been updated with new photos, step-by-step instructions, and helpful tips.