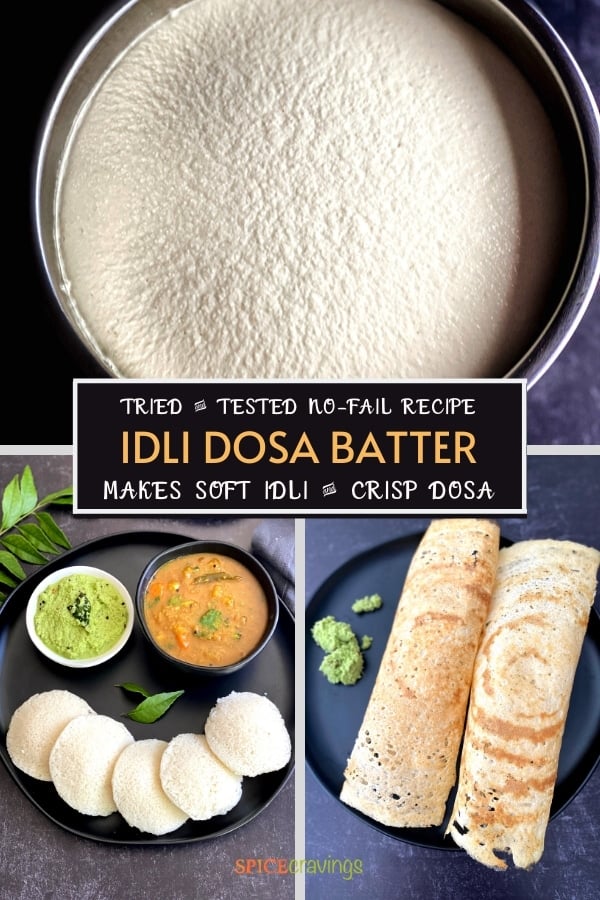
No-Fail Homemade Idli Dosa Recipe
Growing up in Delhi, in a typical north-Indian Punjabi home, Idli and dosa were a restaurant treat for us. My mom would attempt to make it from scratch once in a blue moon, and then we would all shamelessly discourage her from making it the next time 🙂
So I never really had a family recipe for Idli dosa batter!
When my girls were toddlers, they were obsessed with Idli and Dosa. That’s when I learned to make this batter from scratch. I got the recipe from my sister’s south-Indian mother-in-law, along with all her tips and tricks (thank you aunty!)
But I have to admit, the batter I made at home was moody. I would keep it overnight in the oven and pray that it ferments properly by the morning. If it fermented right, I would make idli, else I would use it to make dosas.
The running joke in my home was “so are we having idli or dosa tomorrow”, UNTIL I discovered how to ferment the batter in the Instant Pot. It was a touchdown moment for me 🙂
This recipe has been long requested by my girlfriends (my Friday-dosa-lunch squad), so here I am, sharing this fail-proof recipe. That’s right! With my Instant Pot and a little bit of know-how, this homemade idli dosa recipe ferments every single time.
Important Tip: I highly recommend reading through ALL the tips and tricks for this recipe.
What Is Idli Dosa Batter?
Idli dosa batter is a fermented batter made of idli rice and whole (or split) urad dal. It used to make idli (soft, steamed rice cakes) or dosa (savory crispy crepes). Idli and dosa are a specialty of South India, and are versatile enough to be enjoyed as a healthy breakfast food, lunch or dinner.
One Batter, Two Delicacies (actually Three)!
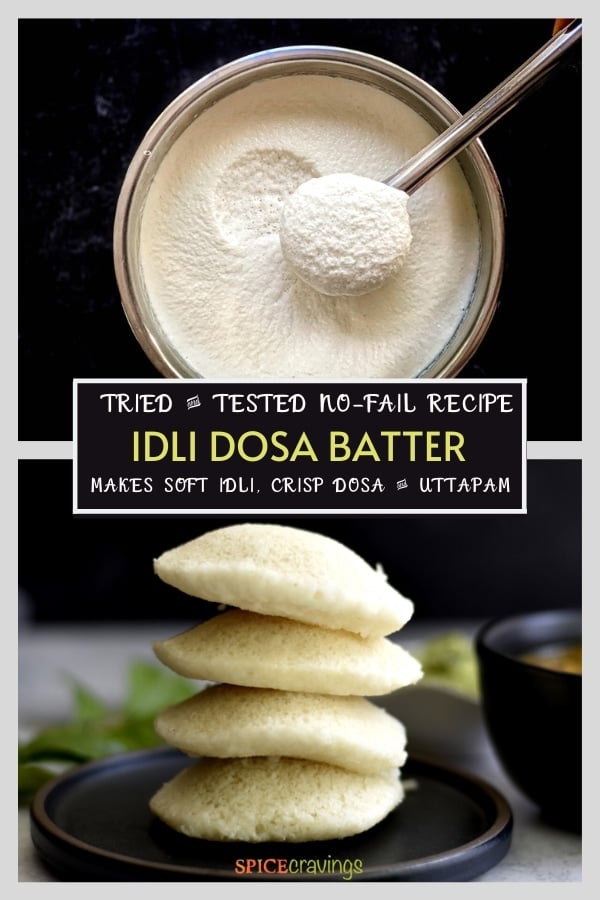
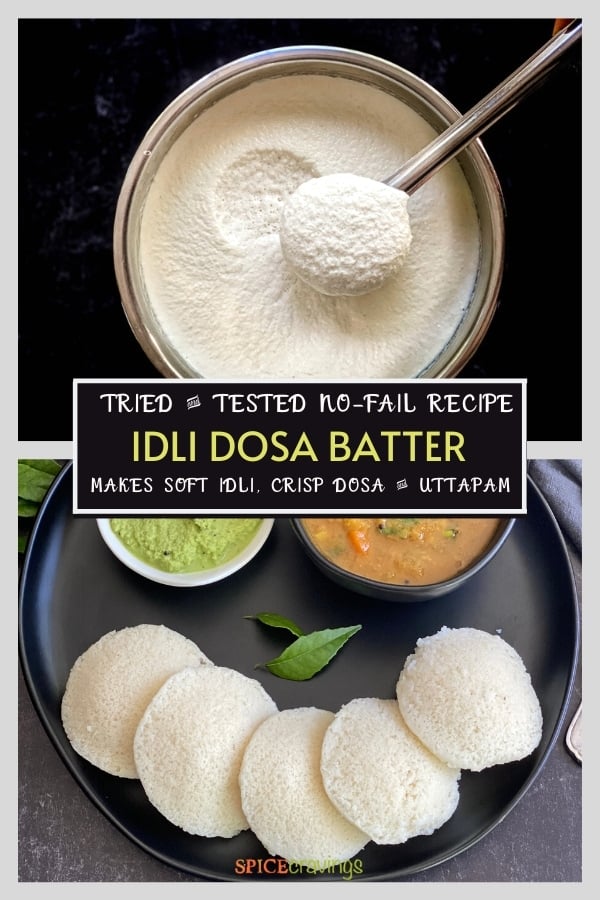
Idlis are soft and tender whereas dosas are crisp and golden. It’s hard to believe two distinctly different foods are cooked from the same batter. When it comes to the batter, it is all about the ingredients, proportion, consistency, and to an extent, the weather. With this batter, you can enjoy idli, dosa and even Uttapam (savory pancakes), any time at home. (Recipes for all three included below)
Instant Pot Idli Dosa Batter
This Instant Pot idli dosa batter is the ultimate game-changer! The trick is using the Yogurt mode set at a low temperature and simply leaving the batter to do its thing for a few hours. The gentle and consistent heat in the Instant Pot provides a controlled atmosphere for the batter to ferment properly. Plus, it’s real easy to put together too. Once the rice and dal are blended until smooth, the rest of the recipe is virtually hands off!
Ingredients, Notes & Substitutions
The ingredients to make this homemade batter include idli rice, urad dal, methi seeds (fenugreek seeds), cold water and non-iodized salt (sea salt, pink salt). Let’s checkout some important notes on these:
A Few Notes to Make the Perfect Batter:
Ratio of Rice to Dal: There are a few variations in the rice-to-dal ratio. I have tried 3:1, 2:1, and for me the best rice to dal ratio is 4:1, it makes the softest idlis and works equally well for dosa. But if you’re looking for a more protein-balanced batter, go for 3:1. Water Temperature: Use ice-cold water in order to prevent the batter from over-heating during the grinding process. Quantity of Water: The actual quantity of water needed will depend on the variety of rice and lentils you are using.For 4 cups rice, start with 1½ cups of water and blend. Add up to another ½ cup as needed. For 1 cup dal, start by adding 1¼ cups of water and blend. Add up to another ¼ cup as needed.
Step by Step Instructions
This simple and homemade batter for idli and dosa is so easy to make with a high-power blender, like Blendtec or Vitamix along with the Instant Pot. All you really have to do is soak, grind, mix, and ferment. Here are the step by step directions:
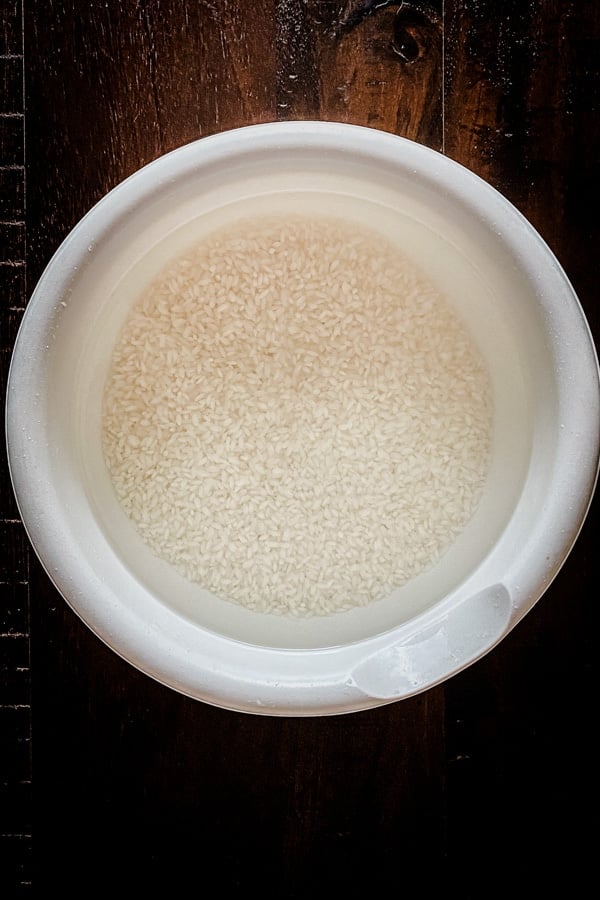
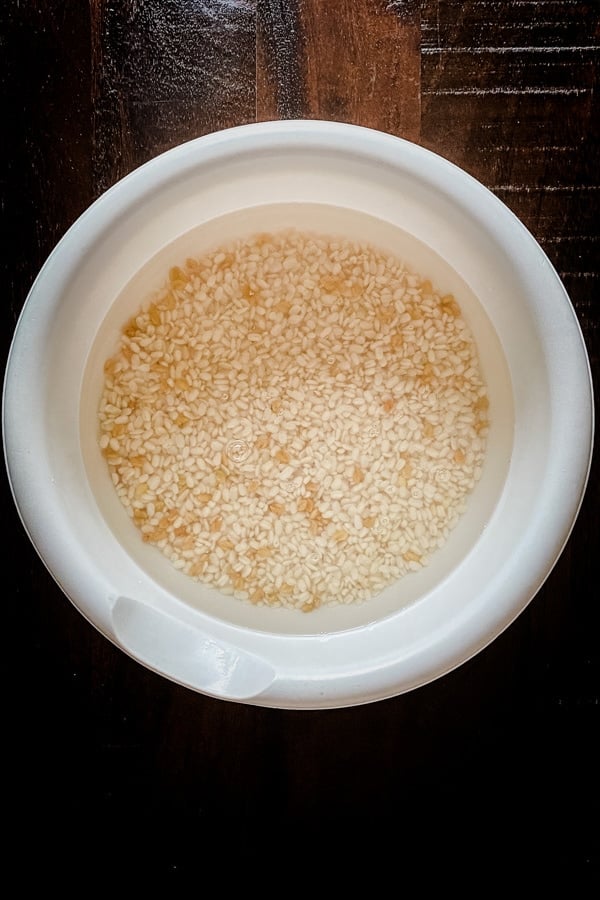
1. Soak Rice & Dal Separately
Since dal and rice have different ‘grinding’ textures, we want to soak them separately.
Rinse rice 2-3 times, until the water runs clear. Soak in enough water for 6 hours or overnight.
Rinse dal 2-3 times until water runs clear. Soak in enough water along with fenugreek seeds, for 6 hours to overnight.
2. Blend Rice & Dal Separately
Drain water from rice and add to the blender. Start by adding 1½ cups of ice-cold water and grind using the smoothie button. The batter should have a flowing consistency. If needed, add another ½-cup water and grind again. Transfer this batter to the Instant Pot stainless steel insert.
Drain the water from dal and add to a high-power blender. Start by adding 1¼ cups of ice-cold water and grind to a smooth paste using the smoothie button. If needed, add another ¼ cup water till you get a smooth pancake batter-like consistency. Transfer the batter to the same Instant Pot steel insert.
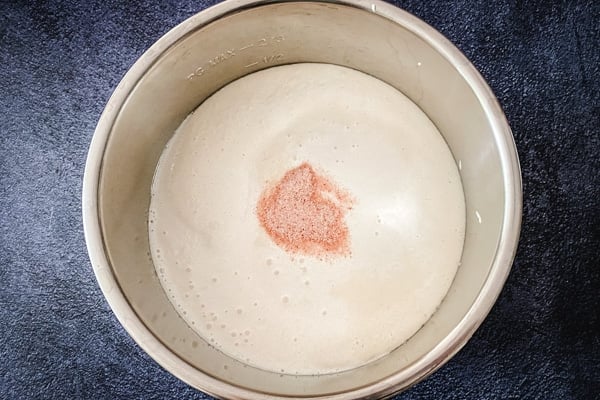
3. Add Salt and Mix
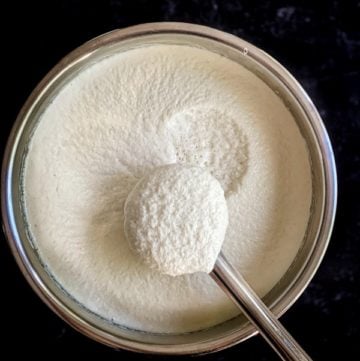
Add salt and mix the batter well, at least 1-2 minutes as this helps promote proper fermentation. Important: At this point, the consistency of the batter should be like pourable pancake batter - neither too thick nor runny.
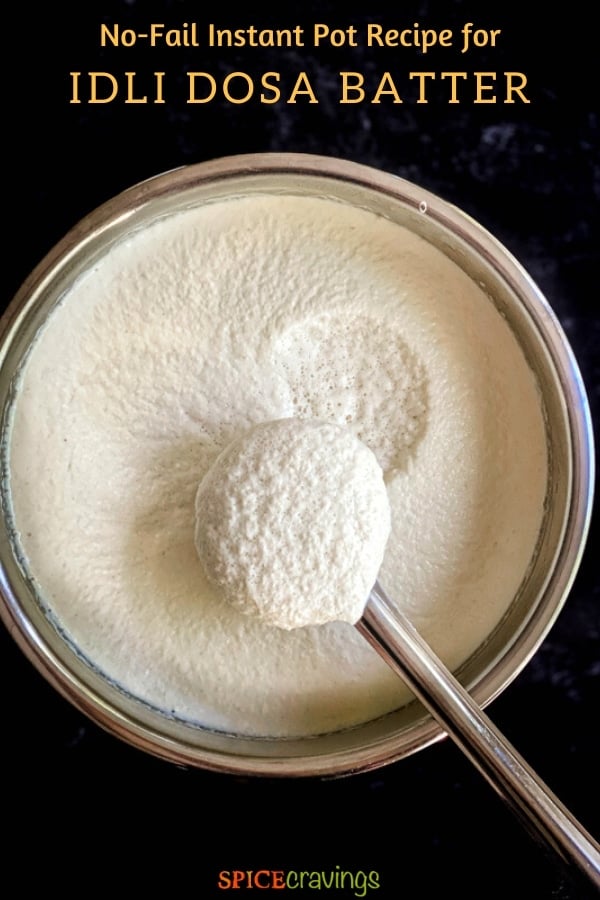
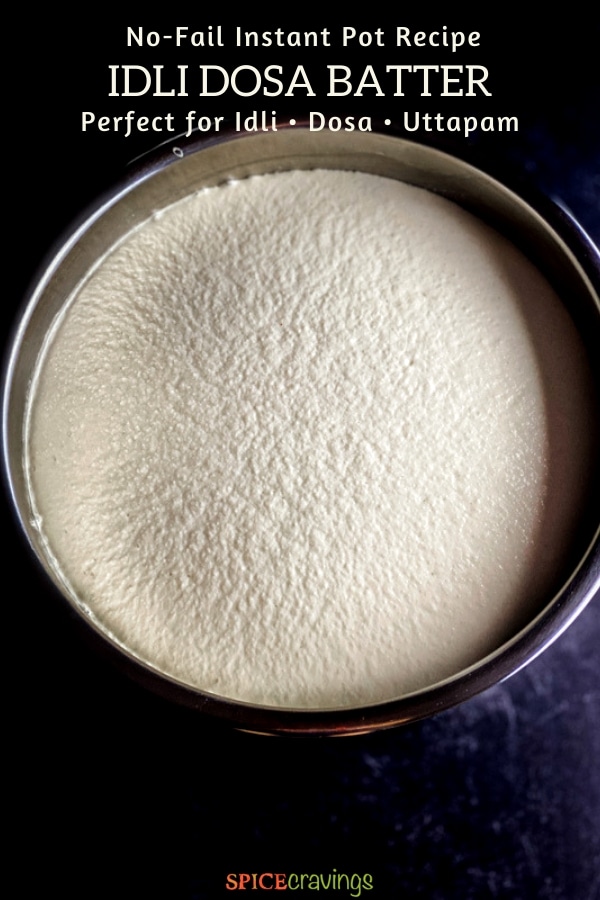
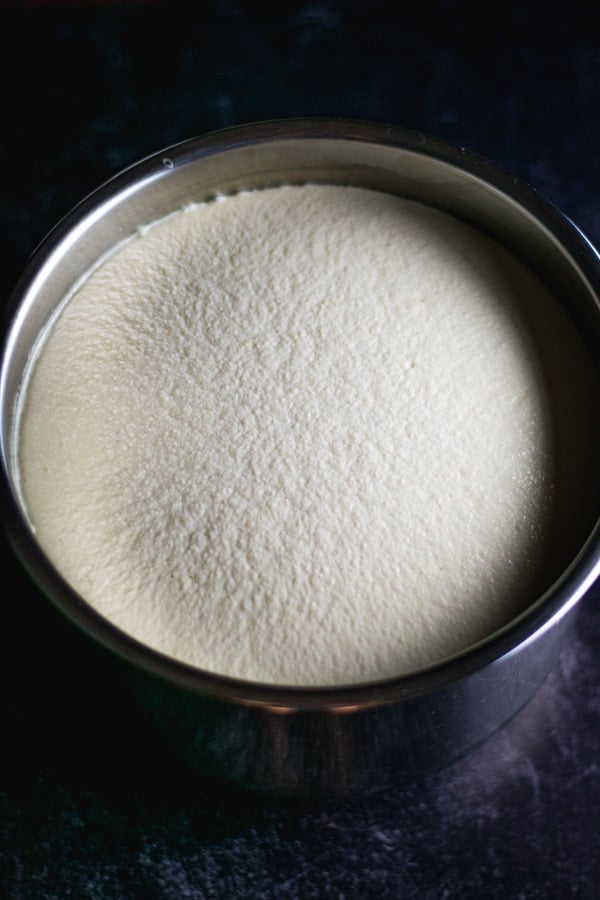
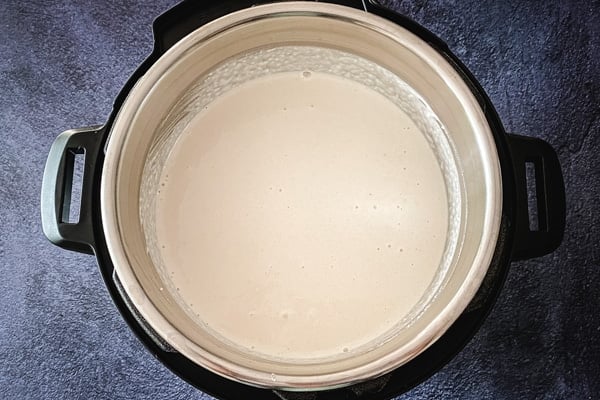
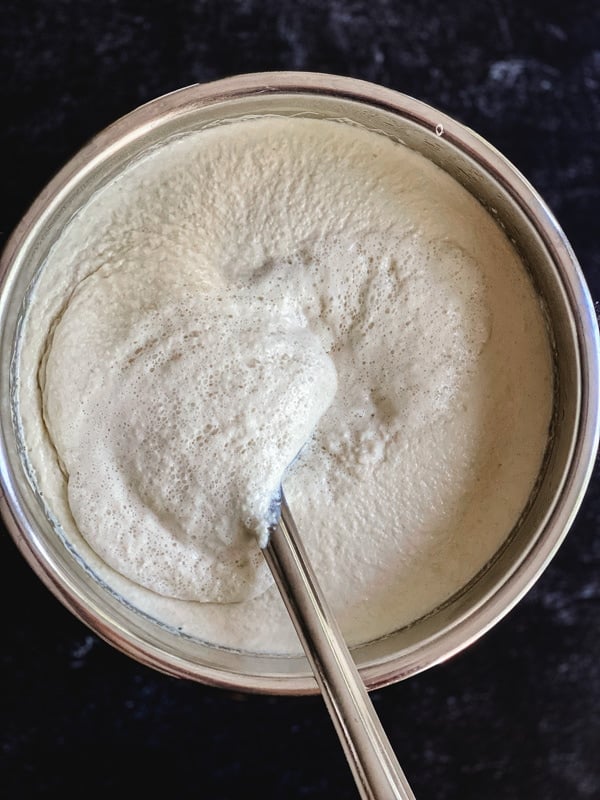
4. Ferment Batter in Instant Pot
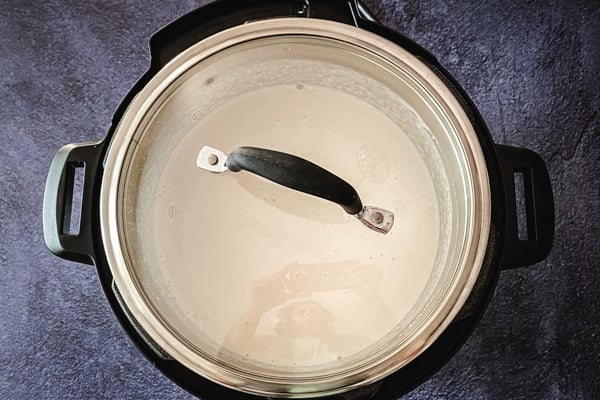
Place the steel insert in the Instant Pot. Cover with a glass lid. I suggest NOT using the Instant Pot lid as the fermented batter might jam the seal.
Select Yogurt mode and adjust to ’less’ or ’low’ mode. Set a time for 12 hours using the +/- buttons. At the end of this time, the batter should have risen to almost double in size and look slightly frothy. Tip: If it doesn’t look fermented, cover the lid and set it on Yogurt mode for another 1-2 hours. (The total time varies between 12-15 hours depending on the climate and variety of rice and dal).
Alternative Method: Ferment Batter in Oven
Transfer the batter to a large bowl with enough capacity to handle the fermented batter (almost double in size). Add salt and mix as per directions. Place it in the oven with the oven light on. Leave it for 12 hours or overnight. For extra insurance against the batter overflowing, place a baking sheet underneath.
Storage & Freezing Instructions
This batter can be stored in an airtight container in the fridge for one week or in the freezer for one month. Tip: I like to use the fresh batter to make idlis for the first few days, then make crispy dosas the rest of the week. They make an exceptionally delicious breakfast or mid-afternoon snack to power me through my day.
Variations To Try - Batter with Poha
Some dosa batter recipes ask for a handful of poha to be added to the rice. Poha (also known as aval) are flattened rice flakes. I have tried making batter ‘with’ and ‘without’ and haven’t noticed any big difference. If you do wish to try it, simply rinse and soak 1 cup poha along with the rice. Adjust the water as necessary.
How to Use this Batter?
This batter creates not only two but three Indian specialties - idli, dosa and uttapam. Follow the directions below to suit your craving.
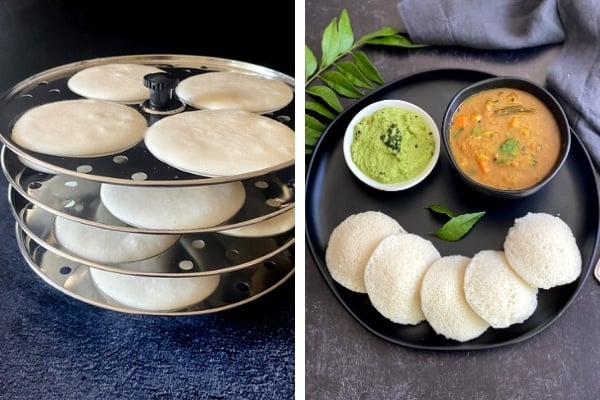
1. Soft Idli (steamed rice cakes)
Idli are soft, fluffy steamed rice cakes that are traditionally served during breakfast or lunch, with coconut chutney and sambar. To make idli, simply: This recipe is simple and straightforward, but here is a detailed step by step recipe for idli in an Instant Pot!
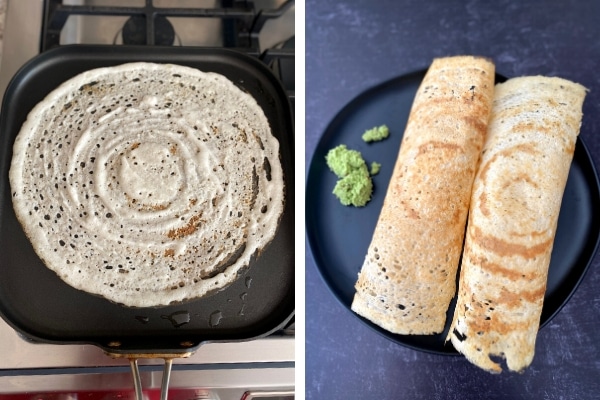
2. Crispy Dosa (savory crepes)
Dosas are similar to a crepe or pancake, with varying degrees of thickness. The recipe below makes thin, crispy dosas. For me, ½ cup of batter makes one 8-9 inch dosa (this may vary depending on the size of dosa you make). Simply:
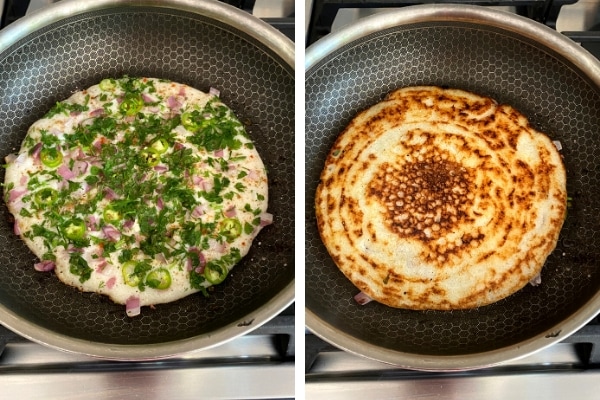
3. Uttapam (savory pancake)
Uttapam is like a thick dosa with toppings. The process for cooking uttapam is much the same as making pancakes. Simply omit the oil and sprinkle in your favorite toppings just before you’re ready to flip. To make uttapam:
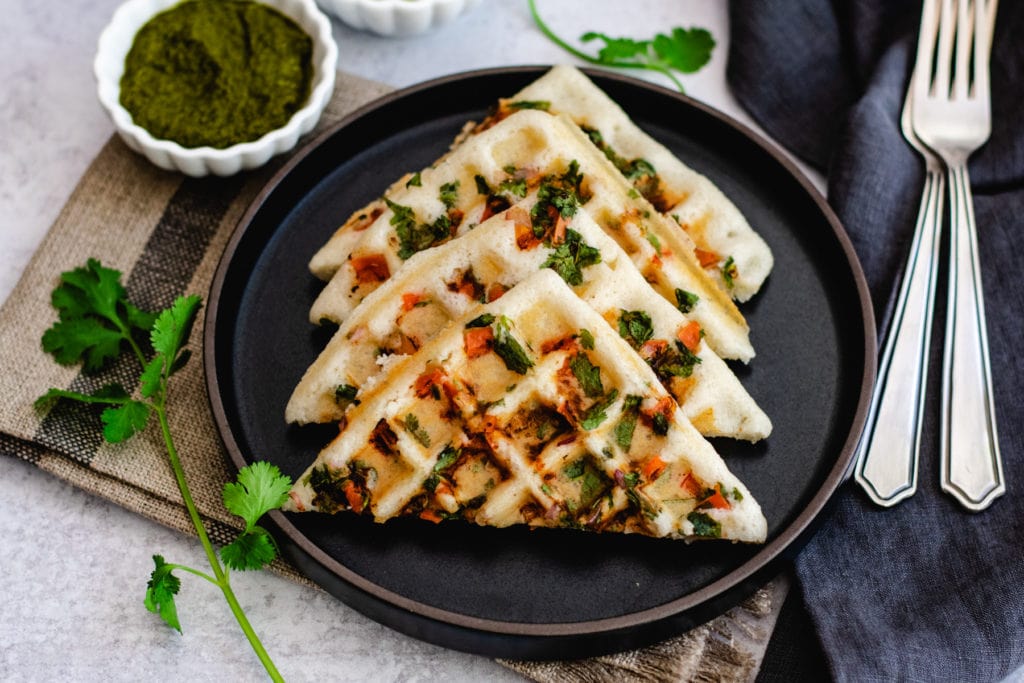
4. Uttapam Waffles- Fun Fusion recipe
If you’re looking to shake up your dosa routine a bit, I highly recommend trying these Uttapam Waffles! They’re a snitch to make and a big hit with kids and adults alike.
Recipe Tips
Idli rice is the ideal choice. However, if you cannot find it, substitute any short-grain parboiled variety of rice such as sona masoori or ponni rice. I wouldn’t recommend using long grain rice for this recipe.For best results, use whole urad dal, also known as ‘urad gota’. If you cannot find it, use split urad dal, just as I have in this recipe.Use pink salt (Himalayan salt) or sea salt. Regular table salt contains iodine, which can interfere with the fermentation process. If you want to use table salt, add it after the fermentation process.Use ice-cold water. This prevents the batter from over-heating during the grinding process.The right amount of water depends on the brand of rice and lentils. For rice, start with 1½ cups of water, then add another ½ cup as needed. For dal, start by adding 1¼ cups of water, then add another ¼ cup as needed.I highly recommend a high powered blender (or mixie, as it’s known in India). A smooth, ground batter is key to fermentation. I use a Blendtec (Vitamix would also work) and grind the batter using the ‘smoothie’ button.Grind dal and rice separately. Rice and lentils both have very different end textures when they are ground. It is important to grind the lentils and rice separately for the right consistency.Consistency of the ground rice batter will always be a bit grainy (not a lot). It should also be thinner than the lentils batter, like a melted ice cream.The consistency of ground dal should be absolutely smooth. Rub a little batter between your fingers, it should feel buttery-smooth. If it’s grainy, grind for another 30-40 seconds.For proper fermentation, it is very important to mix the two batters well for about 1-2 minutes using a spatula.The consistency of the mixed batter (rice + dal) should be like a thick pancake batter after mixing. Neither too runny or too thick.A properly fermented batter should almost double in size. The consistency will be thicker and look a bit frothy in appearance.Use the Instant Pot glass lid. The batter is thick, so there is a chance it will jam the seal on the regular Instant Pot lid.Adjust the Yogurt mode to ’less’ or ’low’. This is an important detail to keep in mind as the yogurt mode in the Instant Pot (or any electric pressure cooker) has 2-3 heat adjustments.Total time for fermentation may range from 12-15 hours, depending on climate and temperature. Here in California, it takes me 12 hours in the peak of summer, 13 hours in spring and fall, and 14 hours or so during winter. To find out what time works for you, I recommend setting it at 12 hours. Then, check the batter and adjust the time accordingly.If you don’t have an electric pressure cooker, use the oven to ferment Idli-Dosa batter. Assemble the batter as per instructions and place it in a bowl that can handle the capacity after fermentation (almost double). Place it in the oven with the oven light on. Leave it for 12 hours or overnight. For extra insurance against the batter overflowing, place a baking sheet underneath.If trying a variation with poha, simply rinse and soak 1 cup poha along with the rice. Store the batter in an airtight container in the fridge for one week or in the freezer for one month. Cook as much as you’d like for a tasty breakfast or afternoon treat.
More Instant Pot Recipes Like This
Instant Pot Rava Idli: A 30-minute steamed semolina cake that’s a variation of the popular breakfast treatInstant Pot Quinoa Poha: A healthy twist on an Indian vegetarian breakfast and snack recipe ready in 30 minutesFrittata Muffins: Warm and fluffy Instant Pot egg bites that are a nutritious and filling low-carb breakfast
📖 Recipe