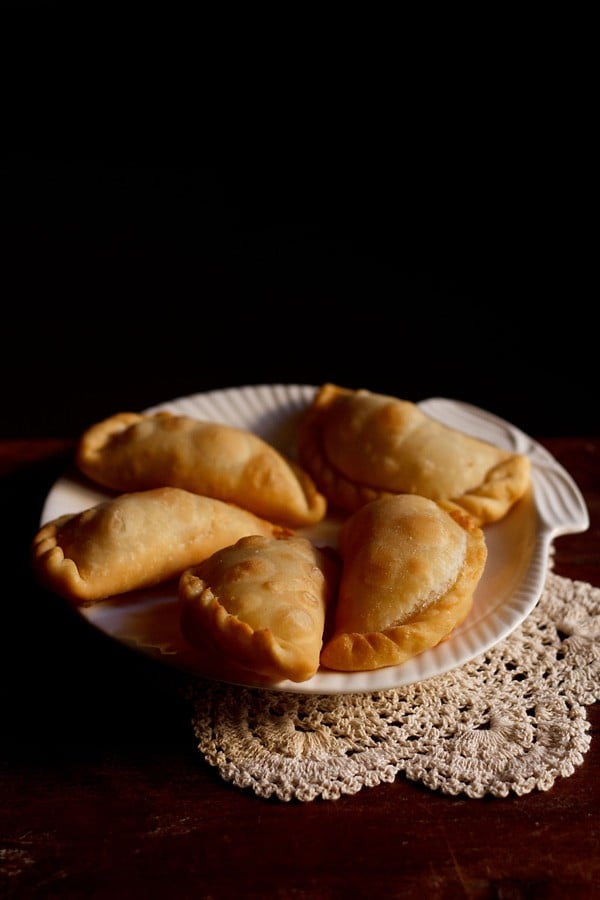
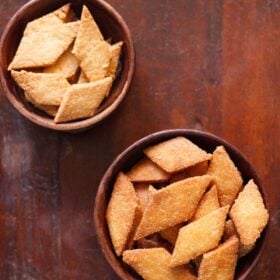
What is Karanji
For as long as I can remember we’ve had karanji as part of our festive occasions. Sweet snacks are a big part of celebrations like Diwali and Ganesh Chaturthi, so these crispy stuffed treats are always a must-have. In North India, the karanji variant is called Gujiya. There are many different versions of karanji recipes that can be made. Usually they include a simple pastry dough that’s cut into circles, loaded with a variety of sweet goodies and spices, shaped into half moons and deep fried. They’re similar to fried dumplings or empanadas, with a deliciously flaky crust more like fruit hand pies. All over India they are known by different names and are made with some variations – called as Karjikai or Karigadubu (in Kannada), Kajjikayalu (in Telugu), Ghughra (in Gujarati) and Somas (in Tamil). These traditional karanji are stuffed with a blend of roasted desiccated (shredded) coconut, sesame seeds, nuts, raisins, and vibrant spices. It’s my mom’s classic karanji recipe, and I think you’ll agree it is the best. One bite of karanji with a perfectly flaky, crispy and buttery crust filled with a melt-in-your-mouth sweet coconut stuffing will have you hooked! If you are looking to make recipes for Diwali festival then you can check these two collections of Diwali Sweets and Diwali Snacks.
How to Make Karanji Recipe
Prepare the Stuffing
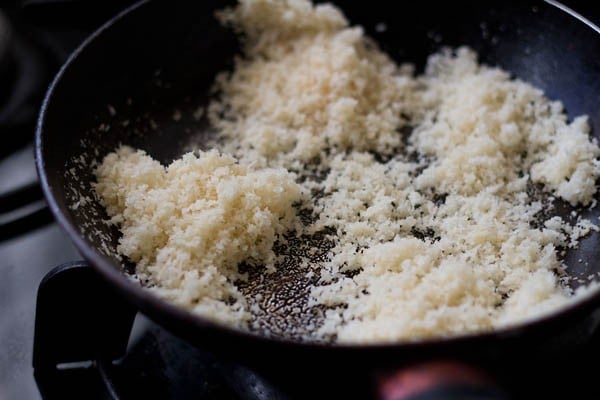
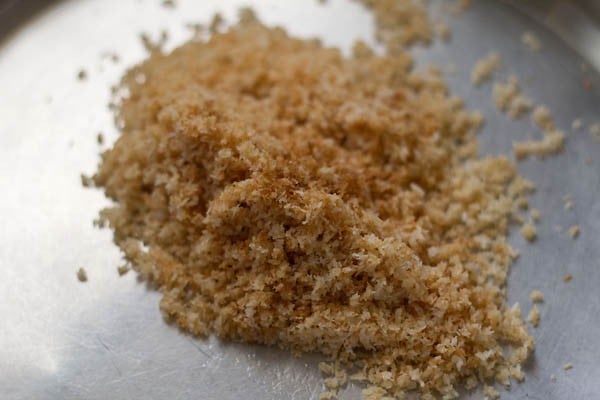
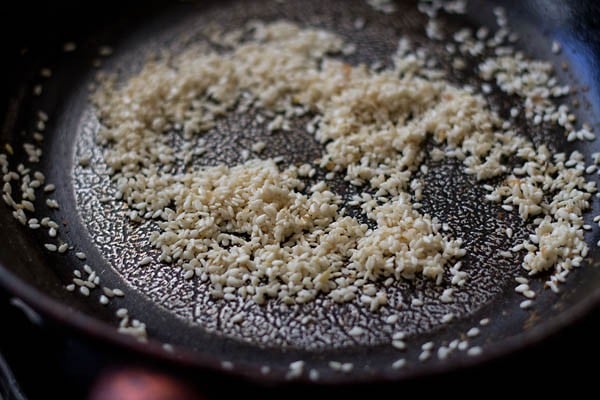
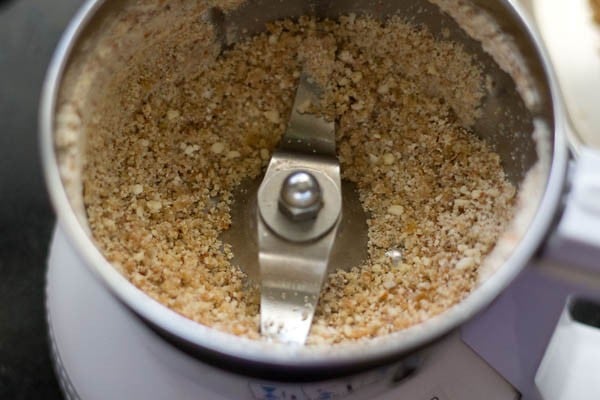
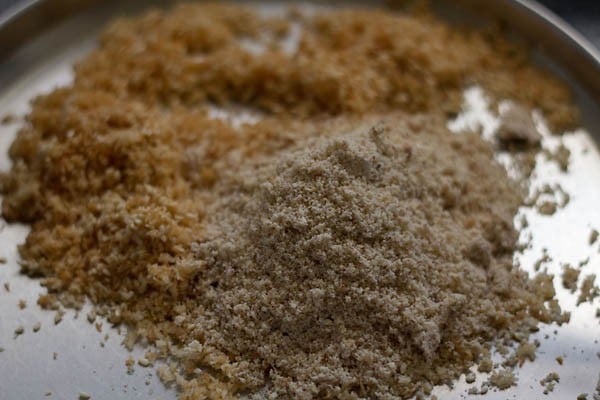
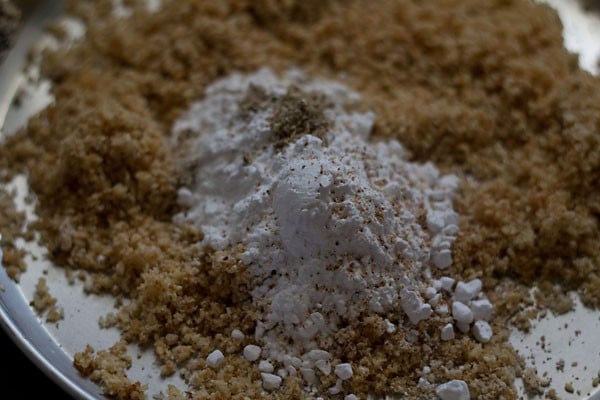
1. Heat ½ tablespoon ghee in a small frying pan. Add the desiccated coconut. Make sure the coconut is of finer texture and does not have long shreds. Tip: If you have desiccated coconut with long shreds, then using a spice-grinder or a mixer-grinder, grind or powder them to a finer texture. 2. Roast, stirring often, till the coconut turns golden. Remove the coconut in a plate and set aside. 3. In the same pan on low heat, add the white sesame seeds and roast till they pop and change color. Set aside together with the roasted coconut. 4. In a dry grinder or coffee grinder, grind or powder 8 to 9 almonds, 9 to 10 cashews, and 9 to 10 golden raisins to a semi fine mixture. You can also choose to finely chop the dry fruits with a knife. 5. Add this ground dry fruits mixture to the sesame seeds and coconut mixture. 6. Now add 3 tablespoons powdered sugar (or confectioner’s sugar), a pinch of grated nutmeg or nutmeg powder and ½ teaspoon cardamom powder. Mix everything well and set the stuffing aside.
Make the Dough
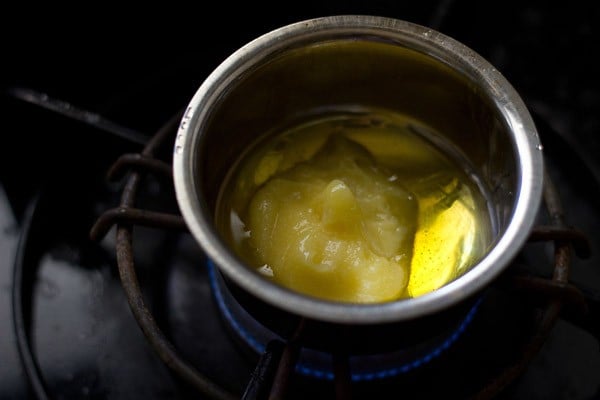
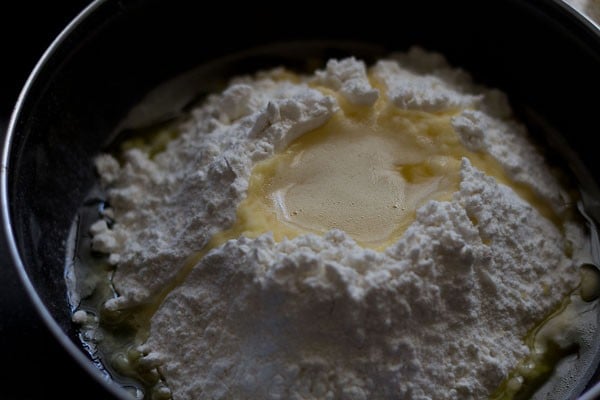
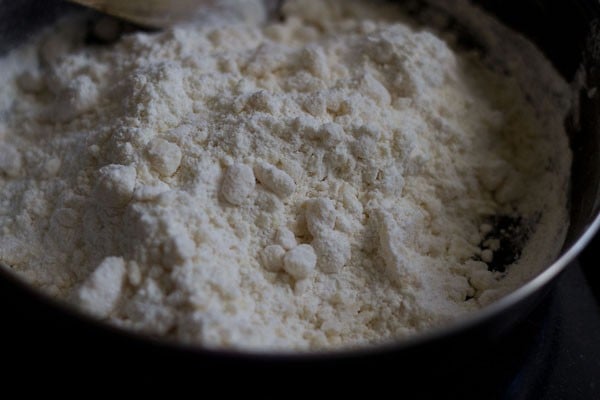
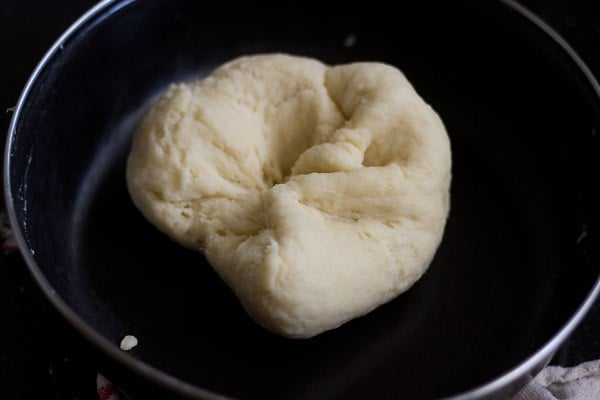
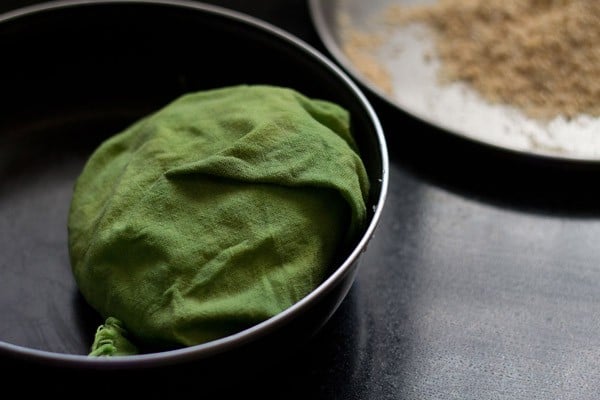
7. Heat 2 tablespoons ghee first in a small pan over low heat. 8. In a bowl or pan, add 2 cups all-purpose flour (maida). Make a well in the center of the flour and add the hot melted ghee and ¼ teaspoon salt in it. 9. Lightly mix everything together with a spoon. Do not over mix! 10. Add milk (about ½ cup + 1 tablespoon) just a bit at a time and begin to knead the dough. 11. Continue to knead the dough adding milk in parts. 12. Knead the dough till it forms into a nice smooth ball. Keep in mind that the dough has to be smooth but also tight and firm. Do not knead to a dough like that of roti dough. Also do not knead the dough for too long. A soft dough will make for a soft crust after frying. 13. Cover the dough with a moist kitchen towel and keep aside for 15 to 20 minutes.
Assemble, Fill and Shape Karanji
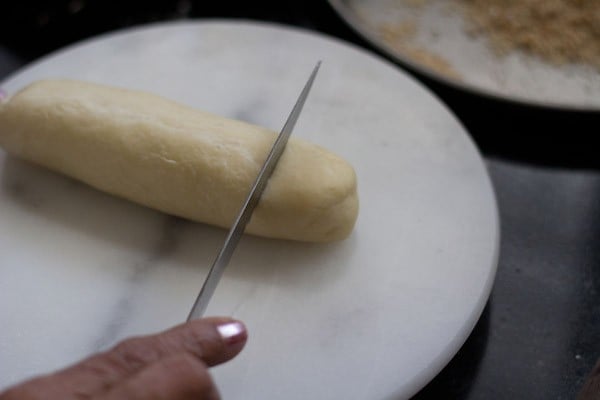
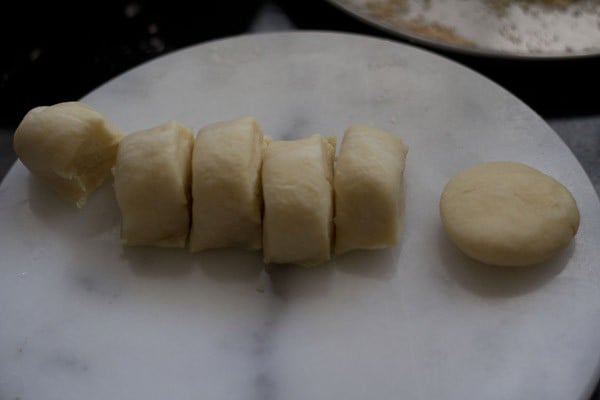
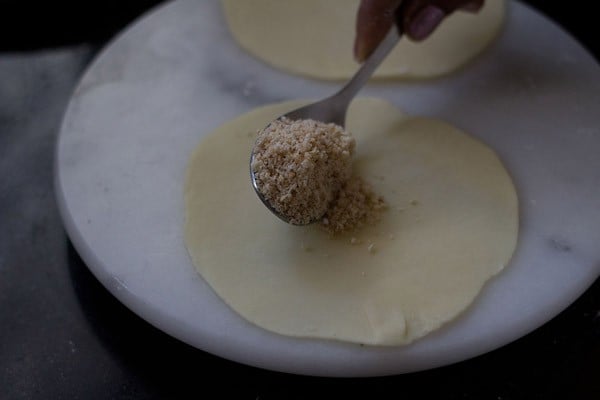
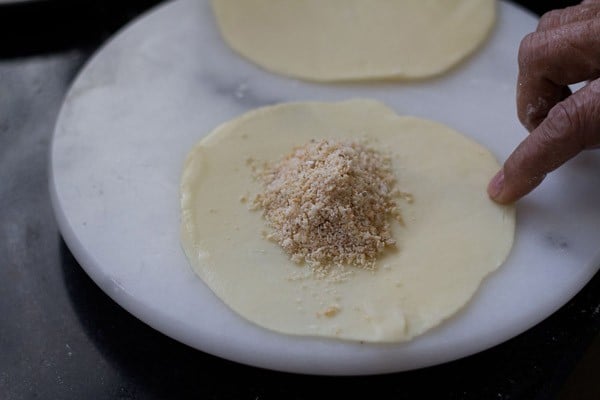
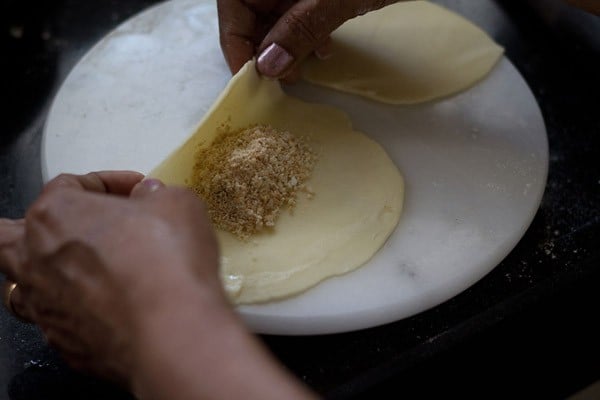
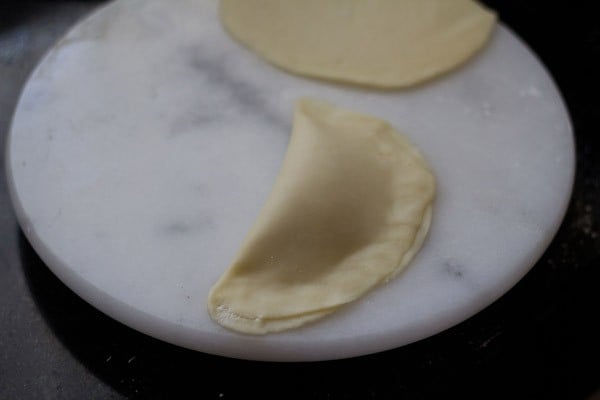
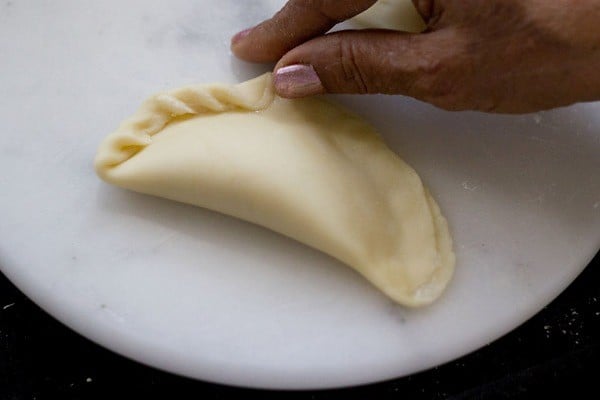
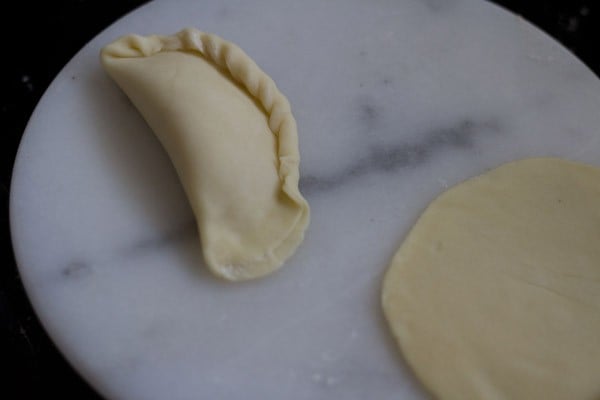
14. When it’s done resting, divide the dough into two parts. Roll each part into a log and begin to cut the log in equal slices. You should have about 6 sections. 15. Take each slice and roll it between your palms and flatten it. 16. Place the dough on a lightly floured surface and use a rolling pin to roll the dough out in a 4 to 5 inches diameter circle. Cover the other slices with a moist kitchen towel while you’re rolling so they don’t get dried out. 17. Next, add 1 to 2 tablespoons of the coconut stuffing in the center of the circle, keeping the edges empty. Don’t add too much of stuffing or it’s difficult to shape them and the karanji may break in the oil. 18. With your fingertips or a pastry brush, apply water all over the circumference edge. 19. Carefully, bring together both the edges and join. 20. Gently press the edges so that it is sealed across. 21. Now with your fingertips, start pinching and pleating the pressed edges. This is similar to shaping a dumpling or empanada. You can also press the edges with a fork instead of pleating them. 22. Continue pleating till you come to the end, and seal with a final pleat.
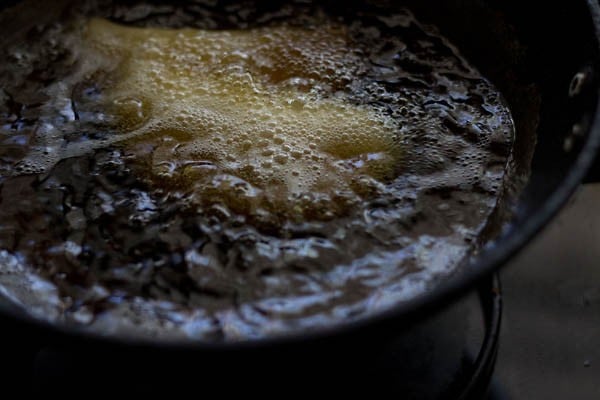
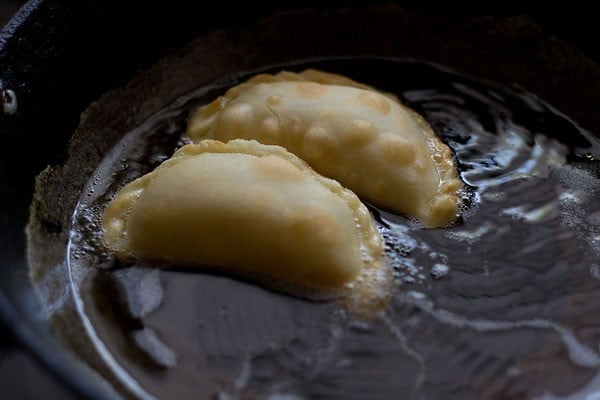
Deep Fry Karanji
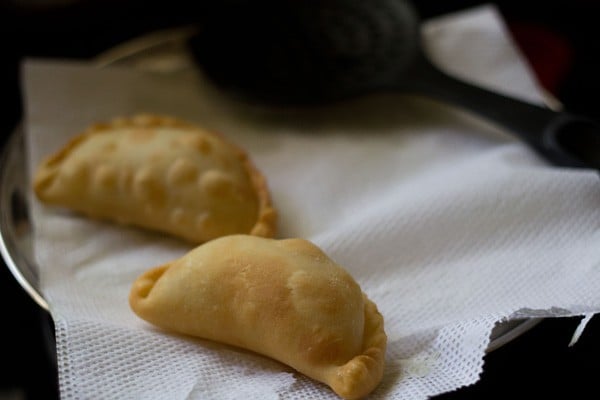
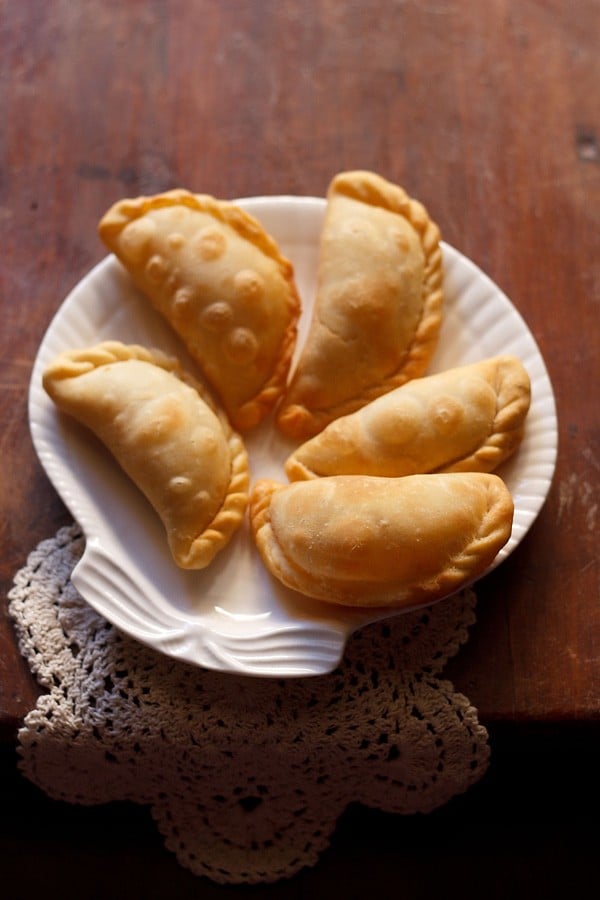
23. Gently place the karanji in a moderately hot oil for deep frying. Only fry 2 to 3 karanji at a time, depending on the size of your kadai or pan. Too many will drop the oil temperature and make them difficult to properly fry. So you have to fry the karanji in batches. Tip 1: The oil has to medium hot. If it is very hot, the karanji will become browned faster and the pastry dough will be undercooked. Tip 2: If the oil is warm or not hot enough, the karanji will absorb a lot of oil and get loaded with it. 24. When one side is golden, using a slotted spoon gently turn over each karanji. Fry the second side until golden. Fry till crispy golden and puffy turning over as needed. Immediately remove and drain karanji on paper towels to remove excess oil. 25. Once cooled, serve or store karanji in an air-tight container. 25. You can serve karanji warm or at room temperature. You can have them for next few weeks with tea or as a snack. Please be sure to rate the recipe in the recipe card or leave a comment below if you have made it. For more vegetarian inspirations, Sign Up for my emails or follow me on Instagram, Youtube, Facebook, Pinterest or Twitter. Shankarpali Recipe – Sweet & Savory Shankarpali Kaju Katli Recipe | How to make Kaju Barfi Rava Laddu Recipe | Suji Ke Laddu Mysore Pak Recipe This Karanji Recipe post from the archives first published in June 2014 has been updated and republished on 21 October 2022.


title: “Karanji Recipe Maharashtrian Recipe " ShowToc: true date: “2024-10-20” author: “Dennis Barnes”
What is Karanji
For as long as I can remember we’ve had karanji as part of our festive occasions. Sweet snacks are a big part of celebrations like Diwali and Ganesh Chaturthi, so these crispy stuffed treats are always a must-have. In North India, the karanji variant is called Gujiya. There are many different versions of karanji recipes that can be made. Usually they include a simple pastry dough that’s cut into circles, loaded with a variety of sweet goodies and spices, shaped into half moons and deep fried. They’re similar to fried dumplings or empanadas, with a deliciously flaky crust more like fruit hand pies. All over India they are known by different names and are made with some variations – called as Karjikai or Karigadubu (in Kannada), Kajjikayalu (in Telugu), Ghughra (in Gujarati) and Somas (in Tamil). These traditional karanji are stuffed with a blend of roasted desiccated (shredded) coconut, sesame seeds, nuts, raisins, and vibrant spices. It’s my mom’s classic karanji recipe, and I think you’ll agree it is the best. One bite of karanji with a perfectly flaky, crispy and buttery crust filled with a melt-in-your-mouth sweet coconut stuffing will have you hooked! If you are looking to make recipes for Diwali festival then you can check these two collections of Diwali Sweets and Diwali Snacks.
How to Make Karanji Recipe
Prepare the Stuffing
1. Heat ½ tablespoon ghee in a small frying pan. Add the desiccated coconut. Make sure the coconut is of finer texture and does not have long shreds. Tip: If you have desiccated coconut with long shreds, then using a spice-grinder or a mixer-grinder, grind or powder them to a finer texture. 2. Roast, stirring often, till the coconut turns golden. Remove the coconut in a plate and set aside. 3. In the same pan on low heat, add the white sesame seeds and roast till they pop and change color. Set aside together with the roasted coconut. 4. In a dry grinder or coffee grinder, grind or powder 8 to 9 almonds, 9 to 10 cashews, and 9 to 10 golden raisins to a semi fine mixture. You can also choose to finely chop the dry fruits with a knife. 5. Add this ground dry fruits mixture to the sesame seeds and coconut mixture. 6. Now add 3 tablespoons powdered sugar (or confectioner’s sugar), a pinch of grated nutmeg or nutmeg powder and ½ teaspoon cardamom powder. Mix everything well and set the stuffing aside.
Make the Dough
7. Heat 2 tablespoons ghee first in a small pan over low heat. 8. In a bowl or pan, add 2 cups all-purpose flour (maida). Make a well in the center of the flour and add the hot melted ghee and ¼ teaspoon salt in it. 9. Lightly mix everything together with a spoon. Do not over mix! 10. Add milk (about ½ cup + 1 tablespoon) just a bit at a time and begin to knead the dough. 11. Continue to knead the dough adding milk in parts. 12. Knead the dough till it forms into a nice smooth ball. Keep in mind that the dough has to be smooth but also tight and firm. Do not knead to a dough like that of roti dough. Also do not knead the dough for too long. A soft dough will make for a soft crust after frying. 13. Cover the dough with a moist kitchen towel and keep aside for 15 to 20 minutes.
Assemble, Fill and Shape Karanji
14. When it’s done resting, divide the dough into two parts. Roll each part into a log and begin to cut the log in equal slices. You should have about 6 sections. 15. Take each slice and roll it between your palms and flatten it. 16. Place the dough on a lightly floured surface and use a rolling pin to roll the dough out in a 4 to 5 inches diameter circle. Cover the other slices with a moist kitchen towel while you’re rolling so they don’t get dried out. 17. Next, add 1 to 2 tablespoons of the coconut stuffing in the center of the circle, keeping the edges empty. Don’t add too much of stuffing or it’s difficult to shape them and the karanji may break in the oil. 18. With your fingertips or a pastry brush, apply water all over the circumference edge. 19. Carefully, bring together both the edges and join. 20. Gently press the edges so that it is sealed across. 21. Now with your fingertips, start pinching and pleating the pressed edges. This is similar to shaping a dumpling or empanada. You can also press the edges with a fork instead of pleating them. 22. Continue pleating till you come to the end, and seal with a final pleat.
Deep Fry Karanji
23. Gently place the karanji in a moderately hot oil for deep frying. Only fry 2 to 3 karanji at a time, depending on the size of your kadai or pan. Too many will drop the oil temperature and make them difficult to properly fry. So you have to fry the karanji in batches. Tip 1: The oil has to medium hot. If it is very hot, the karanji will become browned faster and the pastry dough will be undercooked. Tip 2: If the oil is warm or not hot enough, the karanji will absorb a lot of oil and get loaded with it. 24. When one side is golden, using a slotted spoon gently turn over each karanji. Fry the second side until golden. Fry till crispy golden and puffy turning over as needed. Immediately remove and drain karanji on paper towels to remove excess oil. 25. Once cooled, serve or store karanji in an air-tight container. 25. You can serve karanji warm or at room temperature. You can have them for next few weeks with tea or as a snack. Please be sure to rate the recipe in the recipe card or leave a comment below if you have made it. For more vegetarian inspirations, Sign Up for my emails or follow me on Instagram, Youtube, Facebook, Pinterest or Twitter. Shankarpali Recipe – Sweet & Savory Shankarpali Kaju Katli Recipe | How to make Kaju Barfi Rava Laddu Recipe | Suji Ke Laddu Mysore Pak Recipe This Karanji Recipe post from the archives first published in June 2014 has been updated and republished on 21 October 2022.
