About Malabar Biryani
My family loves rice-based dishes, and it’s a no-brainer that biryani tops the list. Though, it does take some time and effort to make a beautifully fragrant Malabar Biryani too, the beauty of it is that I don’t have to cook anything else with it. It’s a complete meal in itself. Just a simple salad or raita works great with it. This Malabar Biryani recipe is adapted from Neeta Dutta’s ‘1000 Great Indian Recipes: The Ultimate Book of Indian Cuisine,’ which is a great cookbook covering Indian cuisine vastly. I must admit that I have tried a few other recipes from the book. But the Kerala Biryani recipe is a favorite. While other biryanis have a predominant flavor of yogurt in them, this Thalassery Biryani has the principal flavor of coconut milk in which the vegetables are cooked. Overall, this biryani is milder, little sweet in taste and less in heat since it has less spices as compared to the Hyderabadi or Tamil Nadu style biryanis. The Thalassery Biryani is unique in the sense that it is made with kaima rice also known as jeerakasala rice. These are short grained rice having a lovely aroma and are not sticky. In Kerala and some parts of Tamil Nadu this particular rice variant is used to make biryani. Even Nei Choru or the Kerala Ghee Rice is made with kaima rice. Nowadays kaima rice is easily available online. But if still you cannot source it, make the biryani with the easily available basmati rice. Make sure that your basmati rice is aged as it gives the best texture to the biryani.
How to make Malabar Biryani
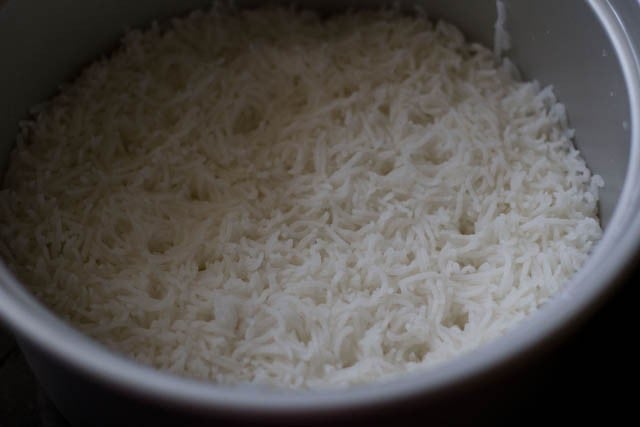
- First soak 2 cups kaima rice or basmati rice in 3 cups water for 20 to 30 minutes. Drain all the water. Cook the rice grains in 6 cups of water until they are ¾ᵗʰ cooked. Using a strainer, drain the remaining starchy water from the rice. You can opt cook rice in a pan, pressure cooker, microwave or in a rice cooker. To make this Thalassery Biryani either use kaima rice (jeerakasala rice) or basmati rice.
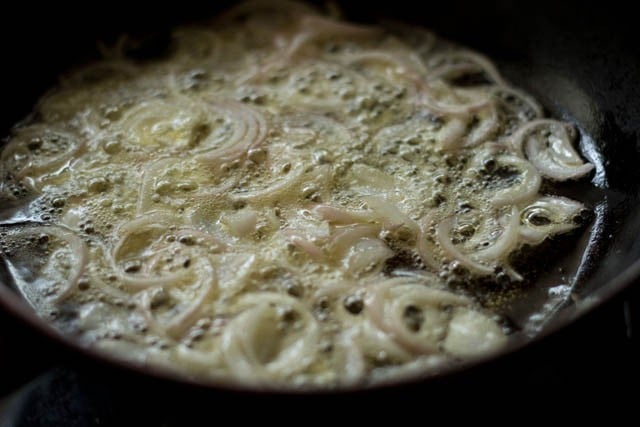
- While the rice is cooking, you can prep the vegetables and keep them aside. Heat 5 to 6 tablespoons oil and add 1 cup of sliced onions. Fry the the onions on medium heat until they become light brown. I have used a neutral flavored oil but feel free to use coconut oil or ghee.
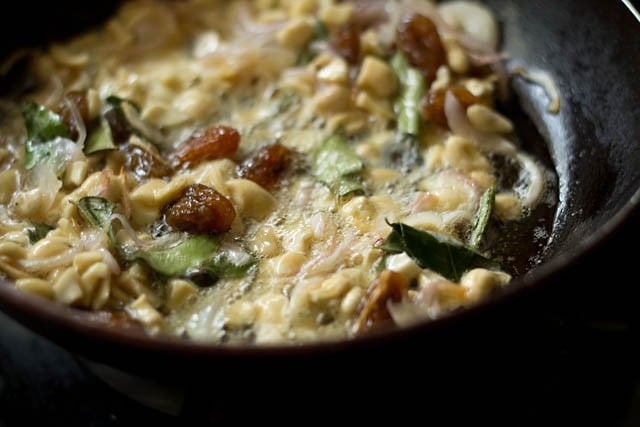
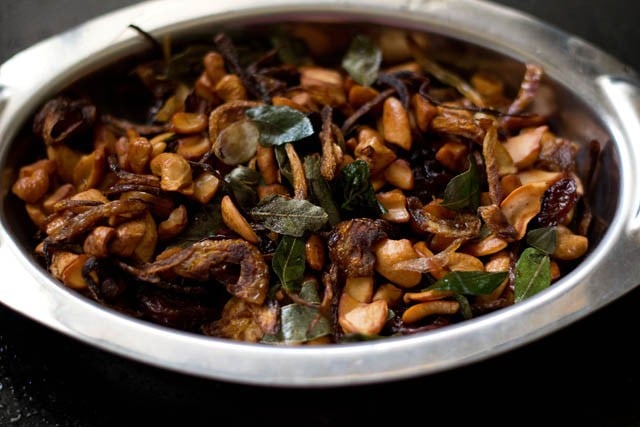
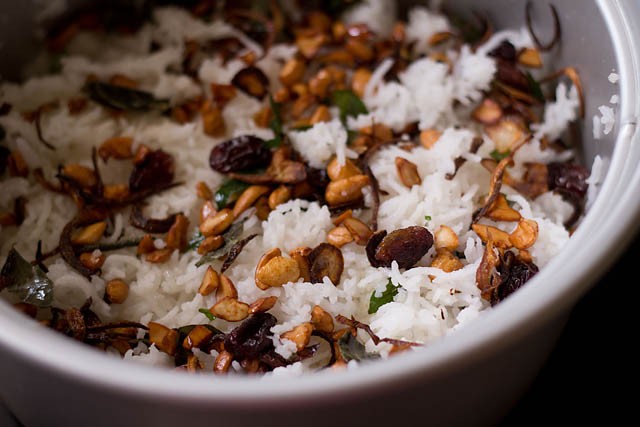
- Now, add ¼ or ⅓ cup chopped cashews, ¼ cup raisins, 2 sprig curry leaves and fry till the mixture turns golden brown. Make sure you don’t burn the mixture. Fry on low heat. By the time onions turn golden brown, the cashews, raisins and curry leaves would also have browned. In case you can’t do this way, then fry all of them one by one.
- Using a slotted spoon remove this fried mixture and set aside on a plate.
Make Vegetable Gravy
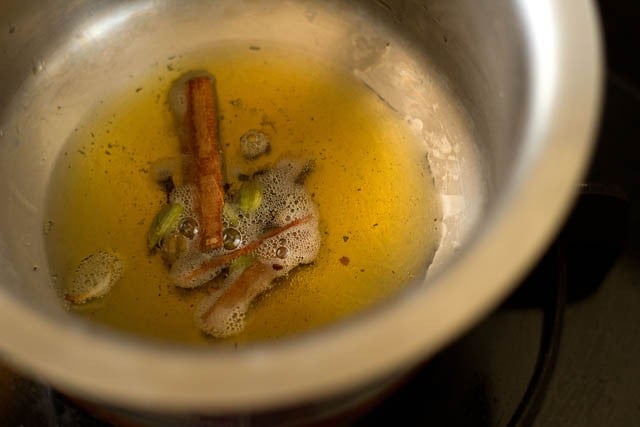
- Use the same oil in which the onions, etc. are fried. Take about 2 to 3 tablespoons of this oil in another pan or pot and place on the stovetop. Keep heat to a low. Add the whole spices – 2 inch cinnamon stick, 7 to 8 cloves and 4 to 5 green cardamoms. Fry on low heat till the spices splutter and the oil becomes fragrant.
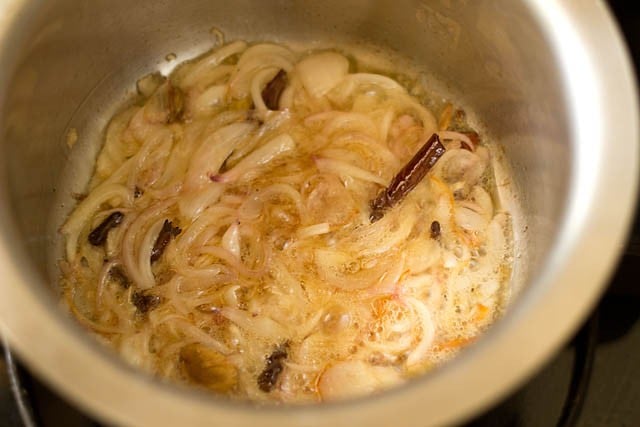
- Add the remaining sliced onions – ¾ cup. Fry onions until they are lightly golden.
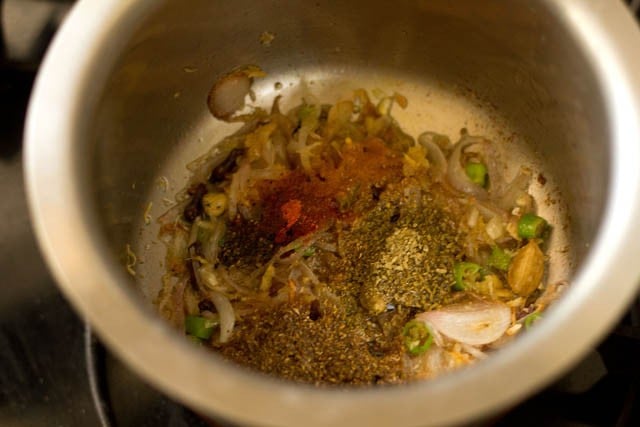
- Add 1 tablespoon ginger-garlic paste and 2 green chilies (chopped) and sauté for a minute on low heat.
- Add the dry spice powders listed below:
1 teaspoon coriander powder1 teaspoon fennel powder½ teaspoon black pepper powder¼ or ½ teaspoon red chili powder ¼ or ½ teaspoon turmeric powder
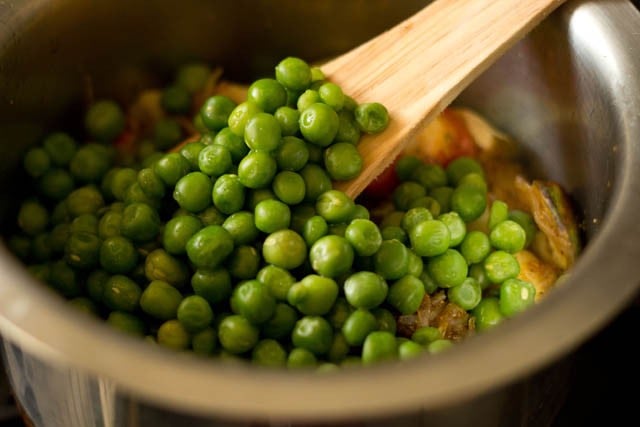
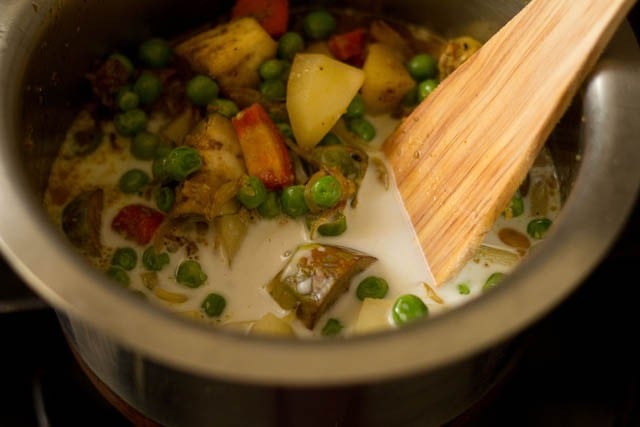
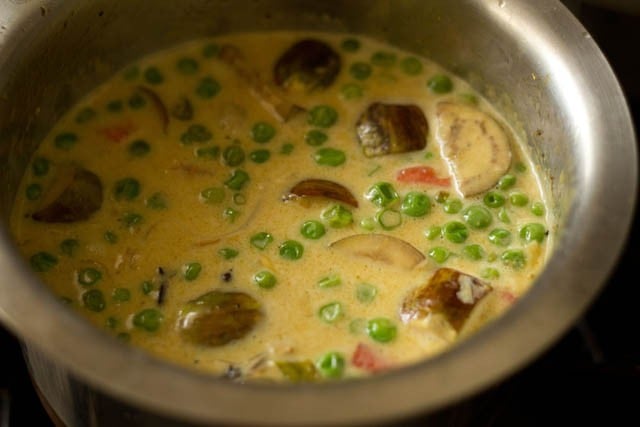
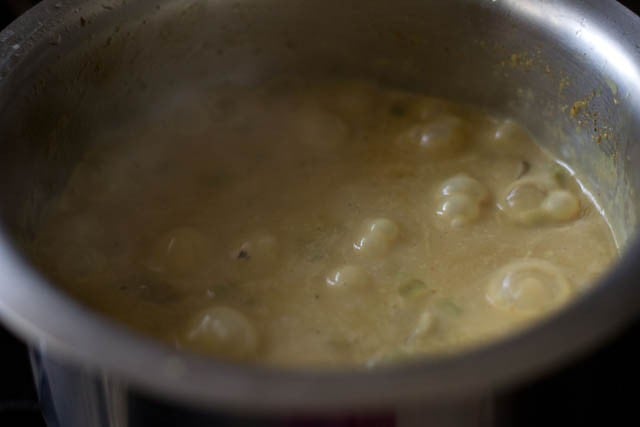
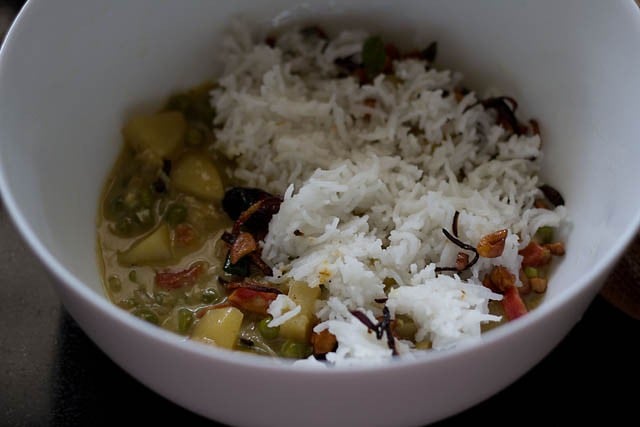
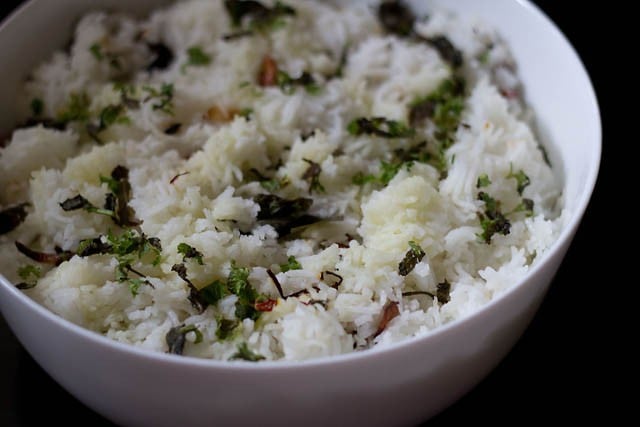
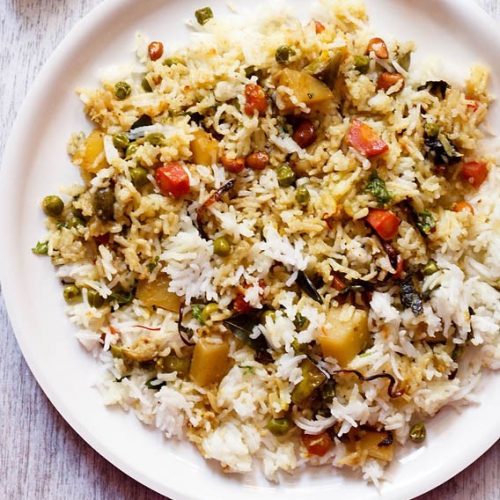
Sauté for a few seconds on low heat taking care not to burn the spices. At this step you can also add about ½ cup chopped tomatoes after sautéing the ground spices. Sauté tomatoes until they turn soft and mushy. 9. Add 2 cups chopped vegetables, ½ cup green peas and stir. Sauté for a minute. I have used small eggplant (brinjal), potato, carrots and peas. Add veggies like cauliflower, french beans, bell peppers, broccoli, baby corn. You can even add mushrooms and steamed or boiled unripe jackfruit and even soya chunks. 10. Now, add 2 cups of thick coconut milk. 11. Stir to combine on low heat. Add ½ cup water (or as needed) along with ½ or 1 tablespoon lemon juice. Mix again. Cover the pan with lid and let the vegetables cook on low to medium-low heat. The curry would reduce a bit once the vegetables are tender and cooked. If you plan to use curd (yogurt) instead of lemon juice, then add at this stage. Mix well and add salt. Add about ¼ cup of beaten yogurt or curd. 12. Meanwhile top the fried mixture (onions, cashews, raisins and curry leaves) onto the cooked rice. 13. Once the vegetables are tender, we can start layering the biryani. The gravy is cooked now.
Layer and Make Malabar Biryani
- Grease an oven proof Pyrex bowl or pan with oil. Layer the vegetable gravy first followed by the rice.
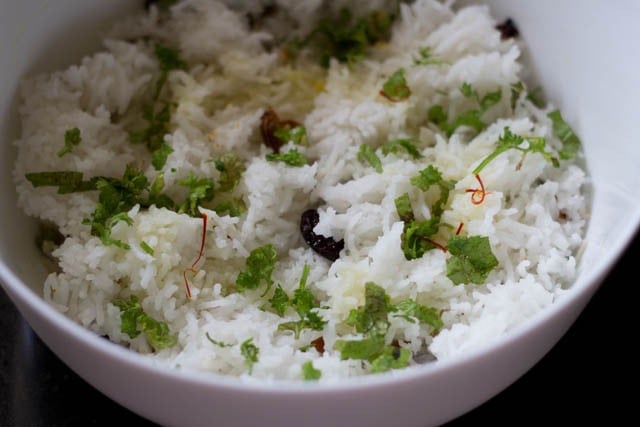
- Spread ½ tablespoon of chopped mint and ½ tablespoon of chopped coriander leaves on top. Sprinkle saffron water (12 to 15 saffron strands soaked in 1.5 tablespoon water). Dot with some oil or ghee if you prefer. Instead of saffron water, you could also use a few drops of natural edible orange or yellow color.
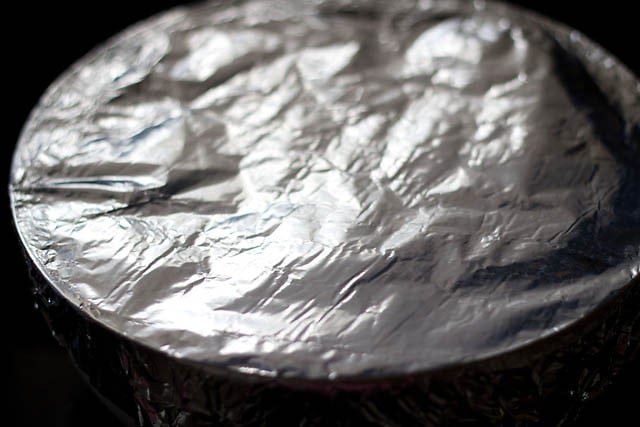
- Spread another layer of the vegetable gravy. Now spread the fourth layer of rice. Sprinkle the chopped mint and coriander leaves and saffron water. Dot with some oil again. Cover with an aluminium foil.
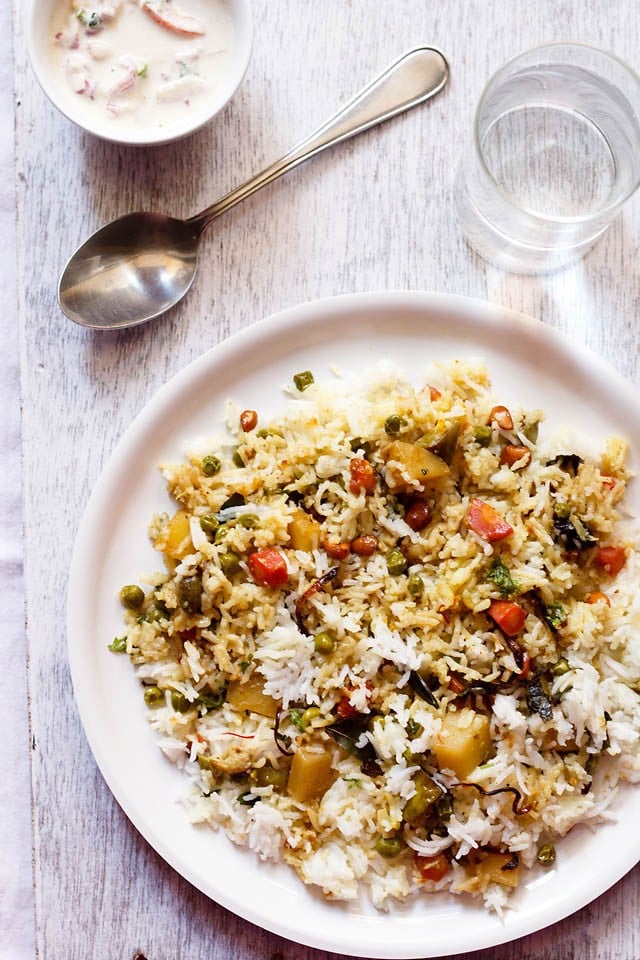
- Bake the Malabar Biryani in a preheated oven at 200 degrees C for 25 to 30 minutes. The below photo shows biryani after baking. You could also opt to cook the layered biryani in a tightly covered pan on stove top for 25 to 30 minutes on low heat. Use a heavy tawa or skillet and heat it first for a few minutes on the stove-top. Place the covered biryani pan/pot on the tawa and then cook the biryani on a low to medium-low heat. I prefer to bake this biryani rather than dum cooking on stovetop as I don’t have to worry about the base layer getting burnt.
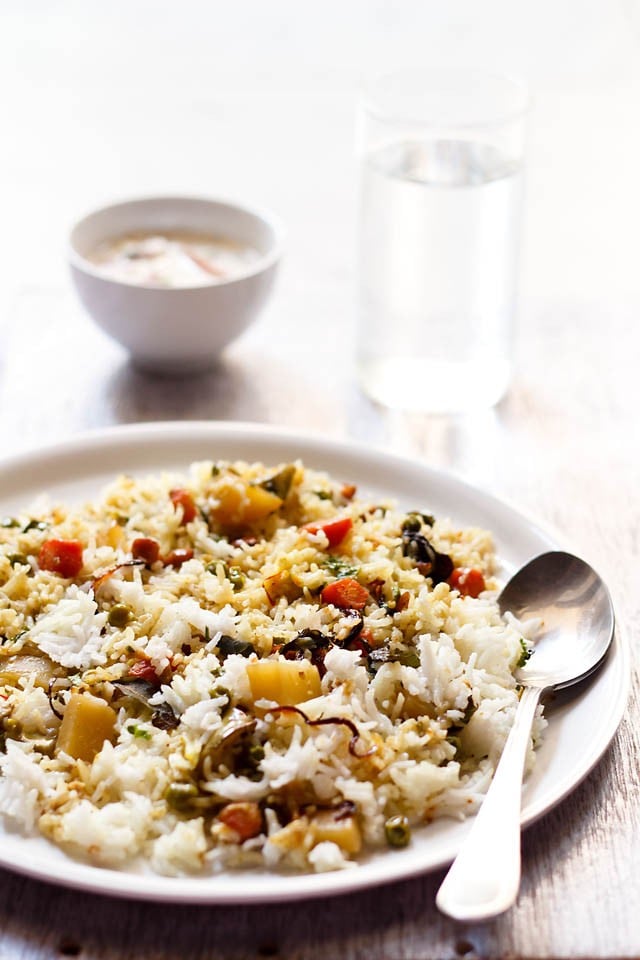
- Serve the Malabar Biryani hot with a raita or salad. I served with Onion Raita.
Serving Suggestions
You can serve this Thalassery Biryani with your choice of raita, plain curd (yogurt), salad or kachumber, lemon wedges, papad or pickle. Or have it just as it is. You can refrigerate the leftover biryani for a day only. While reheating, steam for 5 minutes in a pan or instant pot. Or you can lightly sauté the biryani stirring frequently in a frying pan or skillet until warm or hot.
Vegetarian Biryanis are also a thing
Since I am a vegetarian, I have developed quite a few vegetarian biryani recipes like this Malabar Biryani as well as the Hyderabadi style Veg Biryani. Other than the Malabar Biryani recipe with vegetables, other biryanis that are common at my home are the Kathal Biryani, Palak Biryani, Chana Biryani, Bombay Biryani, etc. I have also created my versions of the famous Lucknowi Biryani, Kolkata Biryani and Mughlai Biryani with veggies. You must check out this Biryani Rice recipe as well to make a simple, flavorful rice that goes great with curries and dal. A lot of people may argue about how an authentic biryani should only be meat-based. What I feel is if you put your heart, soul and follow the traditional recipes to the T, then making certain changes like substituting the non-vegetarian ingredients with vegetarian ones isn’t a big deal. Eventually, you must get a biryani which is flavor-laden and satisfying. That’s what matters!
Expert Tips
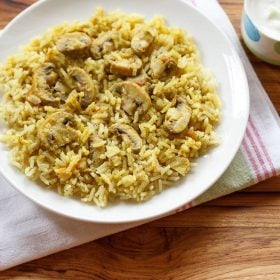
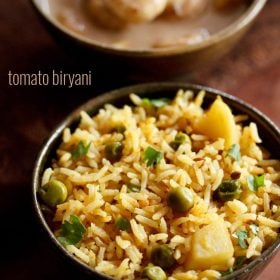
Please be sure to rate the recipe in the recipe card or leave a comment below if you have made it. For more vegetarian inspirations, Sign Up for my emails or follow me on Instagram, Youtube, Facebook, Pinterest or Twitter. Spicy Mushroom Biryani and Chettinad Mushroom Biryani (2 Ways) Ambur Biryani (with mushrooms) Dindigul Biryani (with mushrooms) Tomato Biryani This Malabar Biryani recipe post from the blog archives first published on April 2013 has been updated and republished on December 2022.

title: “Malabar Biryani Kerala Biryani Thalassery Biryani Vegetarian " ShowToc: true date: “2024-10-21” author: “James Stone”
About Malabar Biryani
My family loves rice-based dishes, and it’s a no-brainer that biryani tops the list. Though, it does take some time and effort to make a beautifully fragrant Malabar Biryani too, the beauty of it is that I don’t have to cook anything else with it. It’s a complete meal in itself. Just a simple salad or raita works great with it. This Malabar Biryani recipe is adapted from Neeta Dutta’s ‘1000 Great Indian Recipes: The Ultimate Book of Indian Cuisine,’ which is a great cookbook covering Indian cuisine vastly. I must admit that I have tried a few other recipes from the book. But the Kerala Biryani recipe is a favorite. While other biryanis have a predominant flavor of yogurt in them, this Thalassery Biryani has the principal flavor of coconut milk in which the vegetables are cooked. Overall, this biryani is milder, little sweet in taste and less in heat since it has less spices as compared to the Hyderabadi or Tamil Nadu style biryanis. The Thalassery Biryani is unique in the sense that it is made with kaima rice also known as jeerakasala rice. These are short grained rice having a lovely aroma and are not sticky. In Kerala and some parts of Tamil Nadu this particular rice variant is used to make biryani. Even Nei Choru or the Kerala Ghee Rice is made with kaima rice. Nowadays kaima rice is easily available online. But if still you cannot source it, make the biryani with the easily available basmati rice. Make sure that your basmati rice is aged as it gives the best texture to the biryani.
How to make Malabar Biryani
- First soak 2 cups kaima rice or basmati rice in 3 cups water for 20 to 30 minutes. Drain all the water. Cook the rice grains in 6 cups of water until they are ¾ᵗʰ cooked. Using a strainer, drain the remaining starchy water from the rice. You can opt cook rice in a pan, pressure cooker, microwave or in a rice cooker. To make this Thalassery Biryani either use kaima rice (jeerakasala rice) or basmati rice.
- While the rice is cooking, you can prep the vegetables and keep them aside. Heat 5 to 6 tablespoons oil and add 1 cup of sliced onions. Fry the the onions on medium heat until they become light brown. I have used a neutral flavored oil but feel free to use coconut oil or ghee.
- Now, add ¼ or ⅓ cup chopped cashews, ¼ cup raisins, 2 sprig curry leaves and fry till the mixture turns golden brown. Make sure you don’t burn the mixture. Fry on low heat. By the time onions turn golden brown, the cashews, raisins and curry leaves would also have browned. In case you can’t do this way, then fry all of them one by one.
- Using a slotted spoon remove this fried mixture and set aside on a plate.
Make Vegetable Gravy
- Use the same oil in which the onions, etc. are fried. Take about 2 to 3 tablespoons of this oil in another pan or pot and place on the stovetop. Keep heat to a low. Add the whole spices – 2 inch cinnamon stick, 7 to 8 cloves and 4 to 5 green cardamoms. Fry on low heat till the spices splutter and the oil becomes fragrant.
- Add the remaining sliced onions – ¾ cup. Fry onions until they are lightly golden.
- Add 1 tablespoon ginger-garlic paste and 2 green chilies (chopped) and sauté for a minute on low heat.
- Add the dry spice powders listed below:
1 teaspoon coriander powder1 teaspoon fennel powder½ teaspoon black pepper powder¼ or ½ teaspoon red chili powder ¼ or ½ teaspoon turmeric powder
Sauté for a few seconds on low heat taking care not to burn the spices. At this step you can also add about ½ cup chopped tomatoes after sautéing the ground spices. Sauté tomatoes until they turn soft and mushy. 9. Add 2 cups chopped vegetables, ½ cup green peas and stir. Sauté for a minute. I have used small eggplant (brinjal), potato, carrots and peas. Add veggies like cauliflower, french beans, bell peppers, broccoli, baby corn. You can even add mushrooms and steamed or boiled unripe jackfruit and even soya chunks. 10. Now, add 2 cups of thick coconut milk. 11. Stir to combine on low heat. Add ½ cup water (or as needed) along with ½ or 1 tablespoon lemon juice. Mix again. Cover the pan with lid and let the vegetables cook on low to medium-low heat. The curry would reduce a bit once the vegetables are tender and cooked. If you plan to use curd (yogurt) instead of lemon juice, then add at this stage. Mix well and add salt. Add about ¼ cup of beaten yogurt or curd. 12. Meanwhile top the fried mixture (onions, cashews, raisins and curry leaves) onto the cooked rice. 13. Once the vegetables are tender, we can start layering the biryani. The gravy is cooked now.
Layer and Make Malabar Biryani
- Grease an oven proof Pyrex bowl or pan with oil. Layer the vegetable gravy first followed by the rice.
- Spread ½ tablespoon of chopped mint and ½ tablespoon of chopped coriander leaves on top. Sprinkle saffron water (12 to 15 saffron strands soaked in 1.5 tablespoon water). Dot with some oil or ghee if you prefer. Instead of saffron water, you could also use a few drops of natural edible orange or yellow color.
- Spread another layer of the vegetable gravy. Now spread the fourth layer of rice. Sprinkle the chopped mint and coriander leaves and saffron water. Dot with some oil again. Cover with an aluminium foil.
- Bake the Malabar Biryani in a preheated oven at 200 degrees C for 25 to 30 minutes. The below photo shows biryani after baking. You could also opt to cook the layered biryani in a tightly covered pan on stove top for 25 to 30 minutes on low heat. Use a heavy tawa or skillet and heat it first for a few minutes on the stove-top. Place the covered biryani pan/pot on the tawa and then cook the biryani on a low to medium-low heat. I prefer to bake this biryani rather than dum cooking on stovetop as I don’t have to worry about the base layer getting burnt.
- Serve the Malabar Biryani hot with a raita or salad. I served with Onion Raita.
Serving Suggestions
You can serve this Thalassery Biryani with your choice of raita, plain curd (yogurt), salad or kachumber, lemon wedges, papad or pickle. Or have it just as it is. You can refrigerate the leftover biryani for a day only. While reheating, steam for 5 minutes in a pan or instant pot. Or you can lightly sauté the biryani stirring frequently in a frying pan or skillet until warm or hot.
Vegetarian Biryanis are also a thing
Since I am a vegetarian, I have developed quite a few vegetarian biryani recipes like this Malabar Biryani as well as the Hyderabadi style Veg Biryani. Other than the Malabar Biryani recipe with vegetables, other biryanis that are common at my home are the Kathal Biryani, Palak Biryani, Chana Biryani, Bombay Biryani, etc. I have also created my versions of the famous Lucknowi Biryani, Kolkata Biryani and Mughlai Biryani with veggies. You must check out this Biryani Rice recipe as well to make a simple, flavorful rice that goes great with curries and dal. A lot of people may argue about how an authentic biryani should only be meat-based. What I feel is if you put your heart, soul and follow the traditional recipes to the T, then making certain changes like substituting the non-vegetarian ingredients with vegetarian ones isn’t a big deal. Eventually, you must get a biryani which is flavor-laden and satisfying. That’s what matters!
Expert Tips
Please be sure to rate the recipe in the recipe card or leave a comment below if you have made it. For more vegetarian inspirations, Sign Up for my emails or follow me on Instagram, Youtube, Facebook, Pinterest or Twitter. Spicy Mushroom Biryani and Chettinad Mushroom Biryani (2 Ways) Ambur Biryani (with mushrooms) Dindigul Biryani (with mushrooms) Tomato Biryani This Malabar Biryani recipe post from the blog archives first published on April 2013 has been updated and republished on December 2022.
