Chocolate Lover’s Dream Dessert
My two teens chefs at home, sweetly called Sugar Fairies by family and friends, tweaked (read simplified) my chocolate cheesecake recipe and sneaked in their favorite recipe for hot cocoa. The result is a perfect harmony of flavors and the best of both worlds.
How to Make Mini Chocolate Cheesecake
Here are the step by step instructions for this Easy Cheesecake Recipe Made by my Teen Chefs:
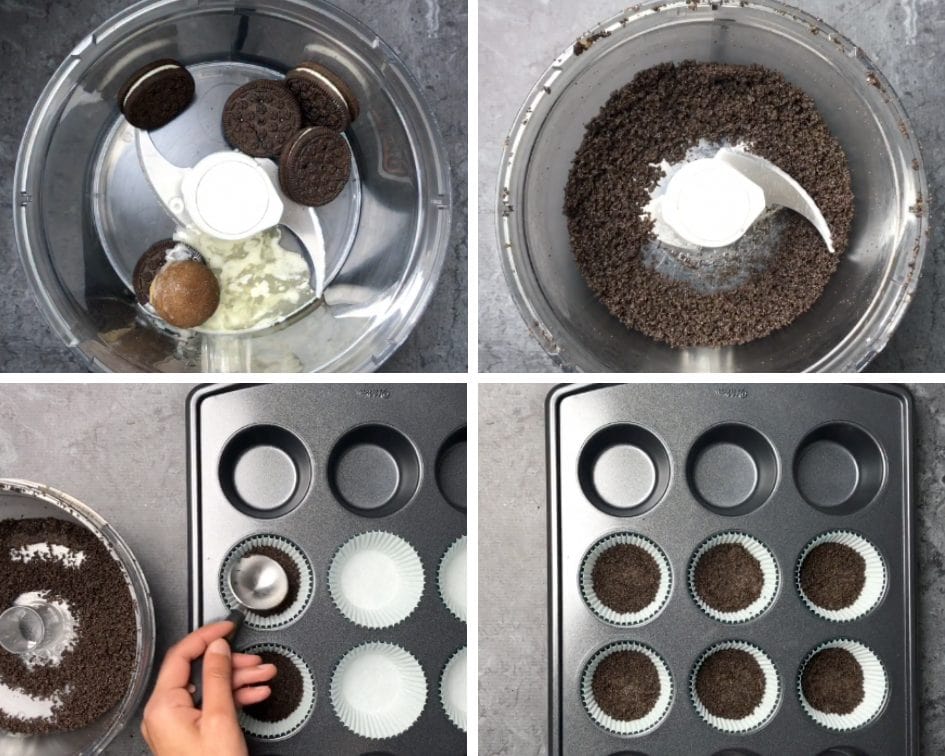
Step#1: Make the Crust
For these Chocolate Cheesecakes, the girls start by making a crust by blending Oreo cookies with butter and brown sugar. Then they press down a tablespoon each into bottoms of lined muffin cups.
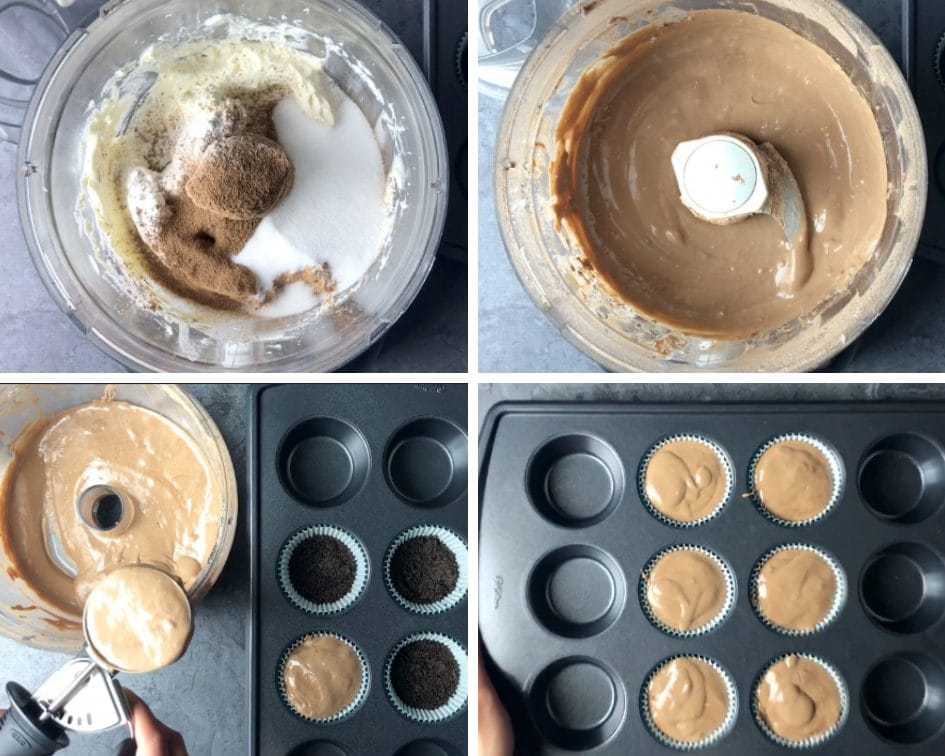
Step#2 : Make the Cheesecake Filling
Then, they make the chocolate cheesecake filling by blending together softened cream cheese with cocoa, sugar, vanilla and eggs. Using an ice-cream scoop, they spread it over the Oreo cookie crust.
Step#3 : Bake the Mini Cheesecakes
There are two ways you can bake these mini Cheesecakes, in the Oven, or, in an electric pressure cooker like Instant Pot. This recipe makes 12 mini-cheesecakes. We prefer to bake them in the oven, as it’s easier to fit and bake everything in one go. We bake them in a pre-heated oven at 350°F, for 17-20 minutes. If you want to Bake these cheesecakes in an Instant Pot, check detailed instructions below.
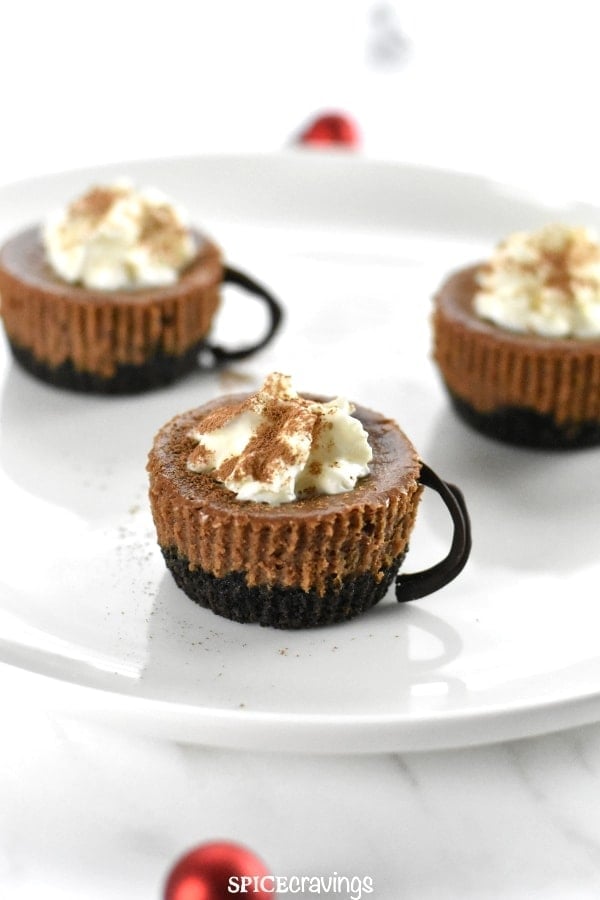
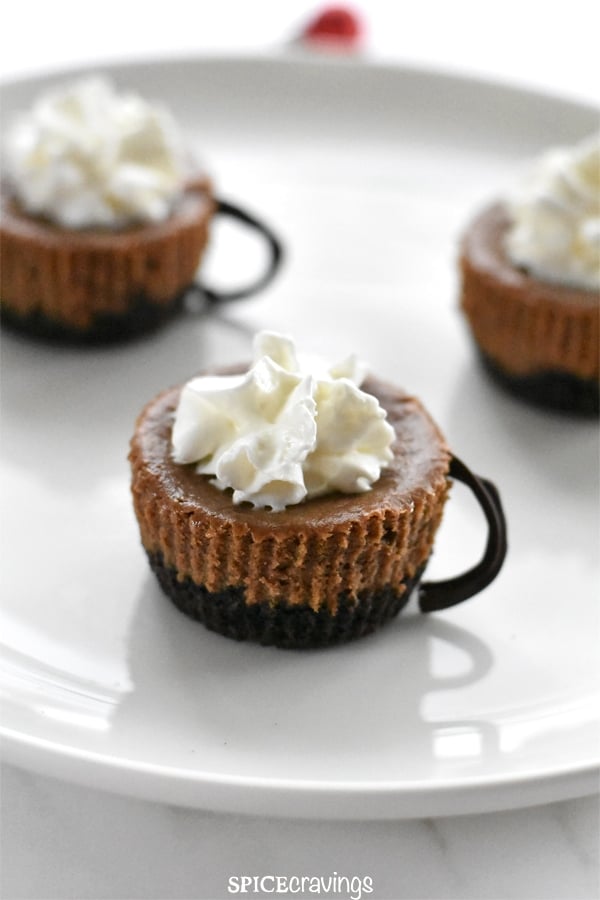
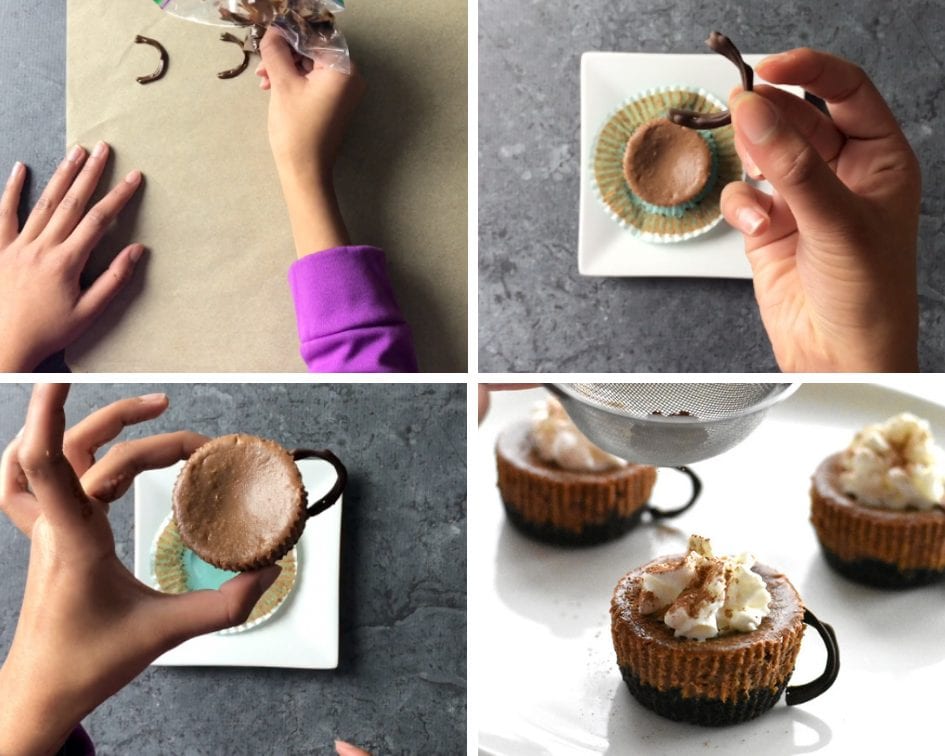
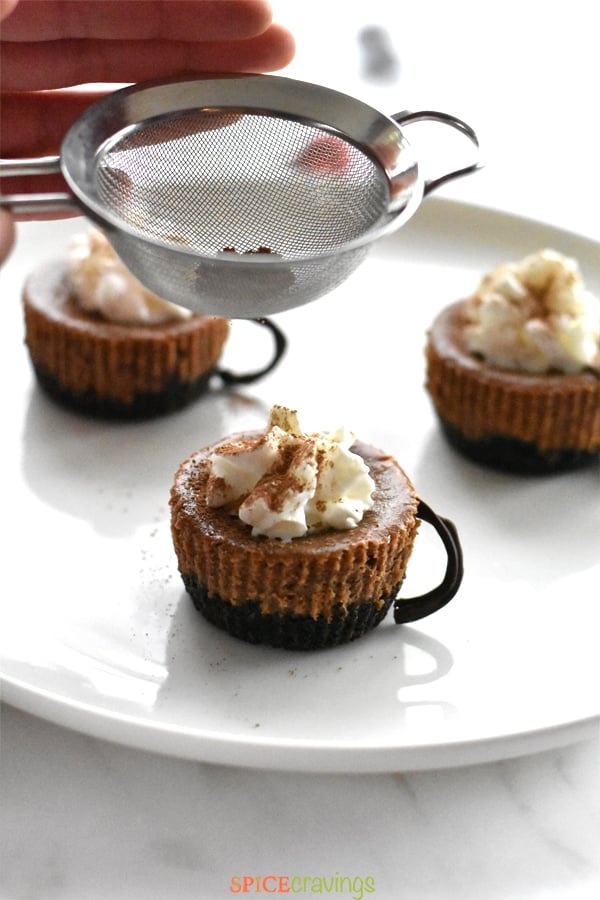
Step#4: Decorate it with Chocolate handles and Whipped Cream
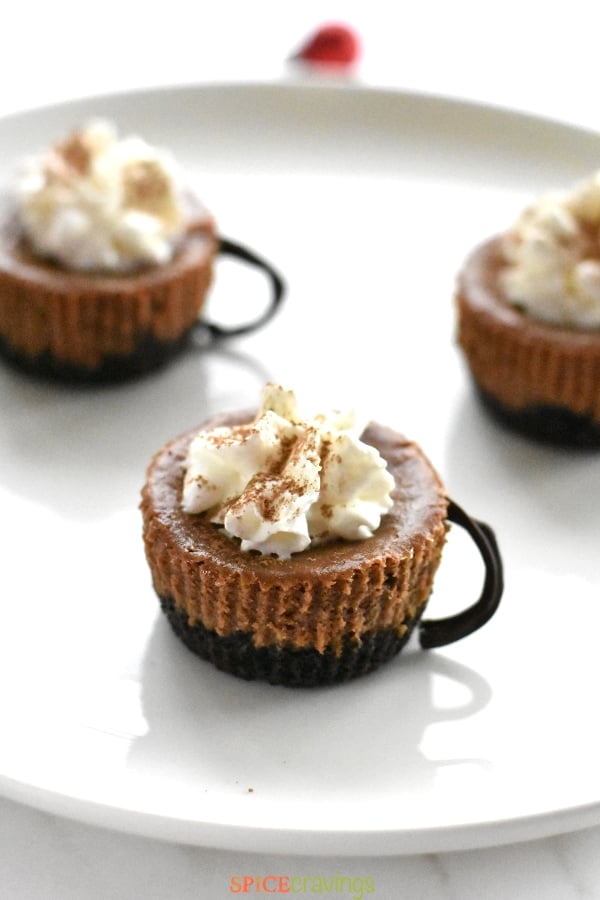
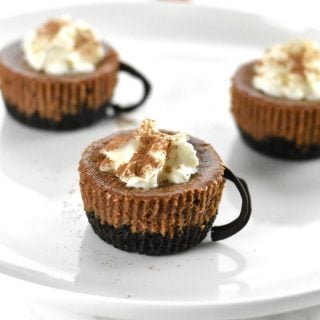
To make Chocolate handles for your cheesecake mugs, melt chocolate chips in the microwave. Wait for them to cool for about 5 minutes, after which transfer them into a piping bag, or a ziplock bag. Cut the corner of the bag, making a very small hole. Now pipe the chocolate in an inverted “C” shape on a parchment lined baking sheet. Wait for them to cool for a few hours. Once your cheesecakes have chilled for a few hours, insert the chocolate handles in the cheesecake. Top with whipped cream and dust some cocoa powder through a sieve. Your Mini Chocolate Cheesecakes are ready!
How to Bake Chocolate Cheesecake in an Instant Pot
Prepare the crust and pour about a tablespoon in silicone cupcake liners, or greased mini ramekins. Press it down and set as per instructions. Prepare the batter as per instructions and fill the silicone liners leaving about ¼ of an inch from the topPour a cup of water in the inner pot of the Instant Pot. If using an 8qt, pour 2 cups. Place a trivet and place 4 filled cupcake molds on top. Carefully stack another tall trivet on the first one, and place another 4 cupcake molds on top. Depending on your cooker size, you may have to bake the 12 cupcakes in two batches. Close the lid. Set valve to sealing position (if using duo). Pressure cook on Manual/Pressure cook for 7 minutes. Wait for natural pressure release after cooking.Remove cheesecakes and cool for 5 mins. Then carefully run your finger around the cupcake mold, gently separating the cheesecake from the mold. This prevents it from cracking when it’s chilling in the fridge. Cool for 30 minutes at room temperature before refrigerating.Decorate as per instructions above in Step # 4 and enjoy!
Accessories Needed for Mini Cheesecakes in Instant Pot
Silicone Cupcake MoldsIf you’re using the silicone cupcake molds, you will need a trivet set to stack the cheesecakes in the Instant Pot.If you choose to skip the chocolate handles, alternatively, you can use 4oz. mason jars, or, 3.5 oz ramekins
📖 Recipe