More on Mixture Recipe
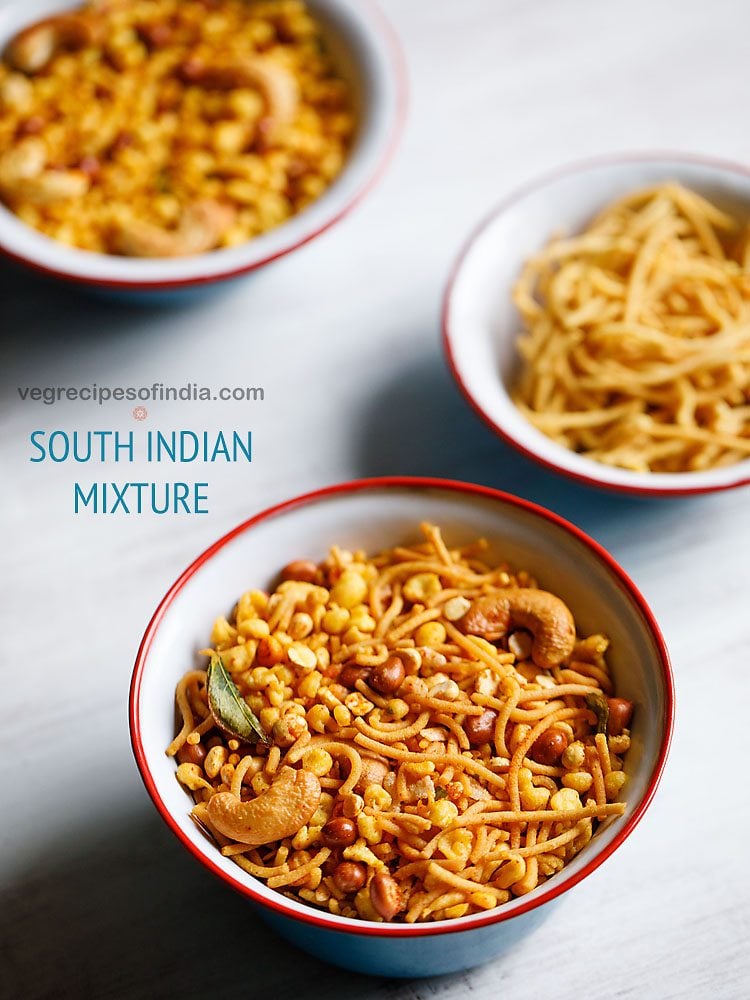
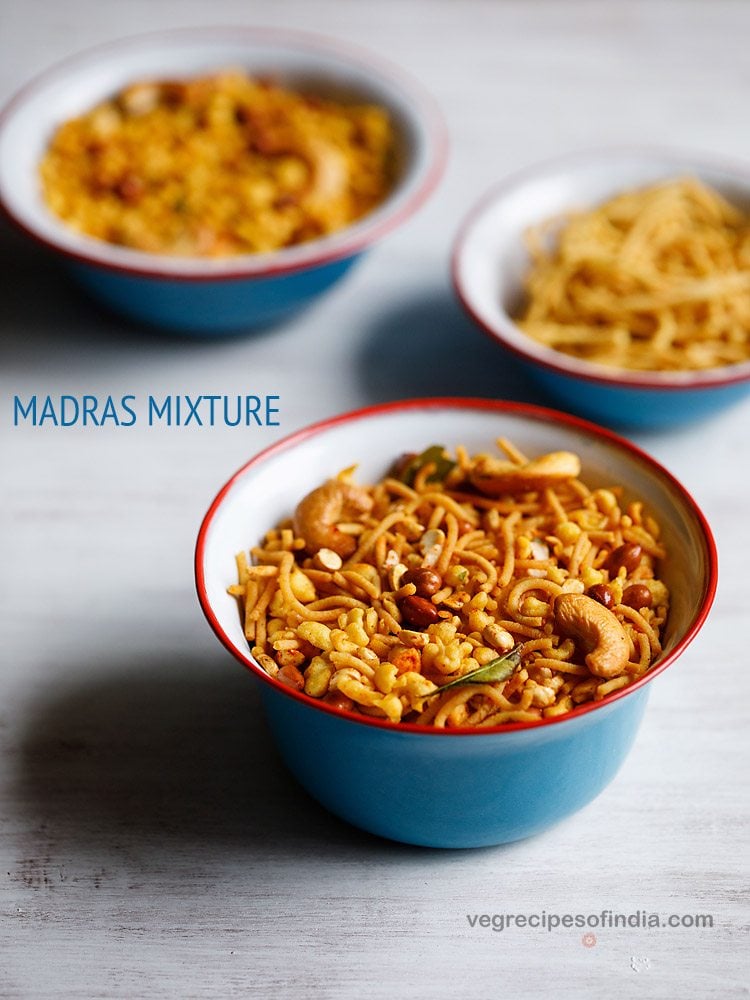
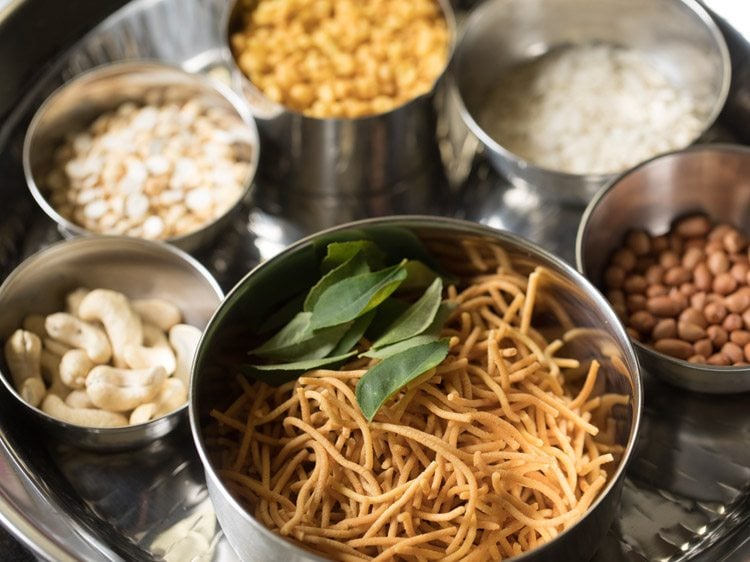
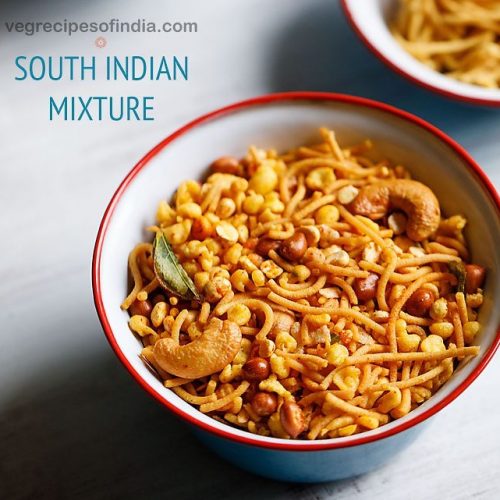
What is commonly known as Chivda in the northern and western parts of India, is the Mixture in southern India. And just like there are many varieties of a chivda recipe, similar is the case with a Mixture Recipe too. In this post, I have shared the popular and loved South Indian Mixture, popular from Madras (Chennai). Two of the main ingredients of this one is omapodi (plain sev) and boondi. Other than these, there are some nuts, poha (aval), chana dal, curry leaves, spices and seasonings. You can even add fried coconut. But I usually don’t add as it reduced the shelf-life of this particular snack. So basically, if you have the boondi and omapodi ready from before, you just have to fry the other ingredients and mix all of them together with the spices and salt. But in case if you don’t have the plain sev and boondi ready, look nowhere else, as my Mixture Recipe mentions the step-by-step pictorial representation of making these as well. Some variations of the South Indian Mixture even have sweet maida (all-purpose flour) biscuits too added in them. However, I like it to keep it simple and authentic. Hence, haven’t added in my recipe. The preparation including the making of the 2 main elements of this Madras Mixture Recipe, does take time. So, you can plan ahead and make accordingly. Just like I made the omapodi and boondi a day before to reduce the prep work, you can also keep these ready, a day prior. This will definitely reduce the time to complete your Mixture Recipe the next day.
Why this recipe works
In this Madras Mixture recipe post, I have mentioned the methods of preparing both the omapodi and boondi. For an exclusive detailed post on both these, you can check this Omapodi Recipe and Kara Boondi Recipe. It is always better to prepare your own snacks, especially the fried ones like this Madras Mixture Recipe, at home. By doing so, you are ensuring that the recipes are getting done using the best of ingredients and also the oil which is used to fry, isn’t reused many times. Thus, homemade chivda and mixtures are healthier too, and will always taste a notch higher as compared to the store-bought ones. In this South Indian Mixture too, you can also add more like Ribbon Pakoda, Thattai, Murukku and even Karasev. Just break these into smaller pieces and toss in with other ingredients. This Madras Mixture Recipe yields about 350 grams of the yummy, crunchy-munchy snack. You can relish it with friends and family during tea-time or make it a part of your Diwali or any other festival celebrations as well. For storing, pack in air-tight jars and keep.
How to Make Mixture Recipe
Make Omapodi Dough
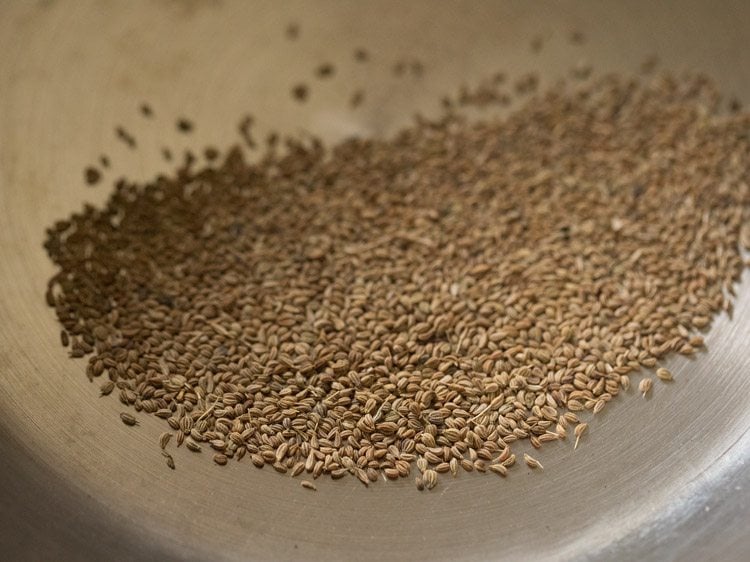
- Heat a small pan and keep the heat to low. Add 1 teaspoon carom seeds (ajwain).
- Stirring often, roast carom seeds for some seconds or till they are fragrant. No need to brown them. Let them cool.
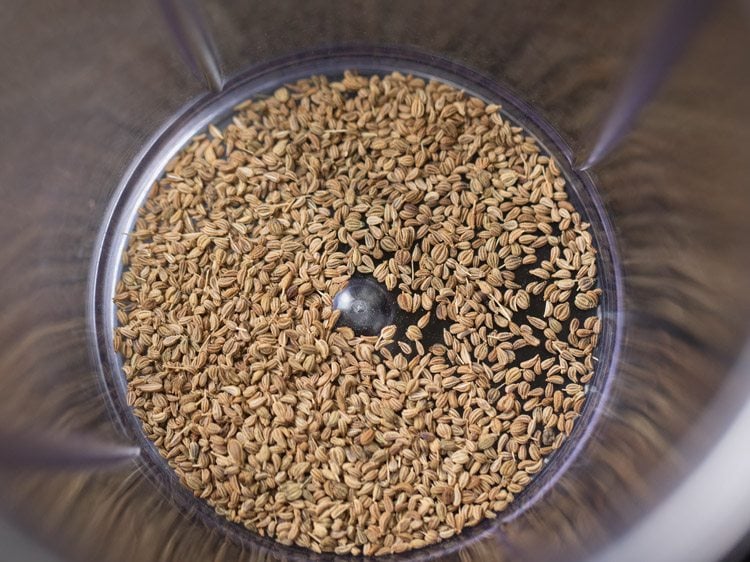
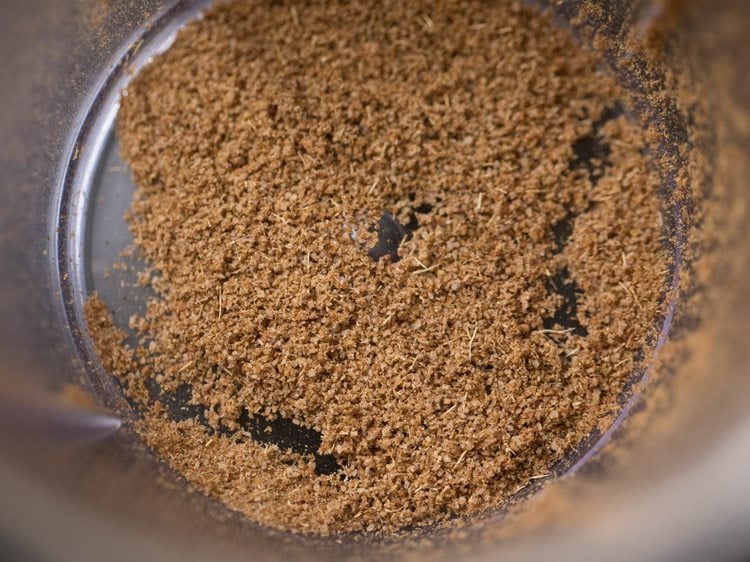
- Then, add them in a small dry grinder jar or a spice grinder.
- Grind to a fine powder. Keep aside. You can even crush ajwain in a mortar-pestle. In this case, when adding ajwain, use a tea strainer and sift the ajwain powder through it. This is done so that when pressing through the sev maker, the dough strands do not break.
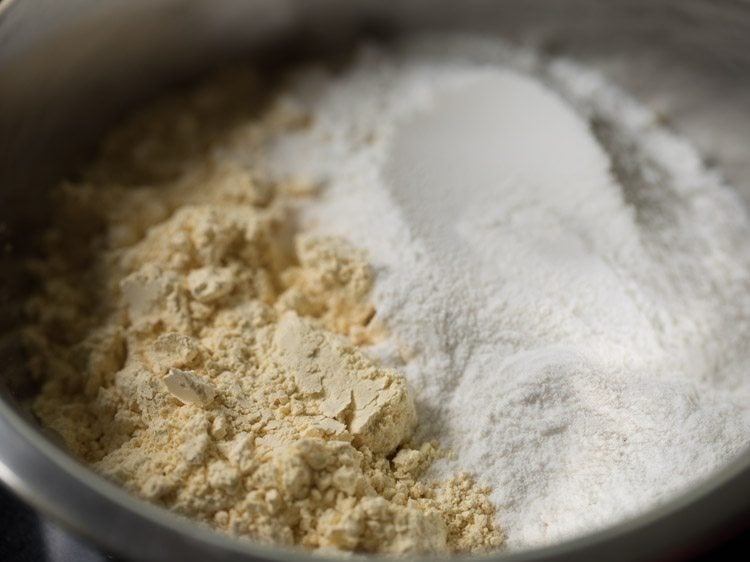
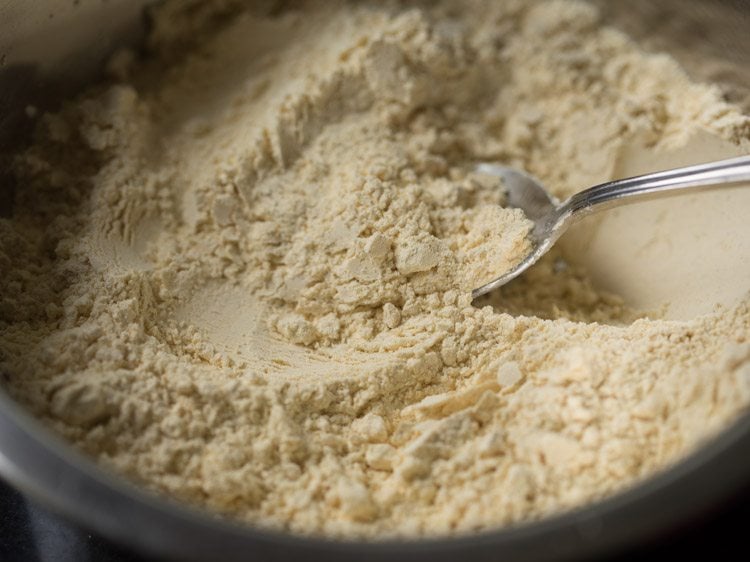
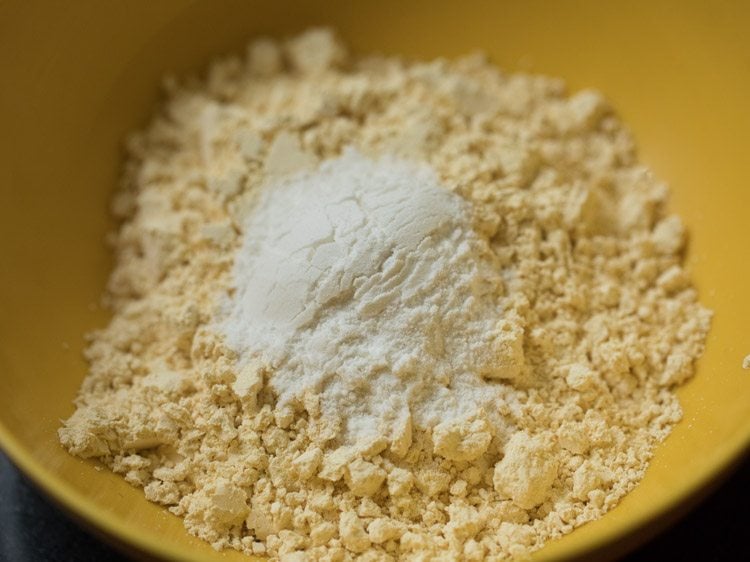
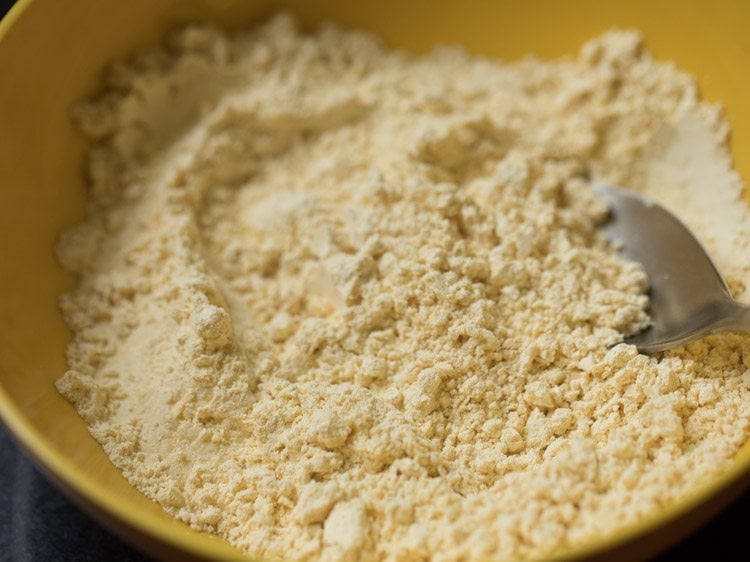
- In a mixing bowl or pan, take 1 cup gram flour (besan) and ½ cup rice flour.
- Add the prepared carom seeds powder.
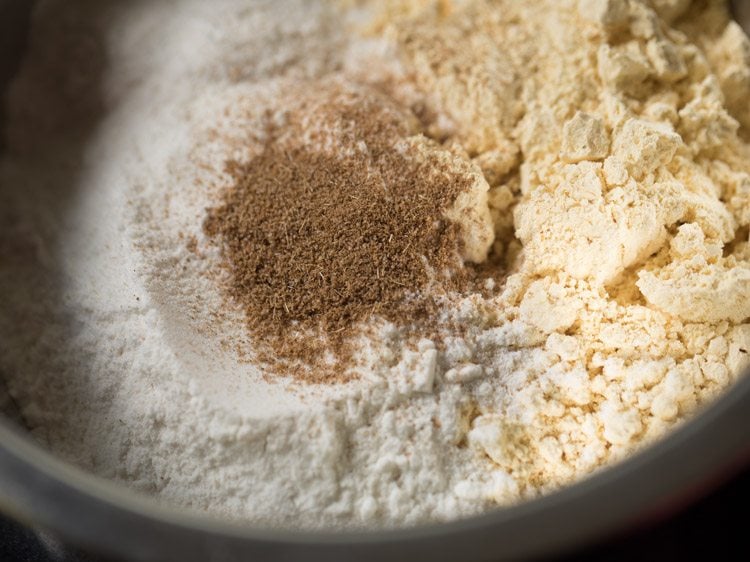
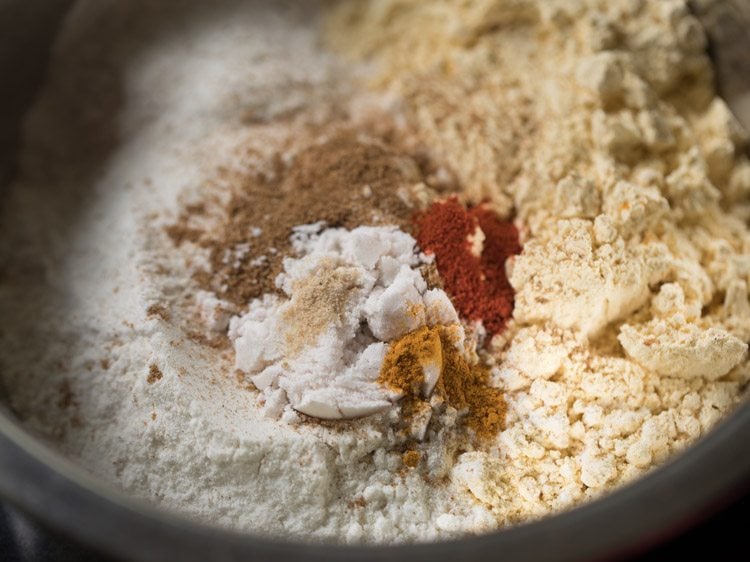
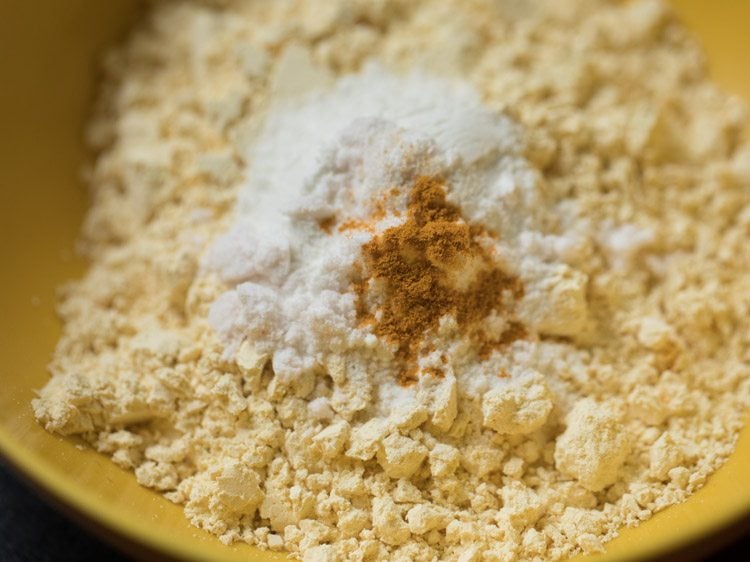
- Then, add 1 generous pinch asafoetida (hing), 2 pinches turmeric powder, ¼ teaspoon red chili powder and 1 teaspoon salt. You can add salt as per taste. Turmeric powder can be skipped. For a spicy omapodi, you can increase the amount of red chili powder. For more crispiness, you can add a pinch of baking soda also. 8. Mix very well with a spoon or spatula.
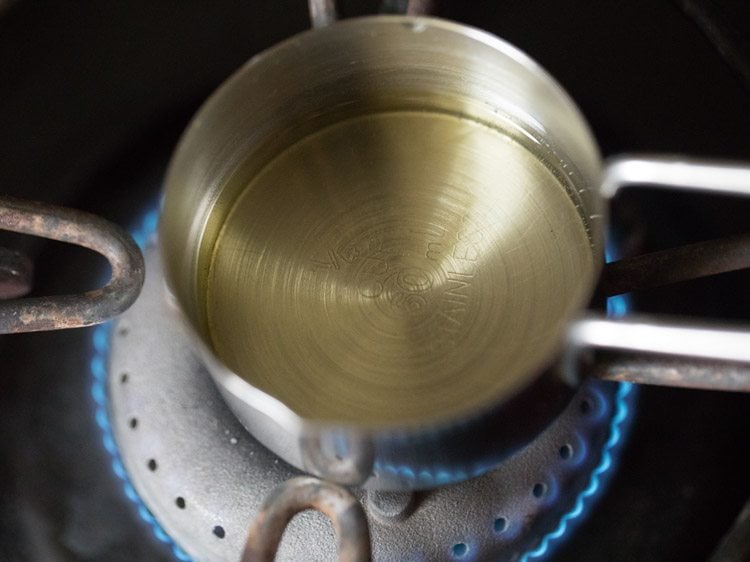
- Now, heat 1 tablespoon oil in a steel bowl or a steel measuring cup.
- When the oil becomes hot, add it to the flour mixture. Instead of oil, you can also use ghee or butter.
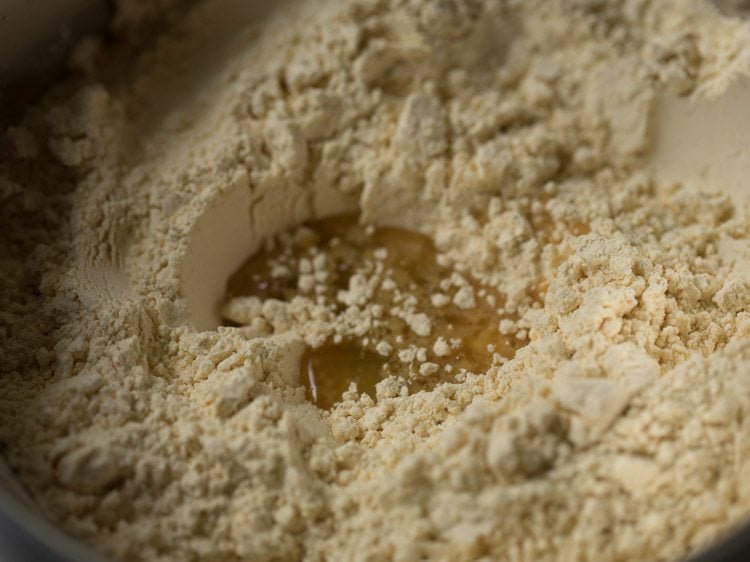
- With a spoon, mix the oil with the flour mixture.
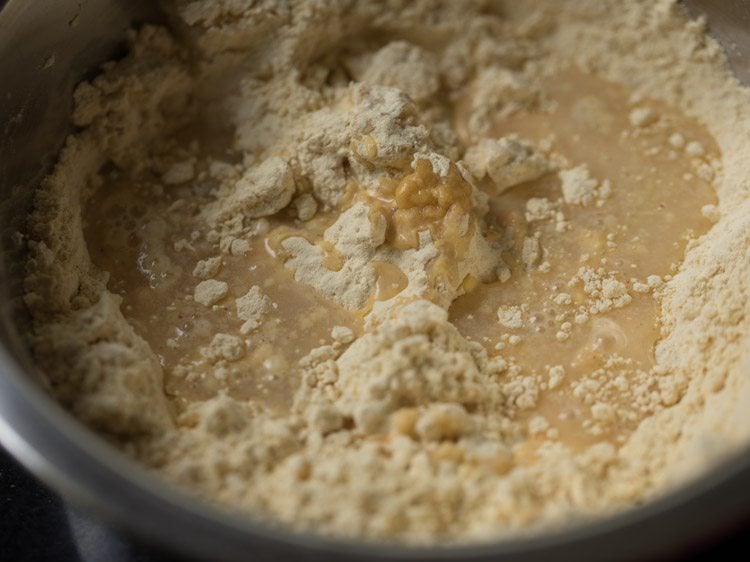
- Now, add water in parts. First, add 2 to 3 tablespoons water. Mix well and begin to knead to a smooth dough. I used 7 tablespoons water overall. You can add 6 to 7 tablespoons water, depending on the quality of gram flour and rice flour.
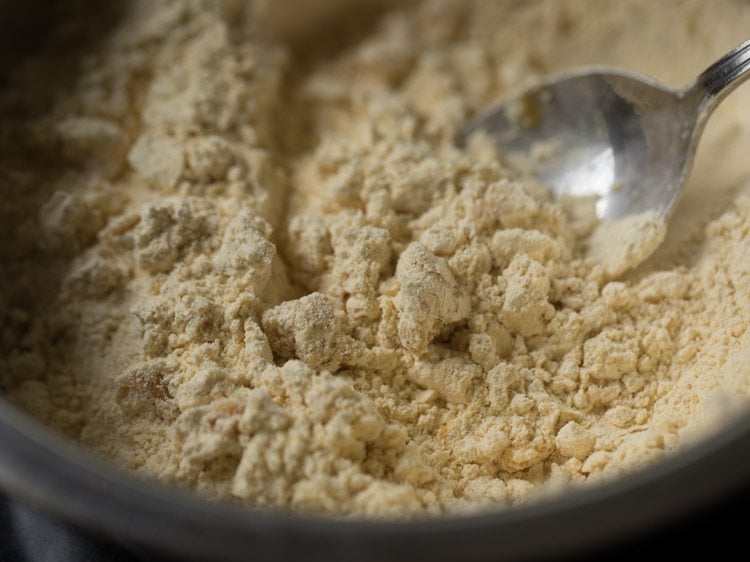
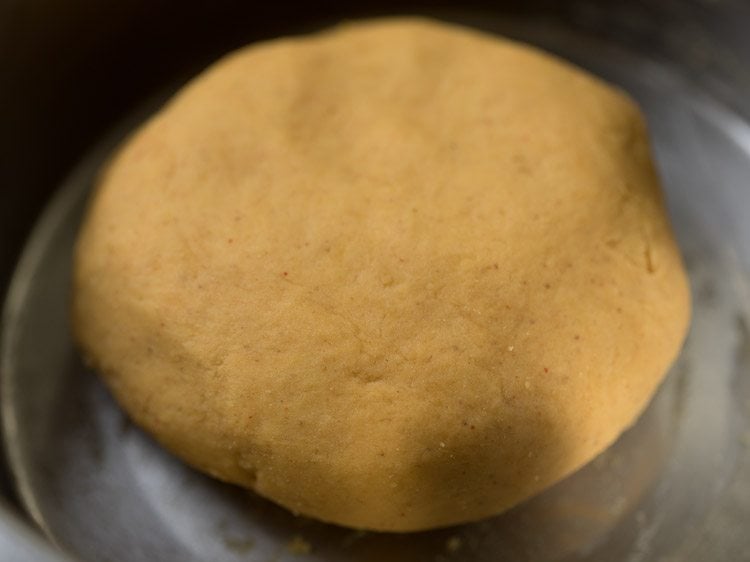
- Knead to a smooth dough. If the dough becomes sticky, then you can add some more besan. If the dough looks dry, then add some more water and knead again. Cover the bowl.
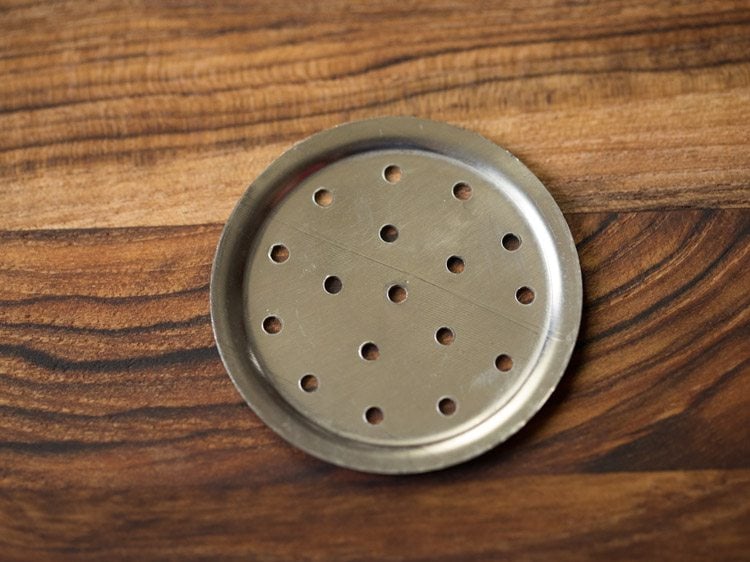
- Use the disc shown in the picture below, for preparing omapodi. You can even use the disc with fine holes. Also, heat a kadai and add oil as required for deep frying omapodi.
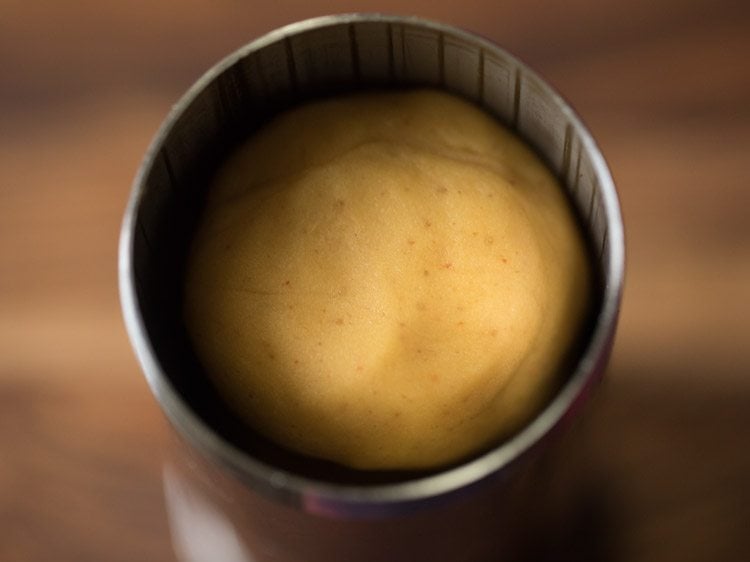
- Apply some water or oil in the sev/murukku maker. Then, take a portion of the omapodi dough and place it inside the sev maker. Cover with the top part and keep aside.
Fry Omapodi
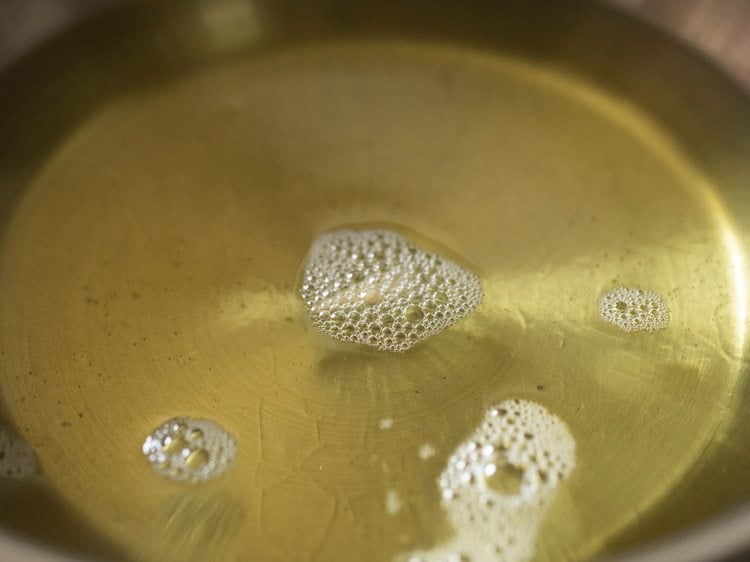
- Let the oil in the kadai become medium hot. Check the oil temperature by adding a tiny piece of the dough. If the small piece comes up gradually and steadily on top, the oil is hot enough to fry. In case it comes up too quickly, then oil is too hot. If it settles down at bottom of kadai or comes up very slowly, the oil is not hot enough for frying.
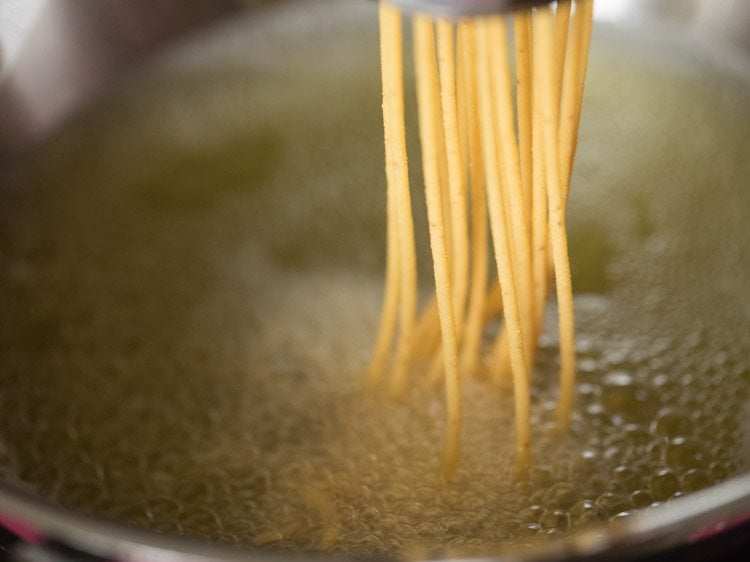
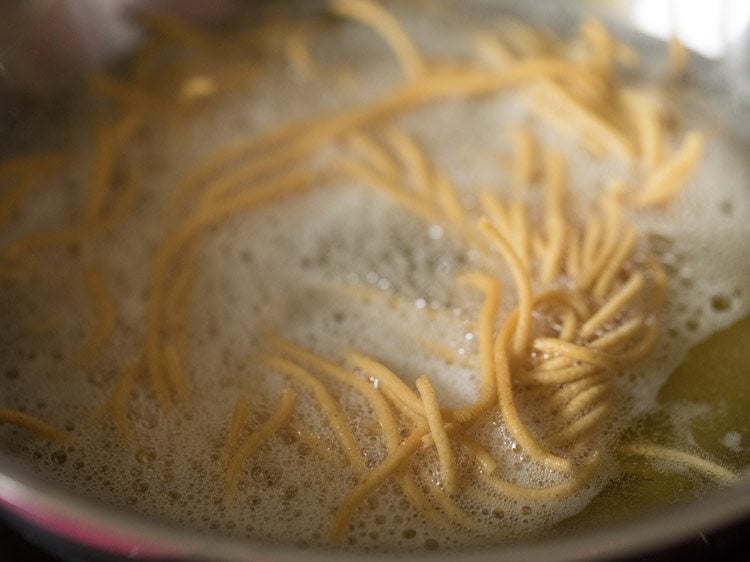
- When the oil is hot enough, directly press holding the sev maker on top of the oil and let the omapodi directly fall in the oil. While pressing, rotate in a concentric circle from the center to outwards similar to making a Chakli. Do not over crowd the kadai with omapodi. Be careful when pressing the omapodi in the oil. After it is is pressed in the oil, break the top strands with a spoon or knife and let the strands fall in the oil.
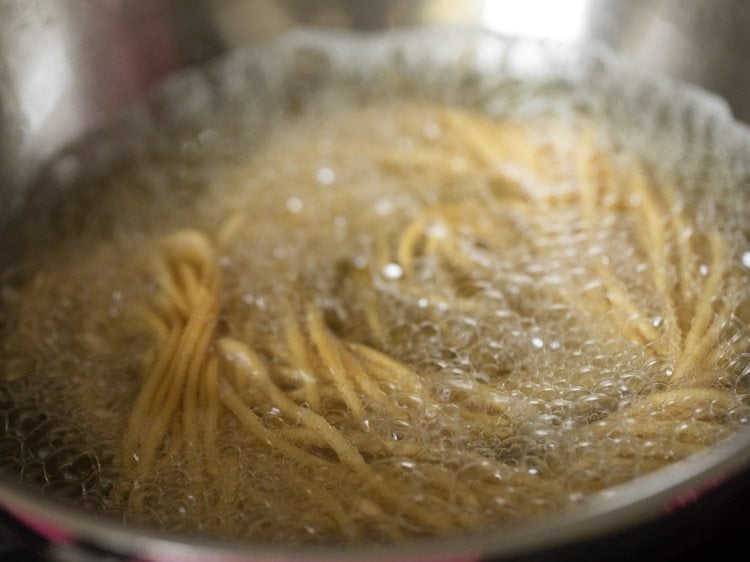
- After adding the omapodi, do not touch immediately with the slotted spoon as they will break. Let them get fried first for a minute. They need to become crisp first and then you can turn them over with the slotted spoon.
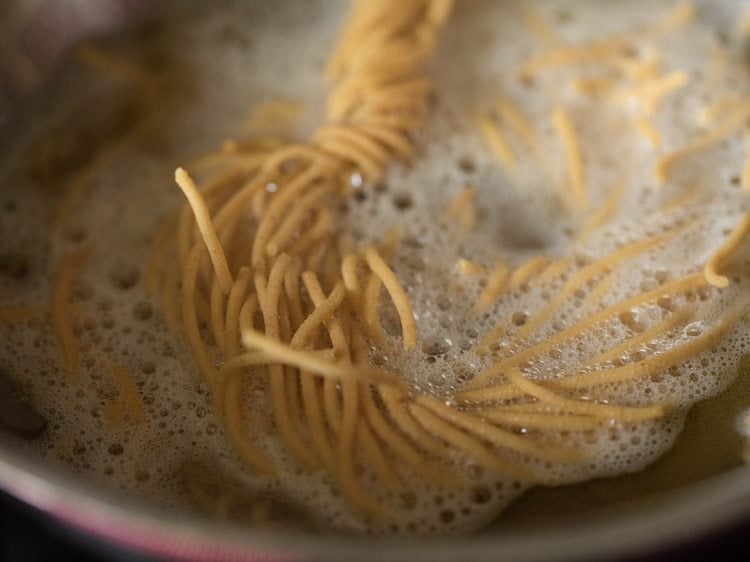
- Gently begin to turn with a slotted spoon.
- Now, fry the second side. You can turn over a couple of times for even frying.
- When the oil stops sizzling, continue to fry for some more seconds till the omapodi is golden and crisp. Turn over as needed, when frying. Do not break omapodi while frying as then it becomes extra work to remove the small pieces from the oil. So, fry the entire round shaped omapodi as one piece and do not break it.
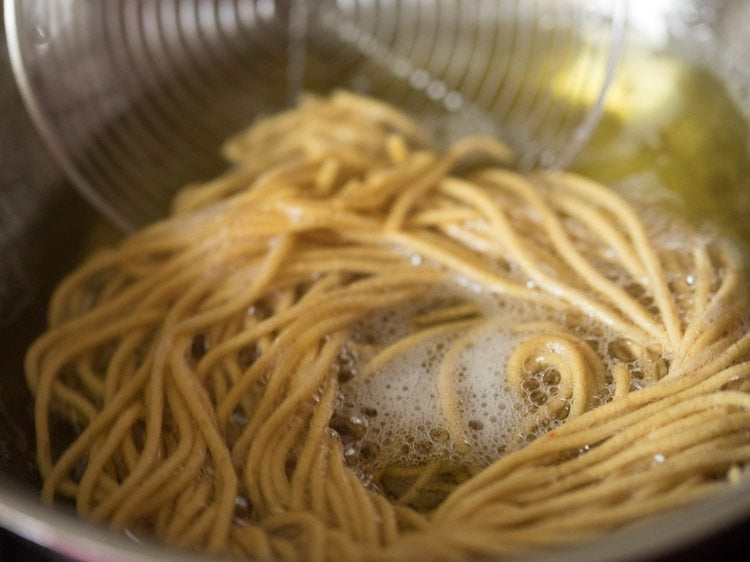
- Once done, remove fried omapodi with a slotted spoon or a strainer spoon draining off the extra oil.
- Place fried omapodi on kitchen paper towels. Fry remaining in the same way.
- When omapodi cools, place in an air-tight container or box. Before adding to the Madras Mixture, break the omapodi.
Make Boondi Batter
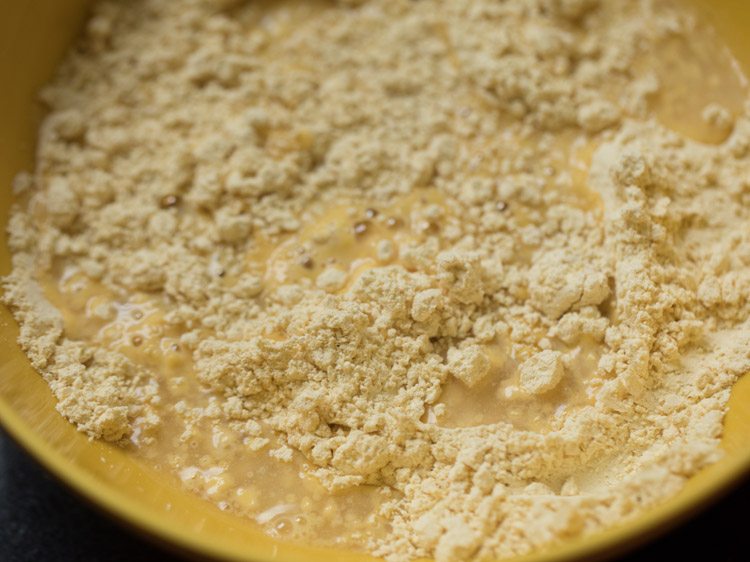
- Take ½ cup gram flour (besan) and 1 tablespoon rice flour in a mixing bowl.
- Then, add 1 pinch asafoetida (hing), 1 pinch baking soda, 2 pinches turmeric powder and ½ teaspoon salt.
- Mix everything with a spoon.
- Now, add 8 to 9 tablespoons water in parts.
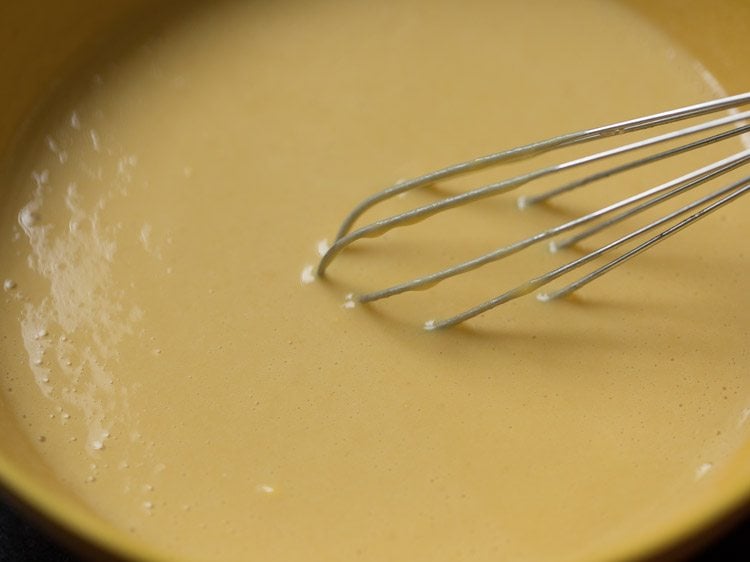
- Using a wired whisk, make a smooth and slightly thin batter without lumps.
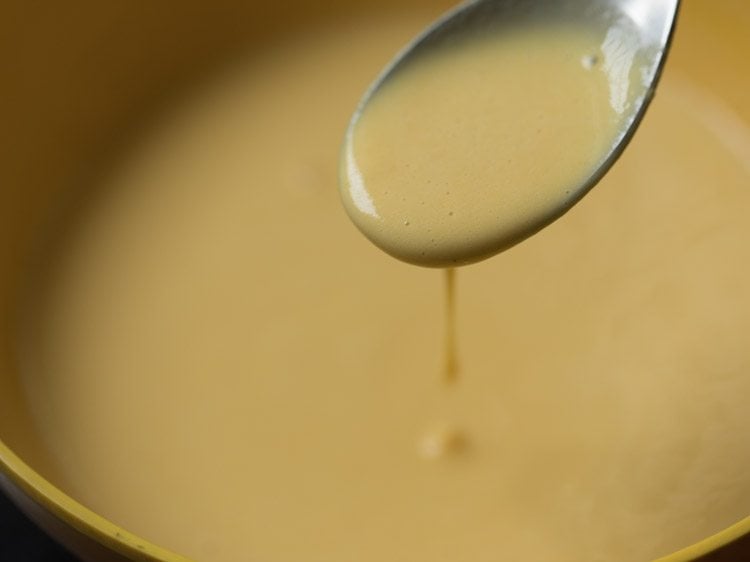
- The batter consistency is slightly thin. The amount of water to be added depends on the quality of gram flour. So, add accordingly.
Fry Boondi
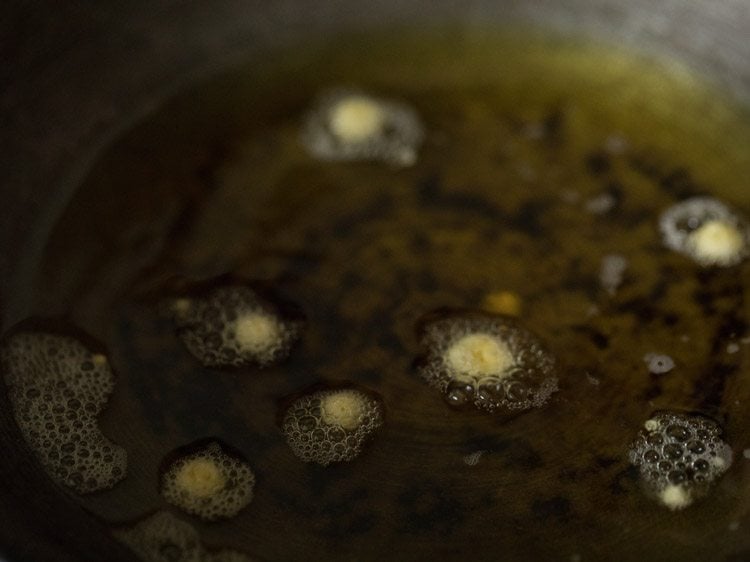
- Heat oil for frying in a kadai or pan. When the oil becomes hot, then tap the wired whisk or the handle of a spoon which has a bit of batter in to the hot oil.
- The boondi should have a round shape. When they become flat, then the batter is thin. If they get tail ends, then the batter is thick. Tip: In case the batter is thin, then add 1 to 2 teaspoons gram flour and check by frying a few boondi. Tip: If the batter is thick, then add a few teaspoons water and then do the same test. Once you get the correct consistency, proceed with the next step of frying the boondi.
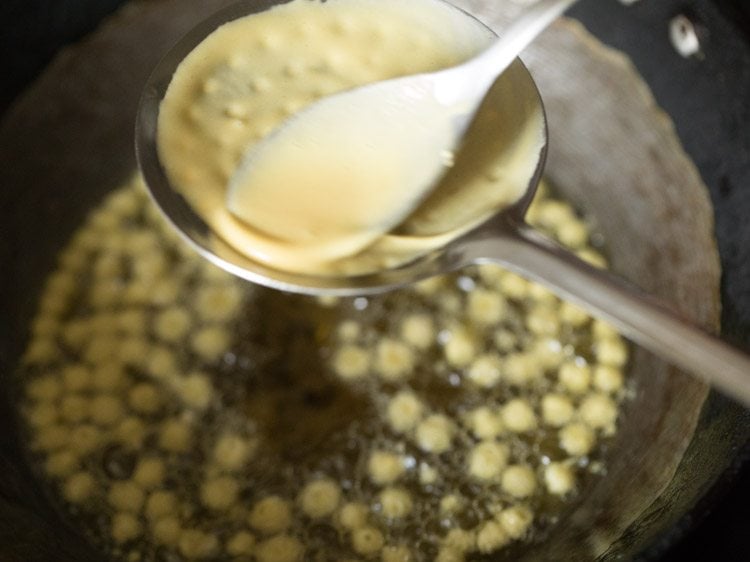
- Now, take a dry perforated ladle (jhara) and place it above the hot oil. Don’t keep at too much height, as the batter droplets, when falling from a height, do not give a round shape. With a spoon, add some batter on the perforated ladle. Spread the batter lightly with a spoon. Finish up the batter on the perforated ladle this way.
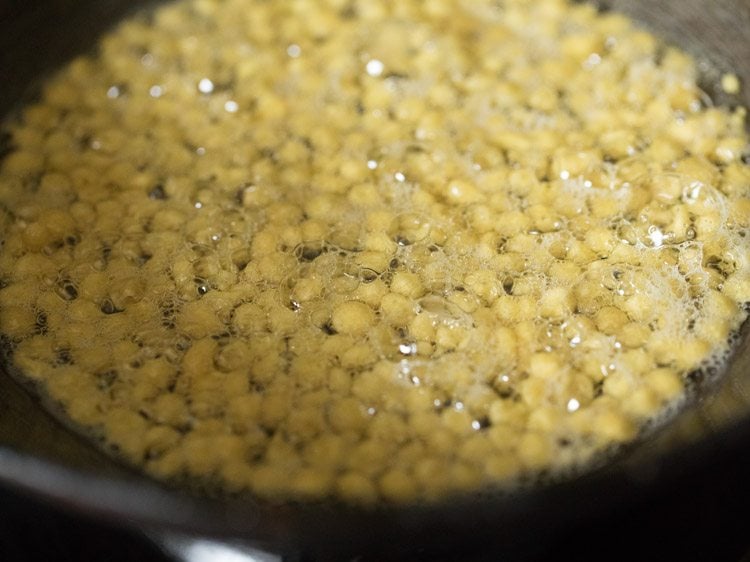
- On medium heat, begin to fry the boondi. Do not turn them. Let them become slightly crisp and then only turn them over.
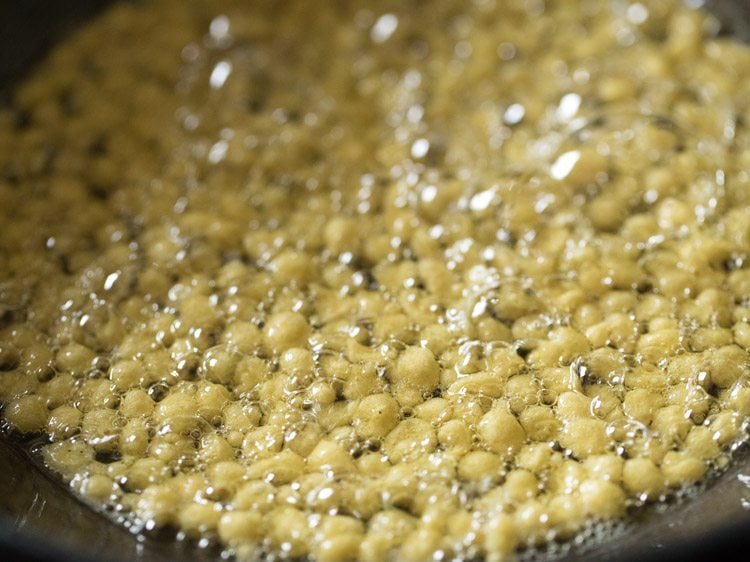
- When the boondi has become crisp, turn with a slotted spoon. You won’t get perfect round shape for each boondi, but it does not matter as the taste of homemade boondi is better than store bought ones.
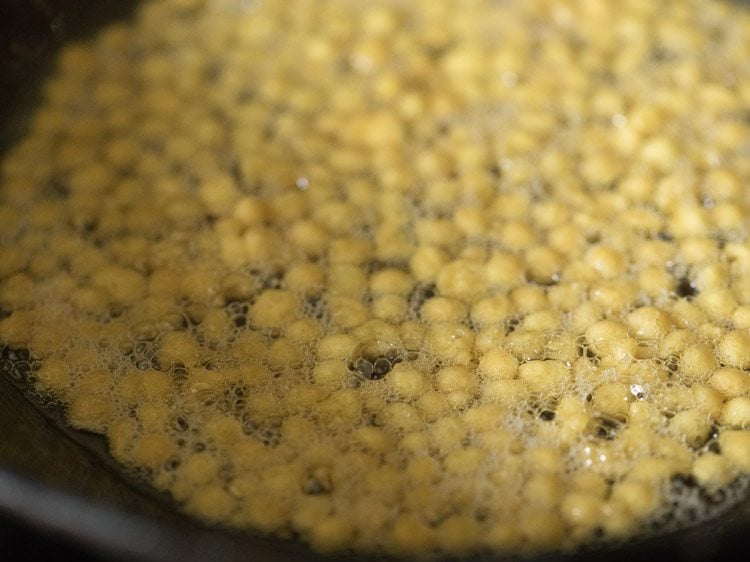
- After the oil stops sizzling, continue to fry the boondi for some more seconds so that they become crisp
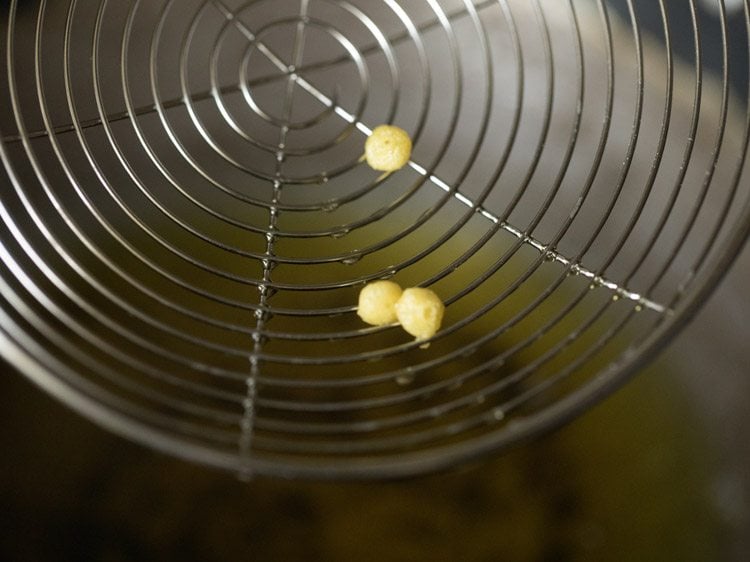
- Remove with a strainer spoon or a slotted spoon draining the extra oil.
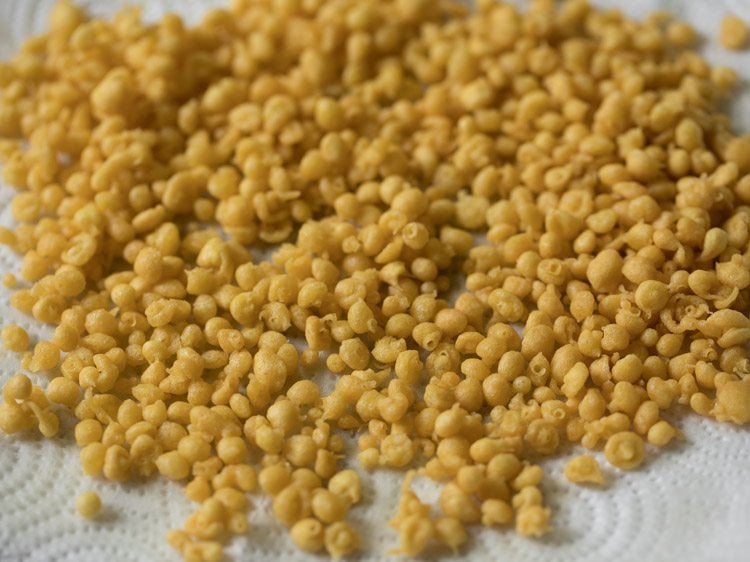
- Place the fried boondi on kitchen paper towels.
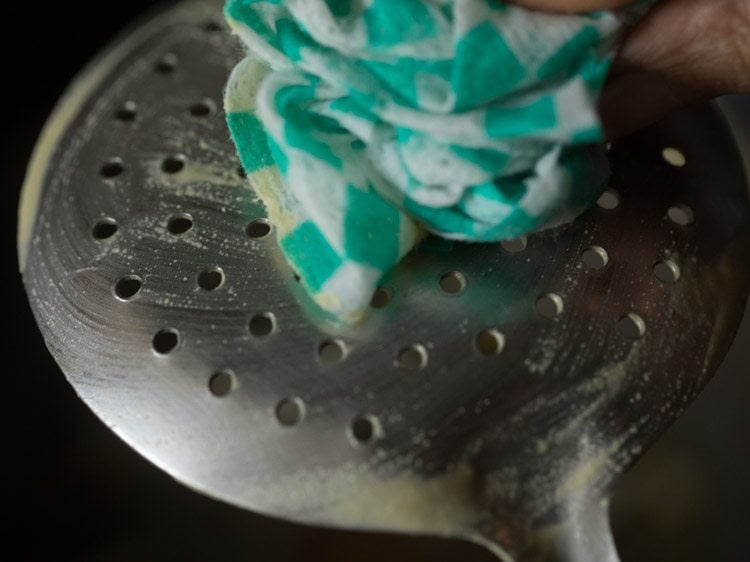
- After each batch, wipe the perforated ladle with a clean piece of thin moist cotton kitchen towel from both sides. Continue to fry boondi this way. Once the boondi cools at room temperature, store in an air-tight jar or container.
- While the boondi is getting fried, you can keep everything ready for the next step. Take 2 cups omapodi and 2 cups boondi. The rest of the omapodi you can serve as snack. The remaining boondi can be used for making other boondi-based dishes.
Fry More Ingredients for Madras Mixture
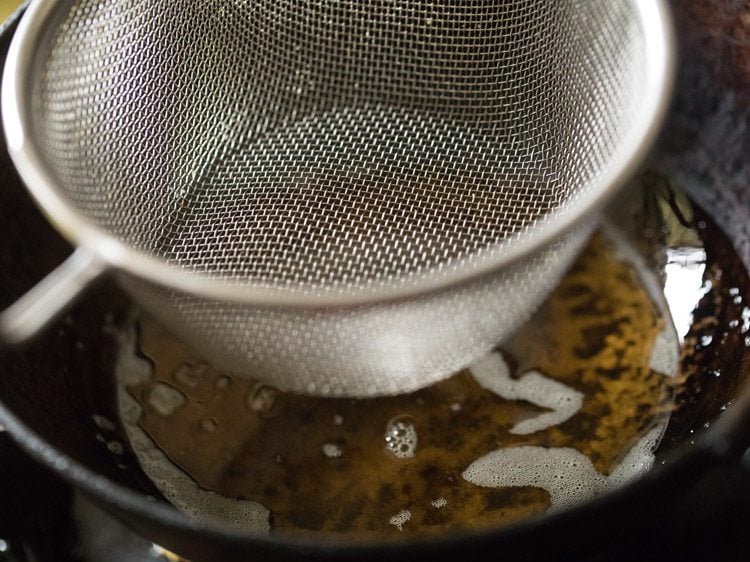
- Use a fine sieve ladle as shown in the picture below for frying. In Indian markets, we get these sieve with a handle. This sieve ladle is very helpful for frying ingredients which have small pieces or flakes. As you don’t waste time and energy trying to find out the rice flakes or the chana dal in the oil. Heat some oil for deep frying in a pan or kadai. You can also use the same oil in which you fried the boondi. Keep the heat to medium.
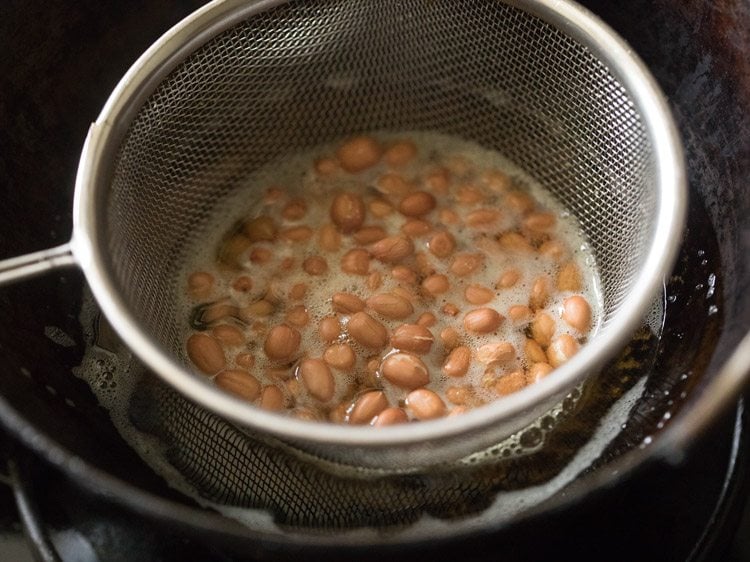
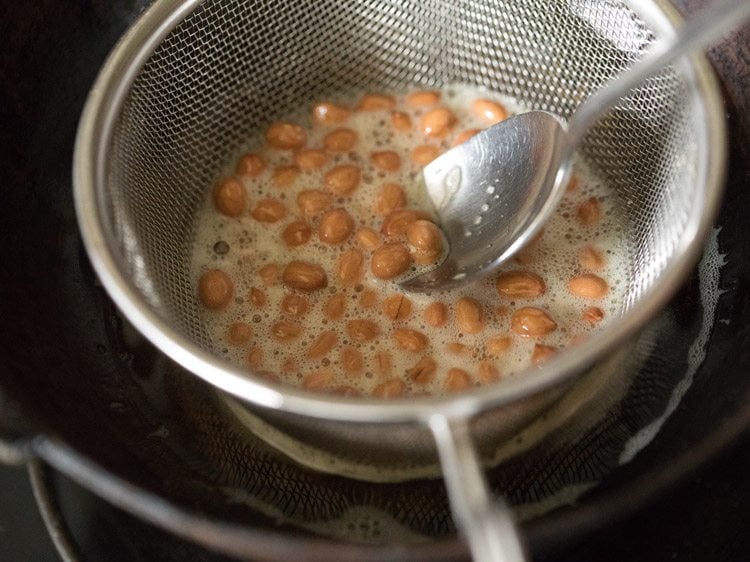
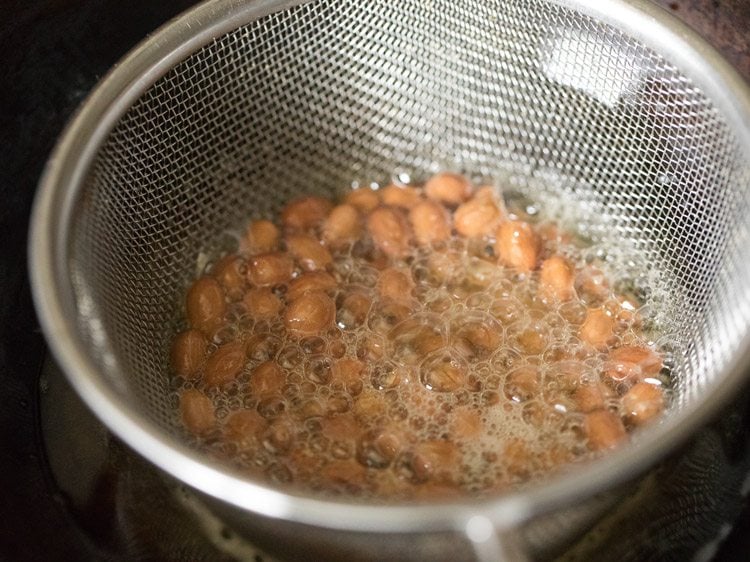
- Take ¼ cup peanuts first in the sieve. Immerse in the oil and begin to fry on medium heat.
- With a spoon, stir often while frying so that the peanuts are fried evenly.
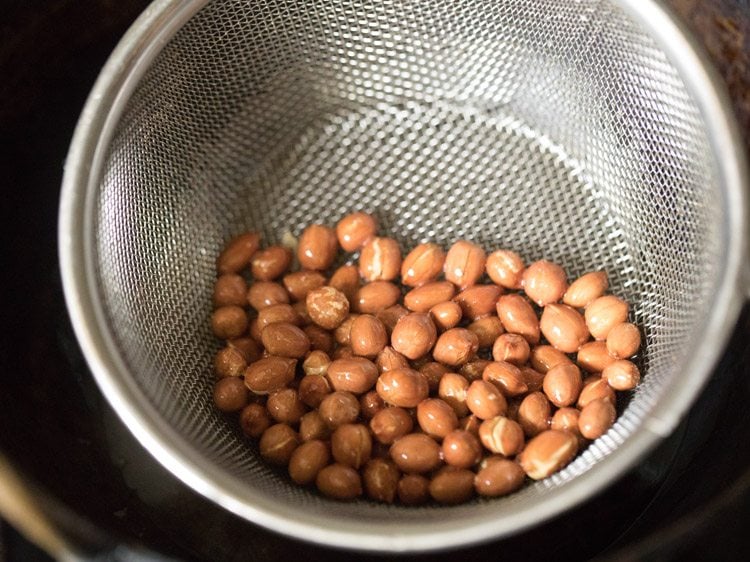
- Fry peanuts till they are crisp and crunchy.
- Using the same sieve, drain the extra oil. So this ladle is helpful for frying as well as for getting rid of extra oil after frying.
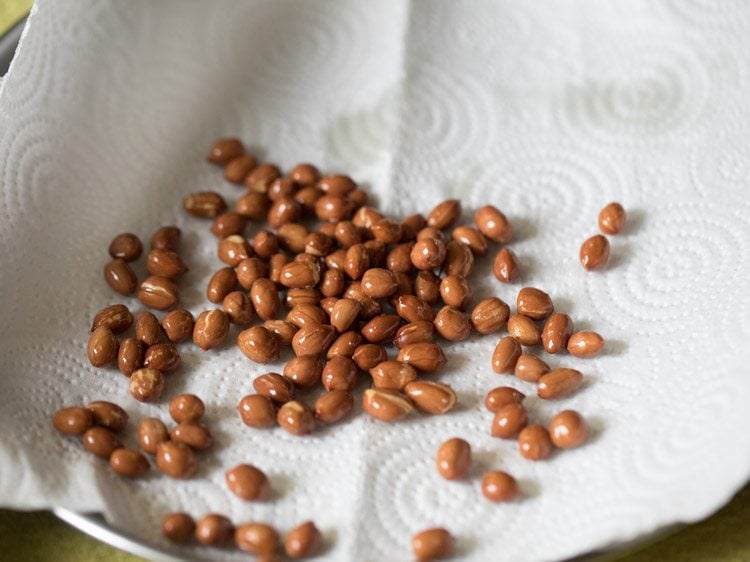
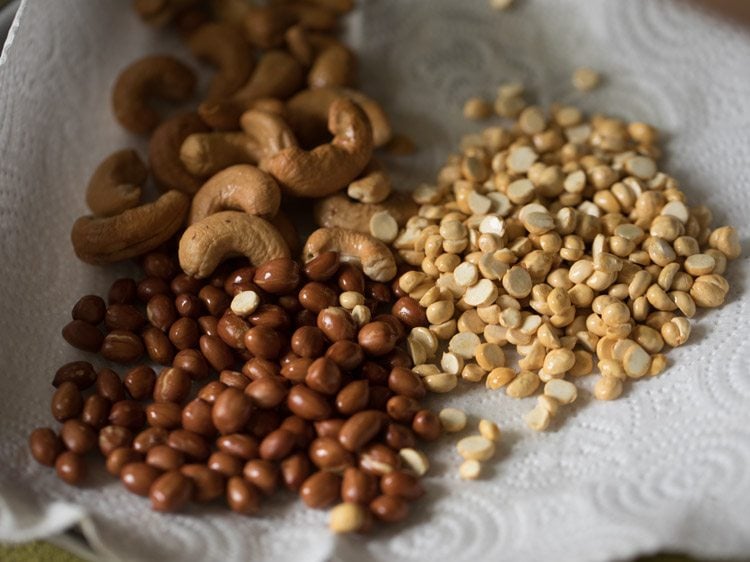
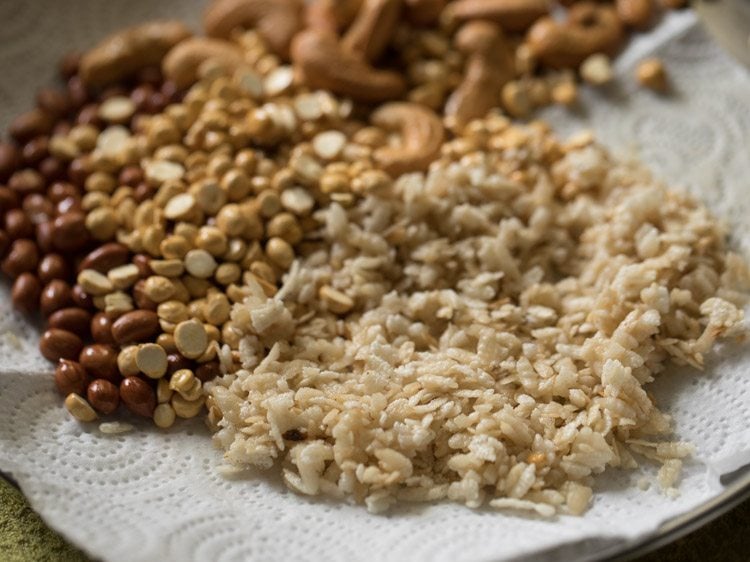
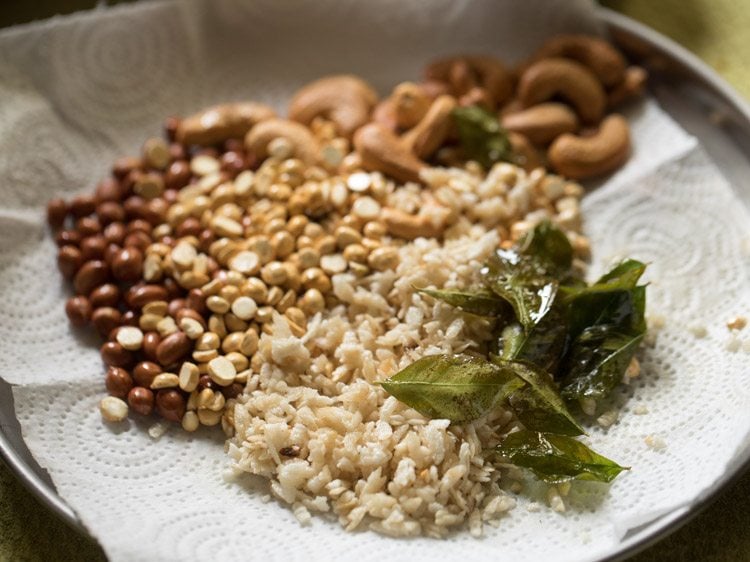
- Place the fried peanuts on kitchen paper towel.
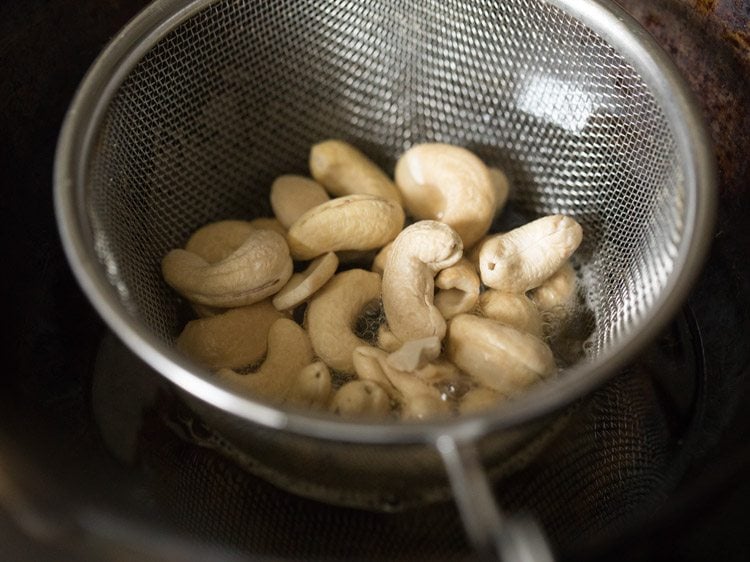
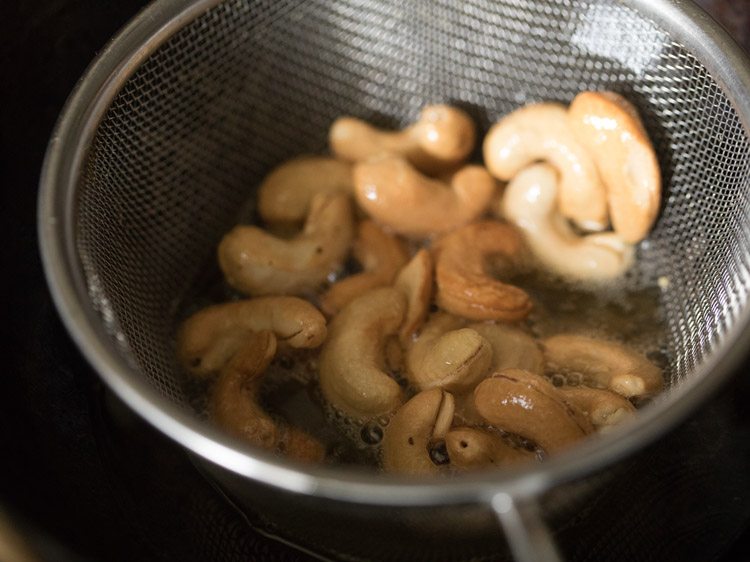
- Then, take 25 cashews in the same ladle.
- Stirring often with a spoon, fry cashews till golden.
- Place the fried cashews on the same kitchen paper towel.
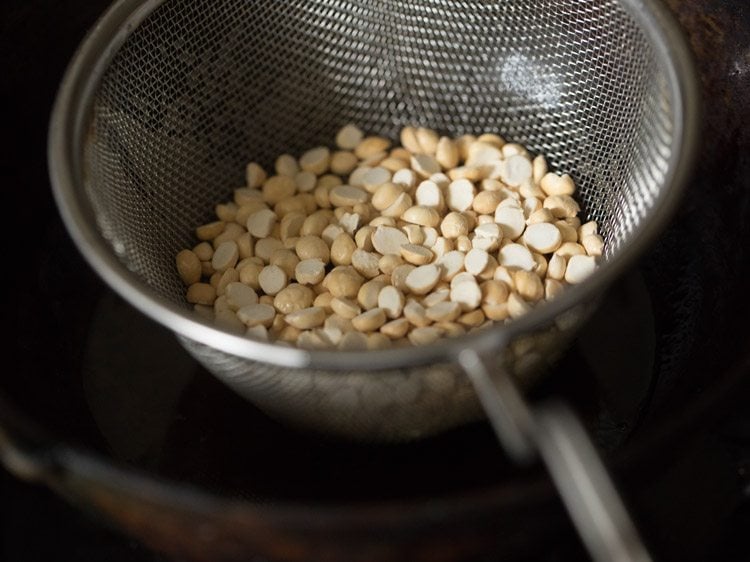
- Next, take ¼ cup roasted Bengal gram (chana dal).
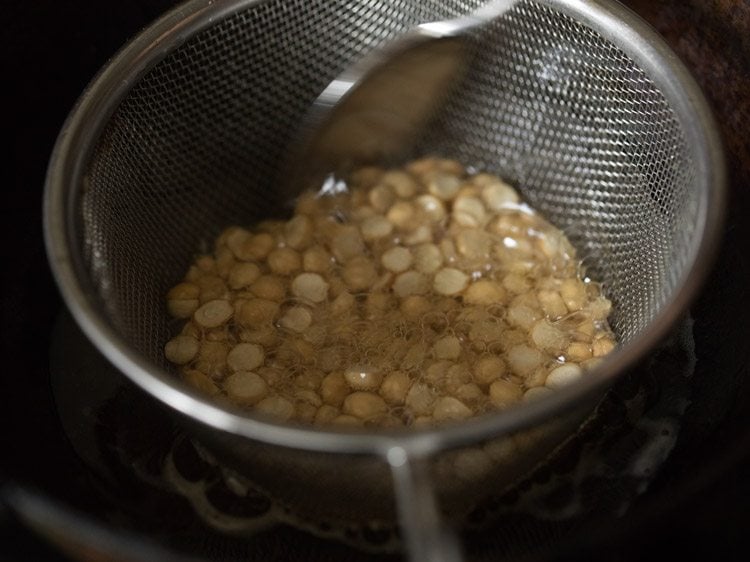
- Stirring often with a spoon, fry roasted chana dal till crisp.
- Frying chana dal will take some seconds and their color will change.
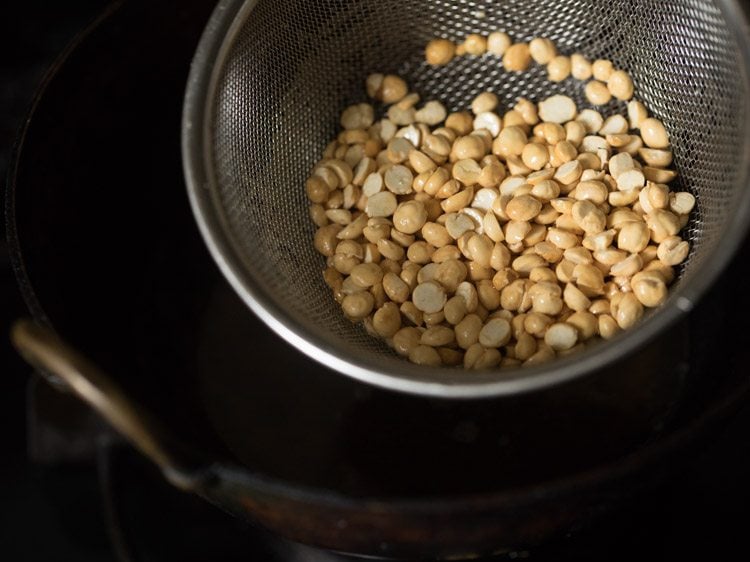
- Place the fried chana dal on the same kitchen paper towel.
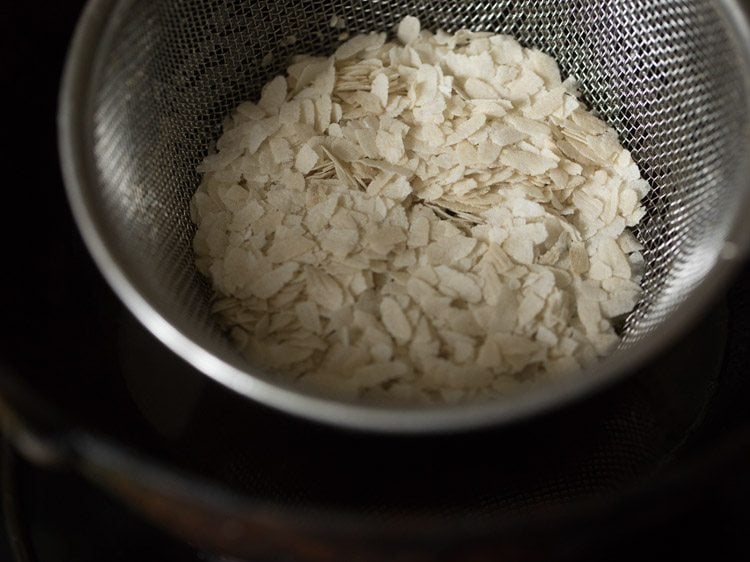
- Now, take ¼ cup thick flattened/parched rice (poha). I have used thick poha. You can also use thin poha.
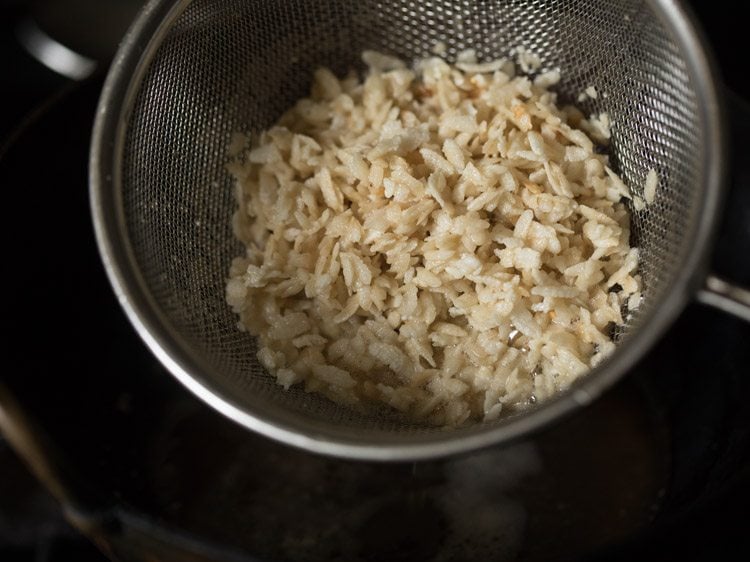
- Stirring often with a spoon, fry the poha till crisp and pale golden. Don’t brown the poha. You can add more poha if you want. You can also add more of peanuts, roasted chana dal or cashews, if you like.
- Once the poha is fried well, drain off the extra oil using the same ladle.
- Place the fried poha on the same kitchen paper towel.
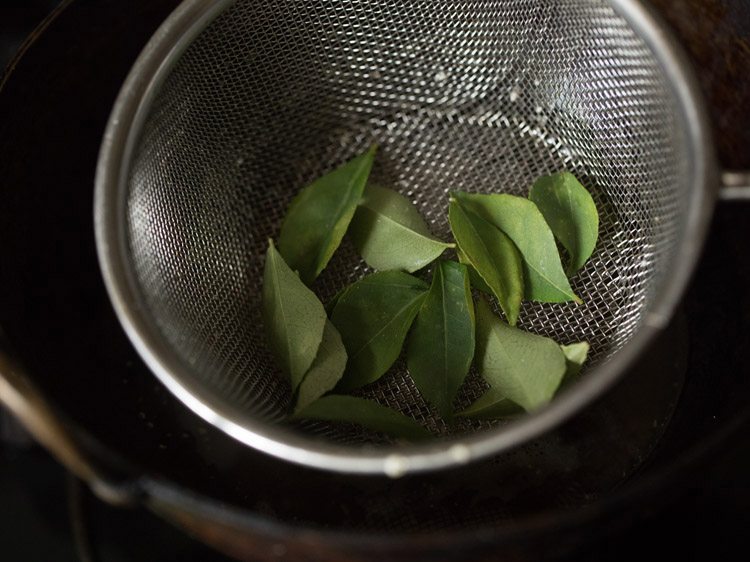
- Next, add 12 to 15 curry leaves.
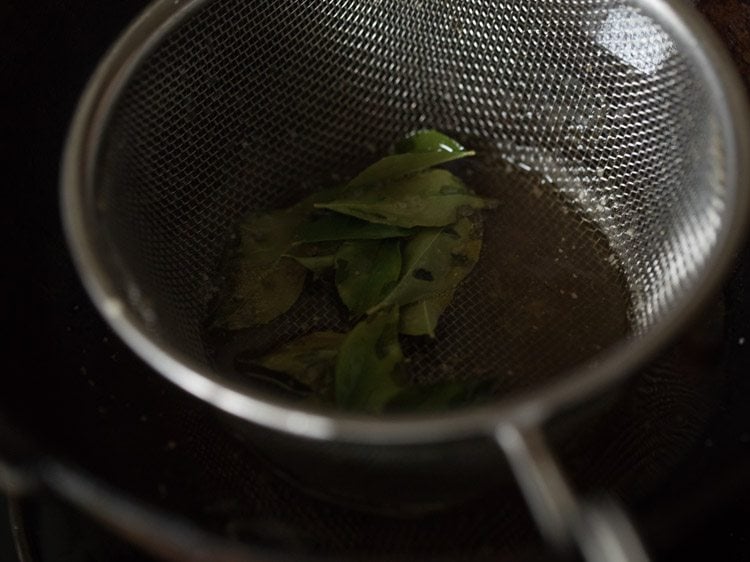
- Stirring often, fry curry leaves till crisp.
- Curry leaves take a few seconds to fry.
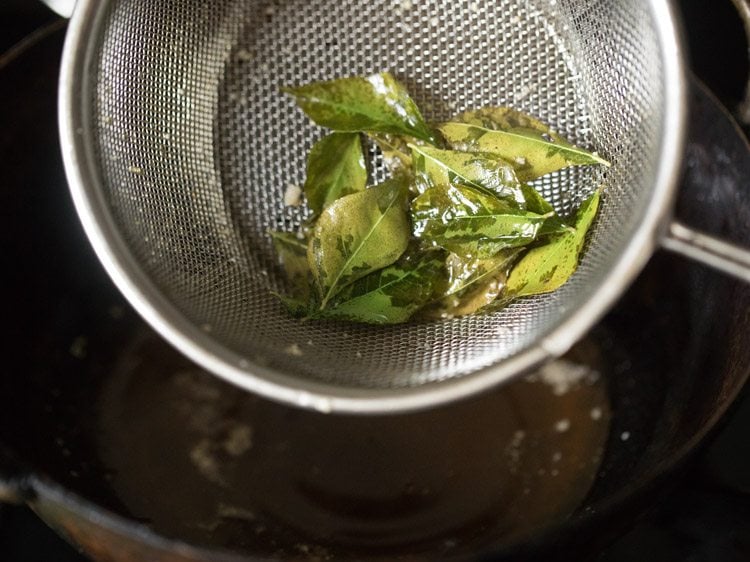
- Place the fried curry leaves on the same kitchen paper towel.
Make South Indian Mixture
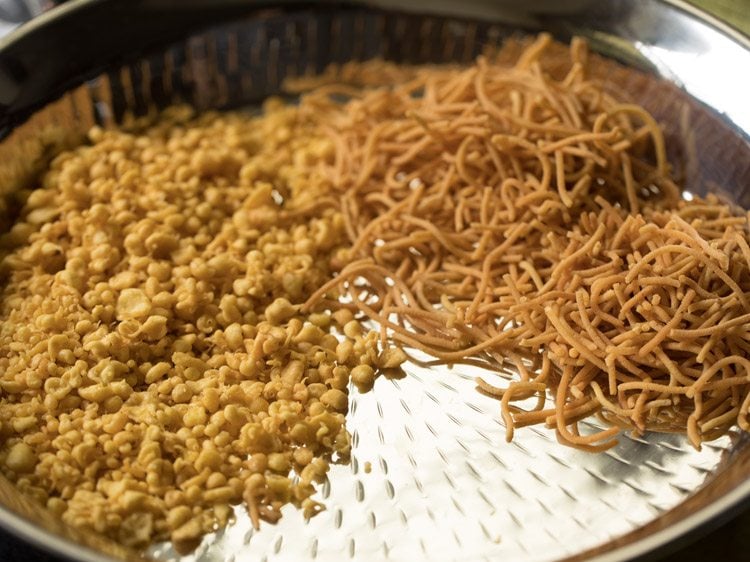
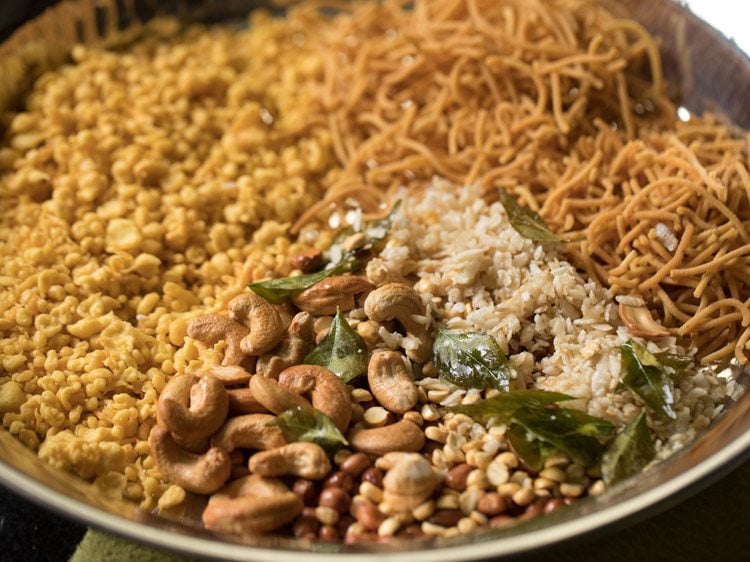
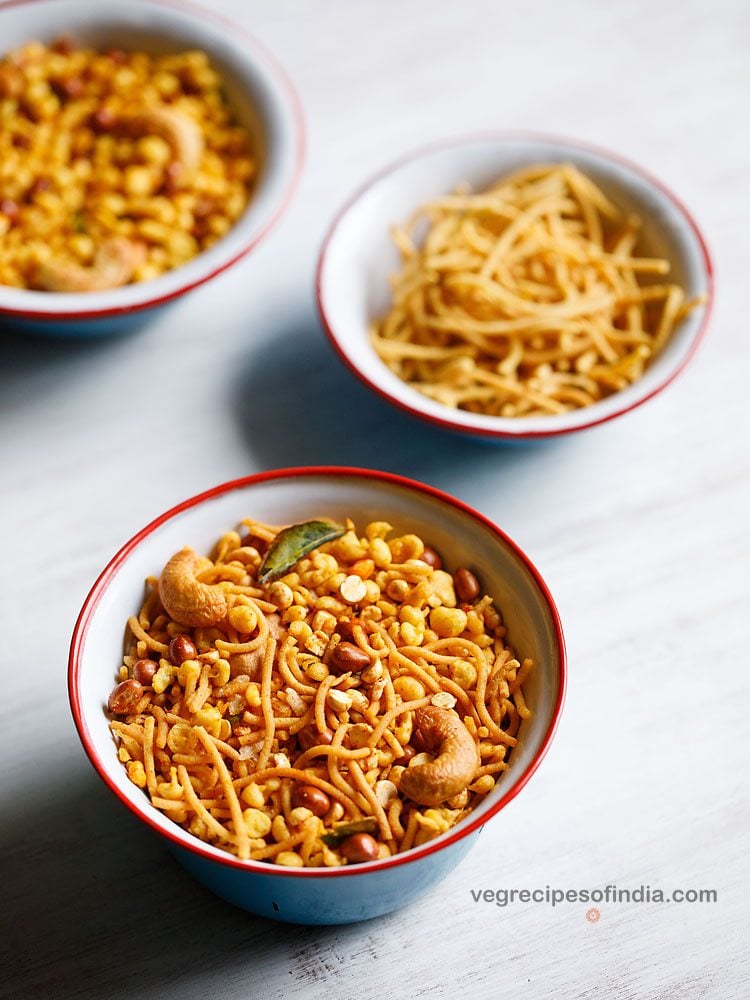
- In a large bowl, tray or plate, take 2 cups omapodi and 2 cups boondi. Break omapodi before you begin to mix.
- Add the fried cashews, poha, chana dal and curry leaves.
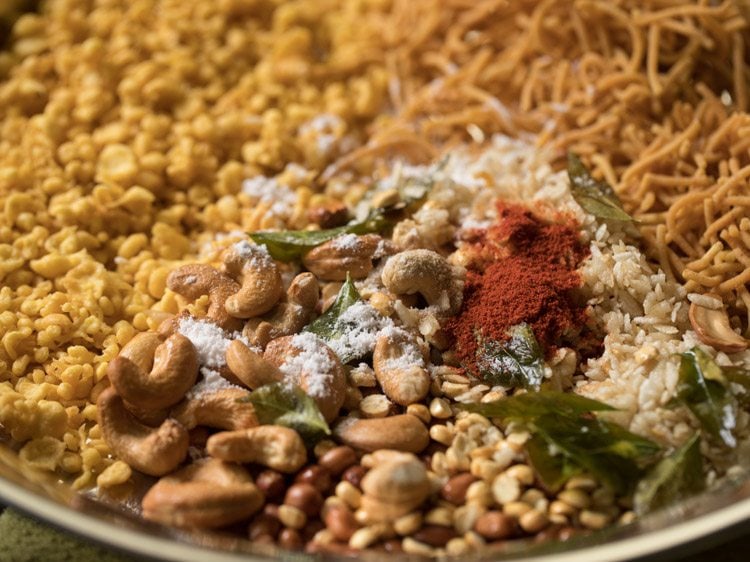
- Add ½ teaspoon red chili powder, ⅛ teaspoon (2 pinches) asafoetida (hing) and salt as per taste over the fried chana dal, poha, nuts and curry leaves, as these will be still hot. You can also add some powdered sugar for a slight sweet taste.
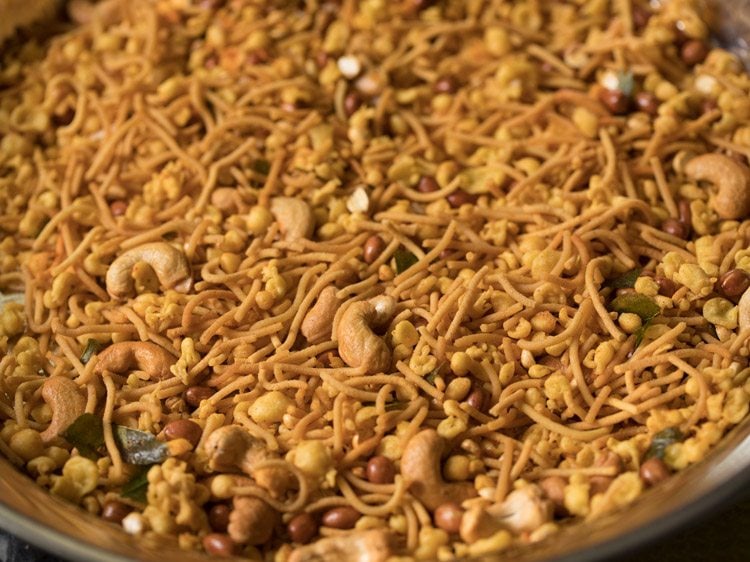
- Mix well with a spoon first and then later you can mix with your hands.
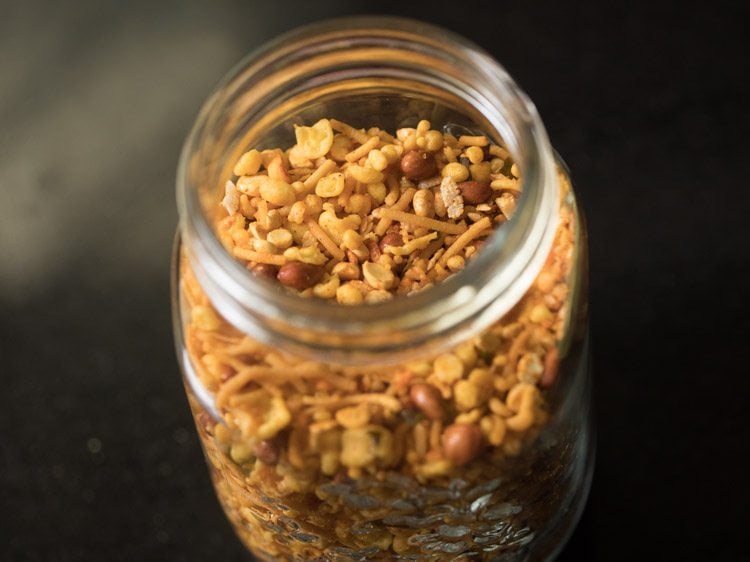
- Then, place the Madras Mixture in an air-tight jar or container. Store at room temperature.
- Serve South Indian Mixture as a Diwali or tea time snack.
Expert Tips
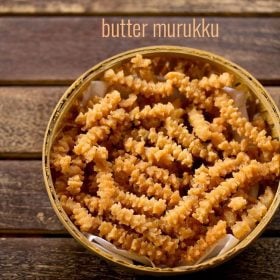
Please be sure to rate the recipe in the recipe card or leave a comment below if you have made it. For more vegetarian inspirations, Sign Up for my emails or follow me on Instagram, Youtube, Facebook, Pinterest or Twitter. Nankhatai Recipe | Nankhatai Biscuit Shakarpara Recipe | Khurma | Shakkarpare Butter Murukku | Butter Chakli Sev Recipe | Karasev | Besan Sev This Mixture Recipe from the archives first published in October 2017 has been updated and republished on 21 October 2022.


title: “Mixture Recipe Madras Mixture " ShowToc: true date: “2024-10-15” author: “Robert Mendoza”
More on Mixture Recipe
What is commonly known as Chivda in the northern and western parts of India, is the Mixture in southern India. And just like there are many varieties of a chivda recipe, similar is the case with a Mixture Recipe too. In this post, I have shared the popular and loved South Indian Mixture, popular from Madras (Chennai). Two of the main ingredients of this one is omapodi (plain sev) and boondi. Other than these, there are some nuts, poha (aval), chana dal, curry leaves, spices and seasonings. You can even add fried coconut. But I usually don’t add as it reduced the shelf-life of this particular snack. So basically, if you have the boondi and omapodi ready from before, you just have to fry the other ingredients and mix all of them together with the spices and salt. But in case if you don’t have the plain sev and boondi ready, look nowhere else, as my Mixture Recipe mentions the step-by-step pictorial representation of making these as well. Some variations of the South Indian Mixture even have sweet maida (all-purpose flour) biscuits too added in them. However, I like it to keep it simple and authentic. Hence, haven’t added in my recipe. The preparation including the making of the 2 main elements of this Madras Mixture Recipe, does take time. So, you can plan ahead and make accordingly. Just like I made the omapodi and boondi a day before to reduce the prep work, you can also keep these ready, a day prior. This will definitely reduce the time to complete your Mixture Recipe the next day.
Why this recipe works
In this Madras Mixture recipe post, I have mentioned the methods of preparing both the omapodi and boondi. For an exclusive detailed post on both these, you can check this Omapodi Recipe and Kara Boondi Recipe. It is always better to prepare your own snacks, especially the fried ones like this Madras Mixture Recipe, at home. By doing so, you are ensuring that the recipes are getting done using the best of ingredients and also the oil which is used to fry, isn’t reused many times. Thus, homemade chivda and mixtures are healthier too, and will always taste a notch higher as compared to the store-bought ones. In this South Indian Mixture too, you can also add more like Ribbon Pakoda, Thattai, Murukku and even Karasev. Just break these into smaller pieces and toss in with other ingredients. This Madras Mixture Recipe yields about 350 grams of the yummy, crunchy-munchy snack. You can relish it with friends and family during tea-time or make it a part of your Diwali or any other festival celebrations as well. For storing, pack in air-tight jars and keep.
How to Make Mixture Recipe
Make Omapodi Dough
- Heat a small pan and keep the heat to low. Add 1 teaspoon carom seeds (ajwain).
- Stirring often, roast carom seeds for some seconds or till they are fragrant. No need to brown them. Let them cool.
- Then, add them in a small dry grinder jar or a spice grinder.
- Grind to a fine powder. Keep aside. You can even crush ajwain in a mortar-pestle. In this case, when adding ajwain, use a tea strainer and sift the ajwain powder through it. This is done so that when pressing through the sev maker, the dough strands do not break.
- In a mixing bowl or pan, take 1 cup gram flour (besan) and ½ cup rice flour.
- Add the prepared carom seeds powder.
- Then, add 1 generous pinch asafoetida (hing), 2 pinches turmeric powder, ¼ teaspoon red chili powder and 1 teaspoon salt. You can add salt as per taste. Turmeric powder can be skipped. For a spicy omapodi, you can increase the amount of red chili powder. For more crispiness, you can add a pinch of baking soda also. 8. Mix very well with a spoon or spatula.
- Now, heat 1 tablespoon oil in a steel bowl or a steel measuring cup.
- When the oil becomes hot, add it to the flour mixture. Instead of oil, you can also use ghee or butter.
- With a spoon, mix the oil with the flour mixture.
- Now, add water in parts. First, add 2 to 3 tablespoons water. Mix well and begin to knead to a smooth dough. I used 7 tablespoons water overall. You can add 6 to 7 tablespoons water, depending on the quality of gram flour and rice flour.
- Knead to a smooth dough. If the dough becomes sticky, then you can add some more besan. If the dough looks dry, then add some more water and knead again. Cover the bowl.
- Use the disc shown in the picture below, for preparing omapodi. You can even use the disc with fine holes. Also, heat a kadai and add oil as required for deep frying omapodi.
- Apply some water or oil in the sev/murukku maker. Then, take a portion of the omapodi dough and place it inside the sev maker. Cover with the top part and keep aside.
Fry Omapodi
- Let the oil in the kadai become medium hot. Check the oil temperature by adding a tiny piece of the dough. If the small piece comes up gradually and steadily on top, the oil is hot enough to fry. In case it comes up too quickly, then oil is too hot. If it settles down at bottom of kadai or comes up very slowly, the oil is not hot enough for frying.
- When the oil is hot enough, directly press holding the sev maker on top of the oil and let the omapodi directly fall in the oil. While pressing, rotate in a concentric circle from the center to outwards similar to making a Chakli. Do not over crowd the kadai with omapodi. Be careful when pressing the omapodi in the oil. After it is is pressed in the oil, break the top strands with a spoon or knife and let the strands fall in the oil.
- After adding the omapodi, do not touch immediately with the slotted spoon as they will break. Let them get fried first for a minute. They need to become crisp first and then you can turn them over with the slotted spoon.
- Gently begin to turn with a slotted spoon.
- Now, fry the second side. You can turn over a couple of times for even frying.
- When the oil stops sizzling, continue to fry for some more seconds till the omapodi is golden and crisp. Turn over as needed, when frying. Do not break omapodi while frying as then it becomes extra work to remove the small pieces from the oil. So, fry the entire round shaped omapodi as one piece and do not break it.
- Once done, remove fried omapodi with a slotted spoon or a strainer spoon draining off the extra oil.
- Place fried omapodi on kitchen paper towels. Fry remaining in the same way.
- When omapodi cools, place in an air-tight container or box. Before adding to the Madras Mixture, break the omapodi.
Make Boondi Batter
- Take ½ cup gram flour (besan) and 1 tablespoon rice flour in a mixing bowl.
- Then, add 1 pinch asafoetida (hing), 1 pinch baking soda, 2 pinches turmeric powder and ½ teaspoon salt.
- Mix everything with a spoon.
- Now, add 8 to 9 tablespoons water in parts.
- Using a wired whisk, make a smooth and slightly thin batter without lumps.
- The batter consistency is slightly thin. The amount of water to be added depends on the quality of gram flour. So, add accordingly.
Fry Boondi
- Heat oil for frying in a kadai or pan. When the oil becomes hot, then tap the wired whisk or the handle of a spoon which has a bit of batter in to the hot oil.
- The boondi should have a round shape. When they become flat, then the batter is thin. If they get tail ends, then the batter is thick. Tip: In case the batter is thin, then add 1 to 2 teaspoons gram flour and check by frying a few boondi. Tip: If the batter is thick, then add a few teaspoons water and then do the same test. Once you get the correct consistency, proceed with the next step of frying the boondi.
- Now, take a dry perforated ladle (jhara) and place it above the hot oil. Don’t keep at too much height, as the batter droplets, when falling from a height, do not give a round shape. With a spoon, add some batter on the perforated ladle. Spread the batter lightly with a spoon. Finish up the batter on the perforated ladle this way.
- On medium heat, begin to fry the boondi. Do not turn them. Let them become slightly crisp and then only turn them over.
- When the boondi has become crisp, turn with a slotted spoon. You won’t get perfect round shape for each boondi, but it does not matter as the taste of homemade boondi is better than store bought ones.
- After the oil stops sizzling, continue to fry the boondi for some more seconds so that they become crisp
- Remove with a strainer spoon or a slotted spoon draining the extra oil.
- Place the fried boondi on kitchen paper towels.
- After each batch, wipe the perforated ladle with a clean piece of thin moist cotton kitchen towel from both sides. Continue to fry boondi this way. Once the boondi cools at room temperature, store in an air-tight jar or container.
- While the boondi is getting fried, you can keep everything ready for the next step. Take 2 cups omapodi and 2 cups boondi. The rest of the omapodi you can serve as snack. The remaining boondi can be used for making other boondi-based dishes.
Fry More Ingredients for Madras Mixture
- Use a fine sieve ladle as shown in the picture below for frying. In Indian markets, we get these sieve with a handle. This sieve ladle is very helpful for frying ingredients which have small pieces or flakes. As you don’t waste time and energy trying to find out the rice flakes or the chana dal in the oil. Heat some oil for deep frying in a pan or kadai. You can also use the same oil in which you fried the boondi. Keep the heat to medium.
- Take ¼ cup peanuts first in the sieve. Immerse in the oil and begin to fry on medium heat.
- With a spoon, stir often while frying so that the peanuts are fried evenly.
- Fry peanuts till they are crisp and crunchy.
- Using the same sieve, drain the extra oil. So this ladle is helpful for frying as well as for getting rid of extra oil after frying.
- Place the fried peanuts on kitchen paper towel.
- Then, take 25 cashews in the same ladle.
- Stirring often with a spoon, fry cashews till golden.
- Place the fried cashews on the same kitchen paper towel.
- Next, take ¼ cup roasted Bengal gram (chana dal).
- Stirring often with a spoon, fry roasted chana dal till crisp.
- Frying chana dal will take some seconds and their color will change.
- Place the fried chana dal on the same kitchen paper towel.
- Now, take ¼ cup thick flattened/parched rice (poha). I have used thick poha. You can also use thin poha.
- Stirring often with a spoon, fry the poha till crisp and pale golden. Don’t brown the poha. You can add more poha if you want. You can also add more of peanuts, roasted chana dal or cashews, if you like.
- Once the poha is fried well, drain off the extra oil using the same ladle.
- Place the fried poha on the same kitchen paper towel.
- Next, add 12 to 15 curry leaves.
- Stirring often, fry curry leaves till crisp.
- Curry leaves take a few seconds to fry.
- Place the fried curry leaves on the same kitchen paper towel.
Make South Indian Mixture
- In a large bowl, tray or plate, take 2 cups omapodi and 2 cups boondi. Break omapodi before you begin to mix.
- Add the fried cashews, poha, chana dal and curry leaves.
- Add ½ teaspoon red chili powder, ⅛ teaspoon (2 pinches) asafoetida (hing) and salt as per taste over the fried chana dal, poha, nuts and curry leaves, as these will be still hot. You can also add some powdered sugar for a slight sweet taste.
- Mix well with a spoon first and then later you can mix with your hands.
- Then, place the Madras Mixture in an air-tight jar or container. Store at room temperature.
- Serve South Indian Mixture as a Diwali or tea time snack.
Expert Tips
Please be sure to rate the recipe in the recipe card or leave a comment below if you have made it. For more vegetarian inspirations, Sign Up for my emails or follow me on Instagram, Youtube, Facebook, Pinterest or Twitter. Nankhatai Recipe | Nankhatai Biscuit Shakarpara Recipe | Khurma | Shakkarpare Butter Murukku | Butter Chakli Sev Recipe | Karasev | Besan Sev This Mixture Recipe from the archives first published in October 2017 has been updated and republished on 21 October 2022.
