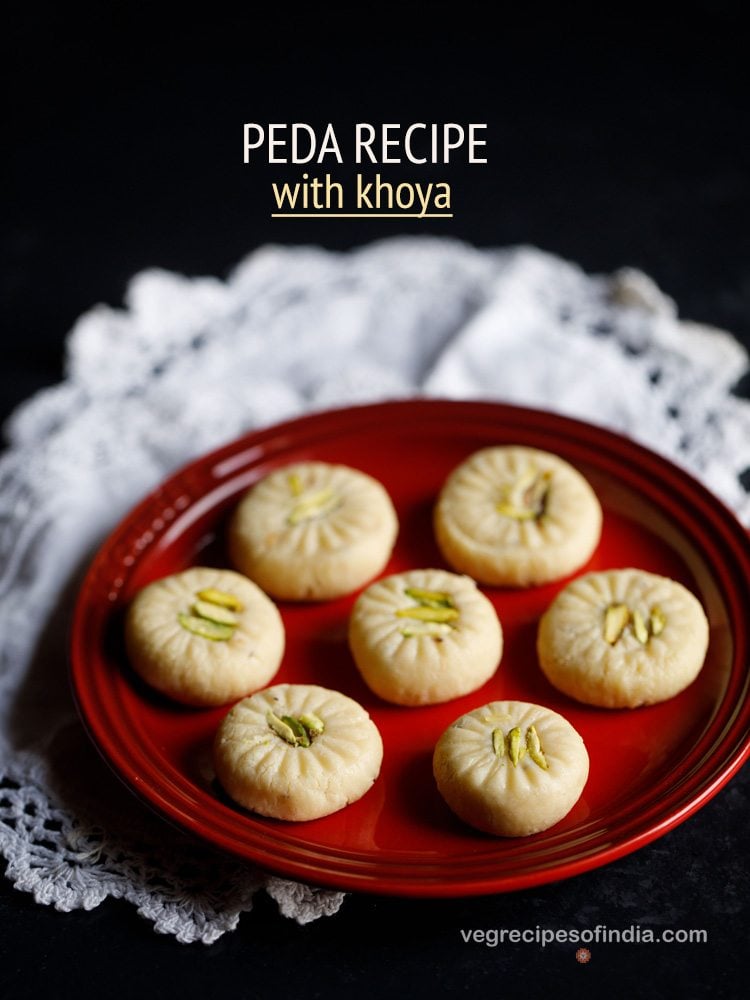
What is Peda
Peda is a fairly general term that refers to a wide variety of spherical or round, delicious milk-based fudge treats. Typically they are made with a combination of dried milk solids (khoya or mawa), sugar and milk, and any preferred flavoring spices. The mixture is simmered on the stovetop until reduced to a thick consistency, which is then cooled and shaped. They are also offered to the deities during religious occasions and ceremonies. Sometimes in temples you are also offered peda as a prasad. Peda can be made two ways. Either you make peda by cooking milk till it thickens, condenses to khoya (which take hours) or use packaged khoya. Some instant peda recipes also use milk powder and condensed milk. This soft fudgy sweet has many variants. Walk into any Indian sweet shop and you will find many varieties of peda. Few popular varieties have originated in certain Indian regions and are a speciality of that area.
Different Types of Peda Recipes
Basically the core ingredients remain the same when you make traditional peda which are – khoya, sugar and flavorings. Some recipes call for cooking the khoya more until it becomes brown and this does not give a milky taste but a more richer, caramelized taste to the peda. A few more variations are achieved by adding some dried fruits, chopped nuts, fragrant spices, coconut and make a different version of peda. Thus there are so many versions of peda! Although I love all the different kinds of wonderful add-ins that you can put in the sweets, I must admit the classic Doodh peda and Dharwad peda are my favorite.
About Doodh Peda
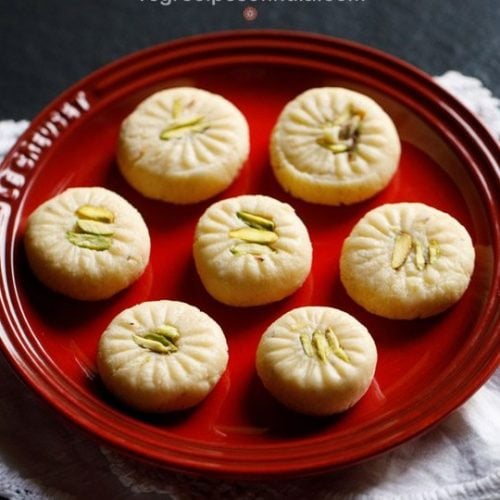
The word “doodh” means milk. Doodh peda refers to the sweet made with milk. Hence also known as milk peda. While khoya is used to make milk peda, but know that – khoya is nothing but thickened, reduced and condensed milk. Making khoya from scratch takes a lot of time. If you have time, make your own or opt to make this Instant Khoya that also works like charm to make this doodh peda recipe. My traditional doodh peda recipe features khoya as the main ingredient. It also includes cardamom, which really compliments the light sweetness of the khoya. I also top the rolled and shaped peda with sliced pistachios for a great crunch that balances the luscious texture of the milk fudge. Make a batch of delicious milk peda in only 15 minutes for your next holiday gathering or special occasion or for festivals like Diwali or Holi. They add a tasty and lovely touch to any celebration!
How to Make Peda Recipe
Make Khoya Mixture
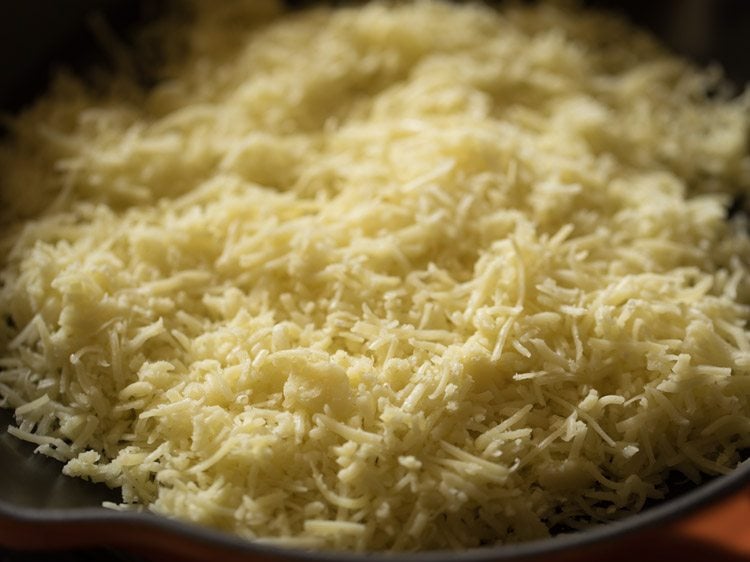
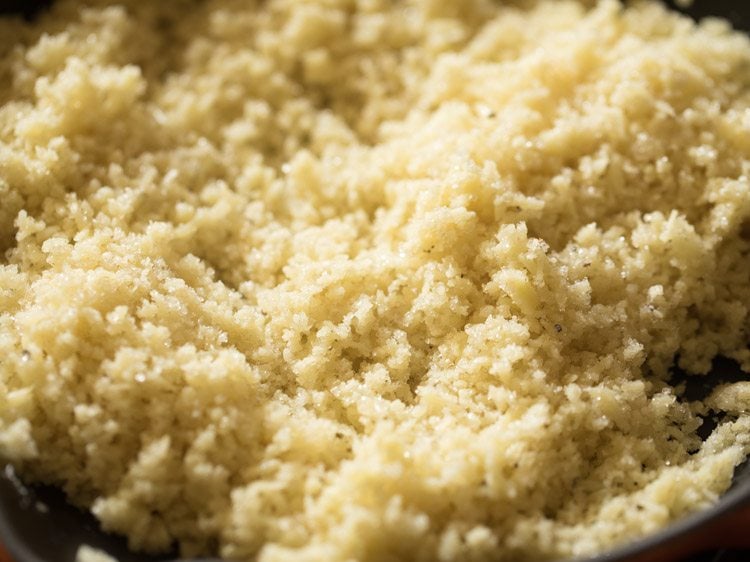
- First grate 200 to 205 grams (about 7.05 oz) of homemade or store bought khoya. You will need 1 cup tightly packed grated khoya. Add this to a deep pan or kadai. Use a heavy and thick bottomed pan so that the khoya mixture does not brown or burn at the bottom.
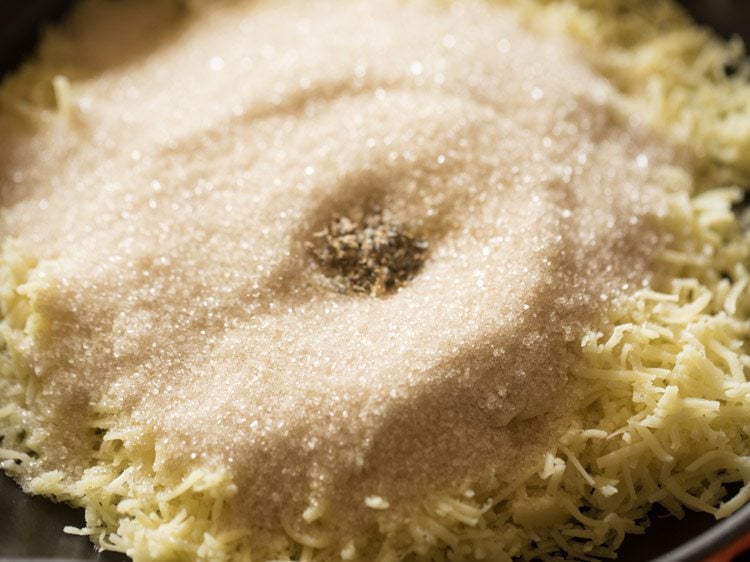
- Add ½ cup sugar (125 grams) and ½ teaspoon cardamom powder.
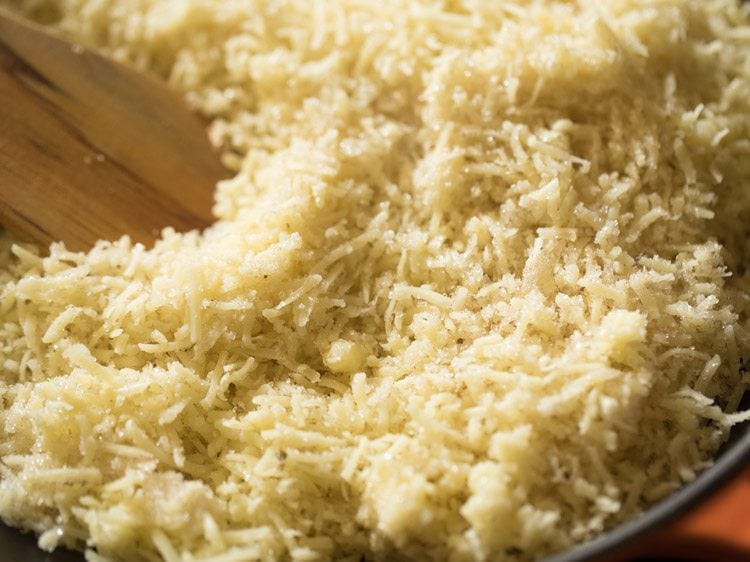
- Set the heat to low. Then mix in the khoya with the sugar.
- Mix evenly and very well.
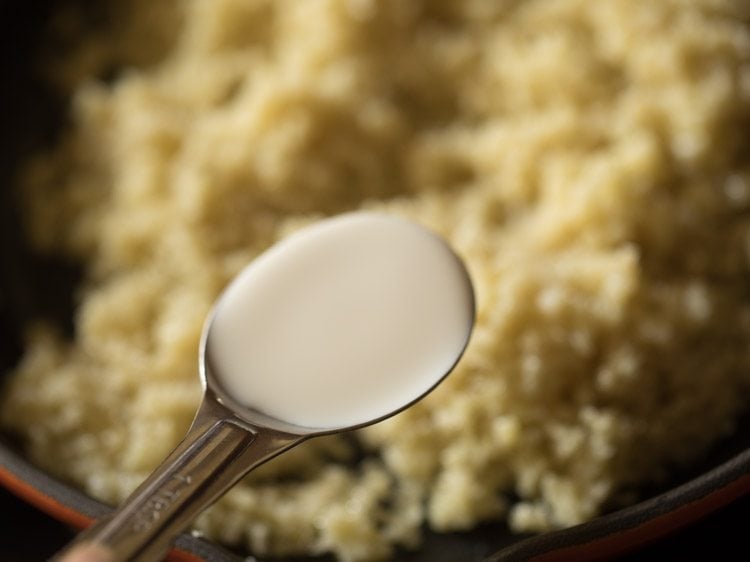
- Now add 2 to 3 tablespoons milk.
Cook Peda Mixture
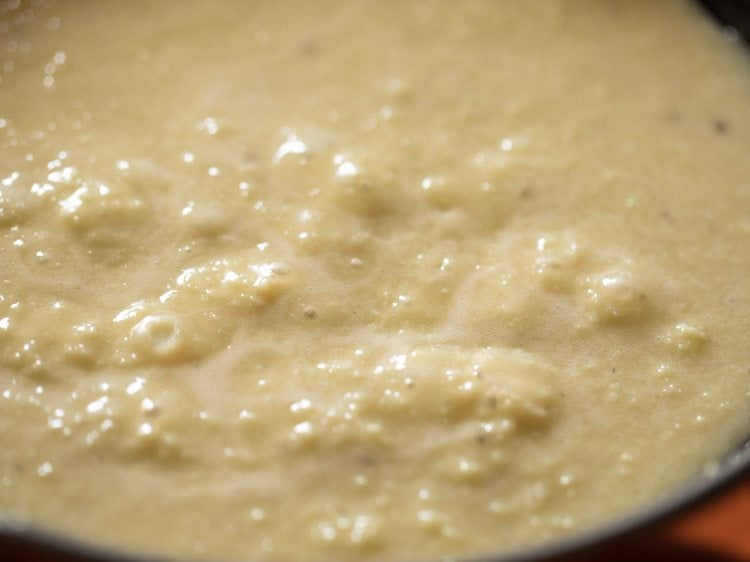
- Mix well. You will see the sugar melting and the mixture becomes more of a liquid.
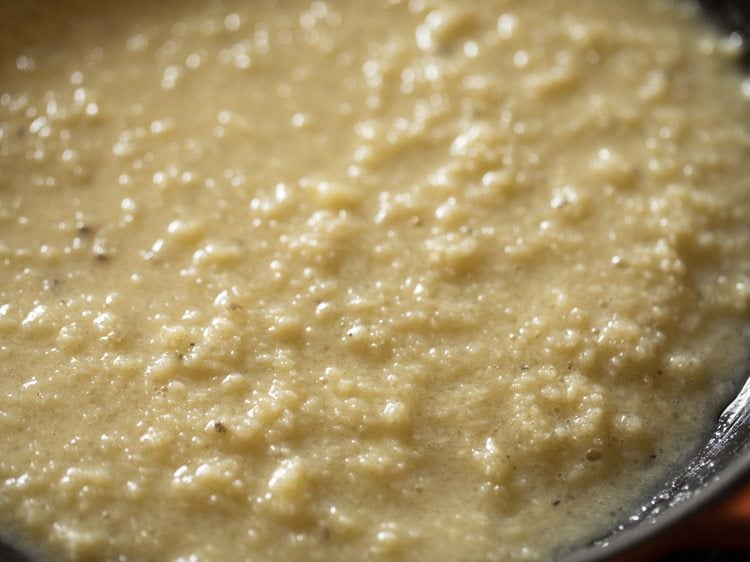
- Simmer the mixture on low heat while stirring continuously.
- You have to stir non-stop so that the mixture does not get browned or stick to the bottom of the pan with a wooden spatula.
- Soon the mixture will start to bubble as you stir.
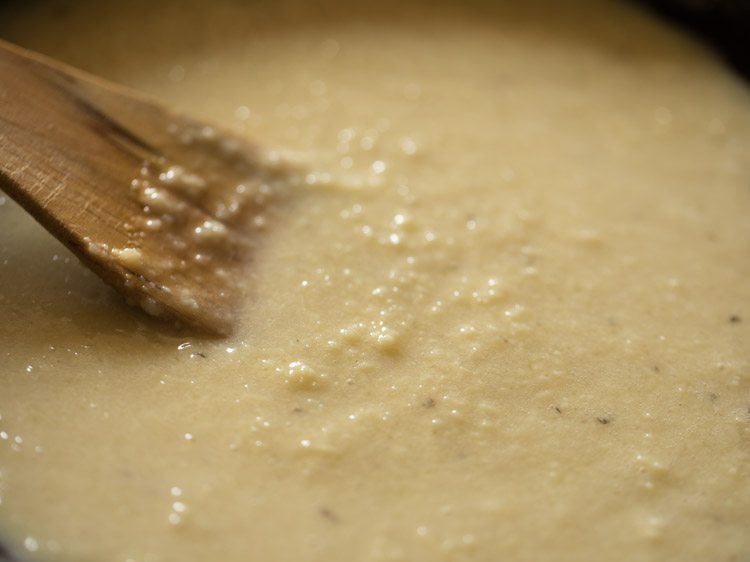
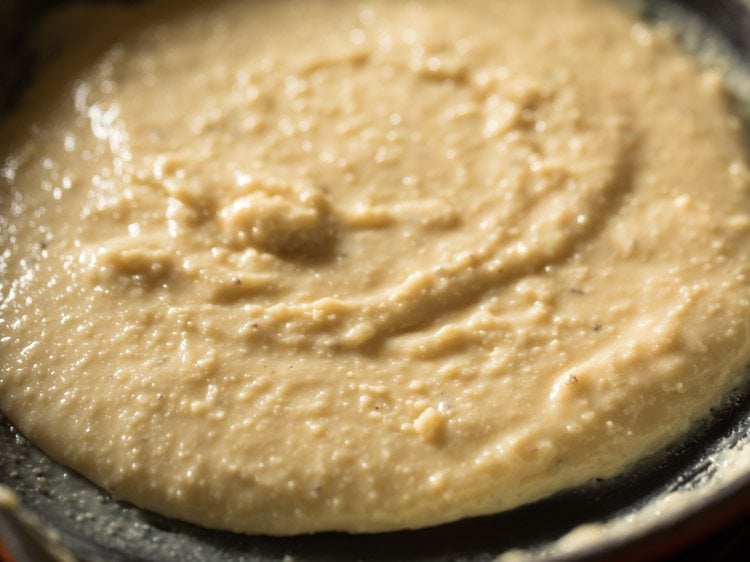
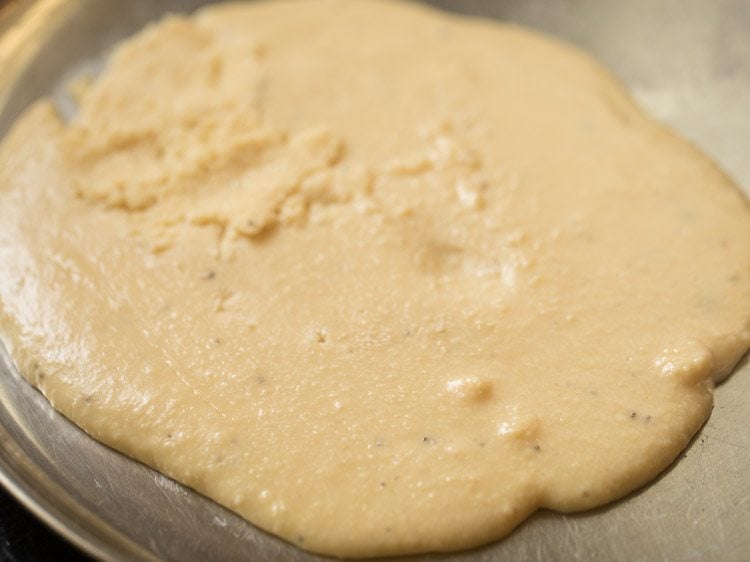
- Continue to stir and cook until the mixture thickens, and starts to pull away from the side of the pan.
- In the below photo you can see how the mixture has thickened, condensed and leaves the side of the pan. The color will also change.
Cool Doodh Peda Mixture
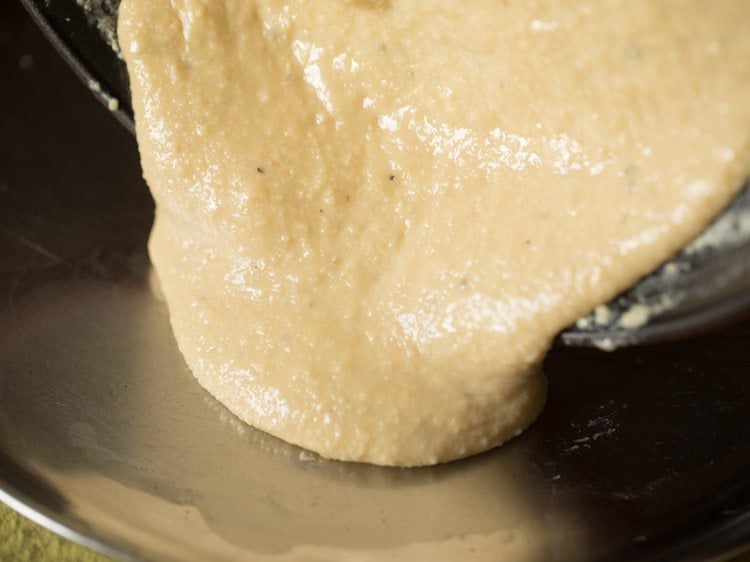
- Immediately pour the entire molten peda mixture onto a steel plate or tray. It should be thick but still spread a bit. Be sure that you do not overcook the peda before attempting to pour, or the fudge will become chewy.
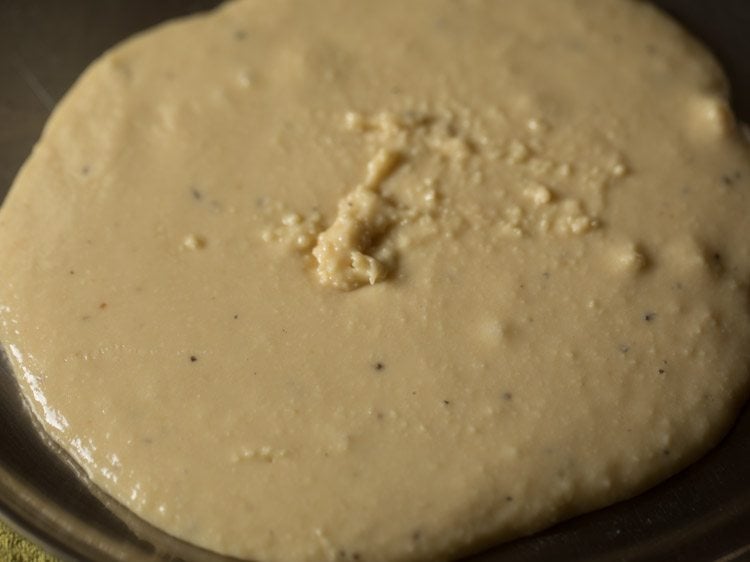
- Let the mixture cool to room temperature.
- In the below photo the mawa peda mixture has become lukewarm.
Shape Peda
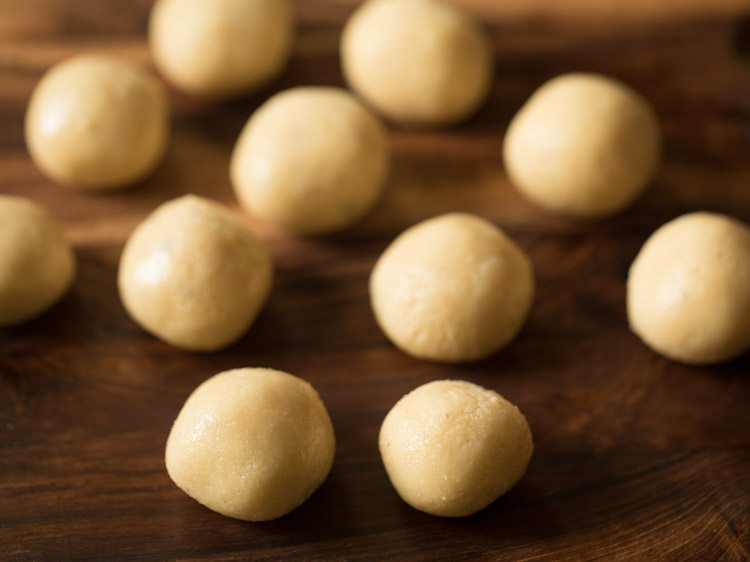
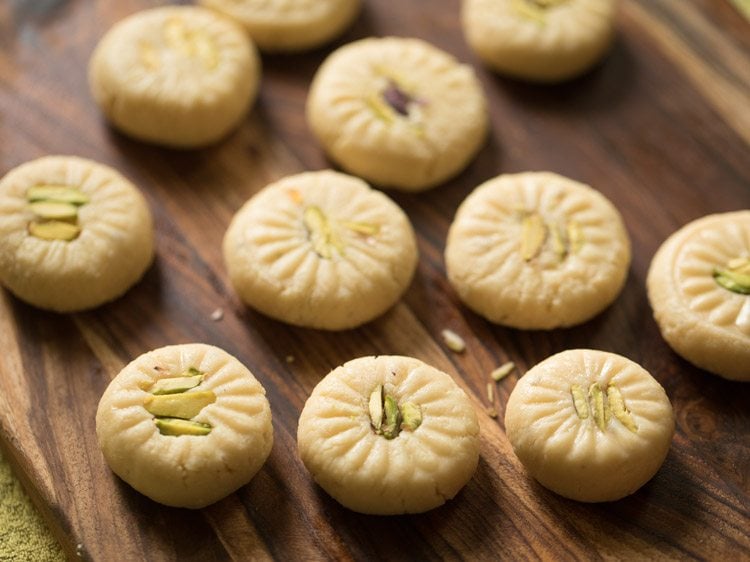
- Now take small portions from the lukewarm peda mixture and roll them into small-to-medium balls. They should be about the size of a small to medium lime.
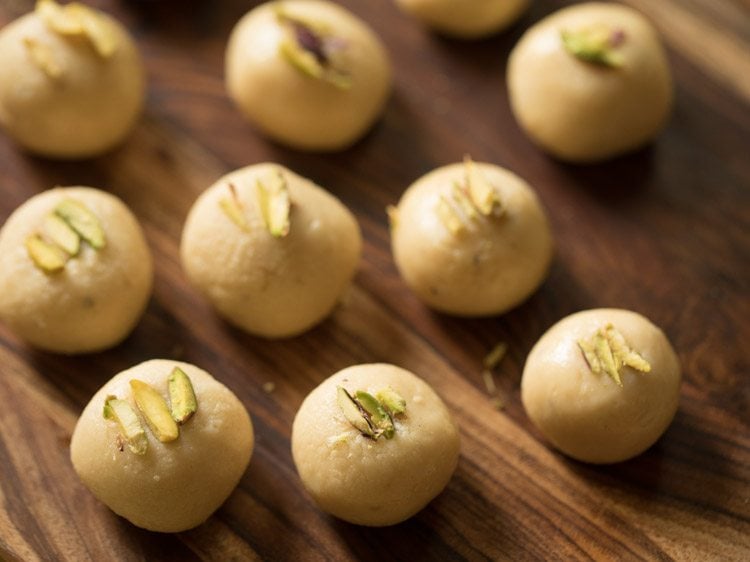
- Place a few slivered pistachios or almonds on top of each milk peda ball.
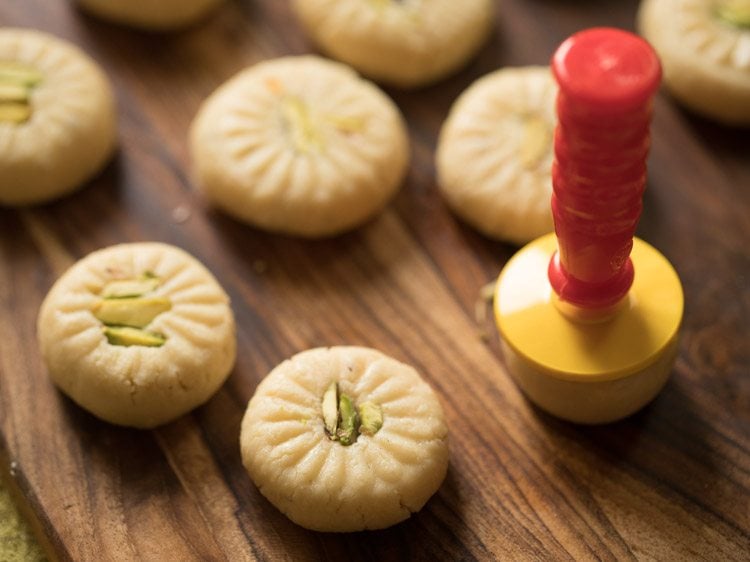
- With a peda maker or peda press, gently press each ball to flatten and shape the milk fudge. If you don’t have a peda maker you can simply use a flat-bottomed bowl or a small steel glass to press them into a thick disc shape. You can also roll the mixture in balls between your palms and then flatten them. Press lightly a few almonds or pistachios on top in the center.
- You can also top with additional nuts, if you like.
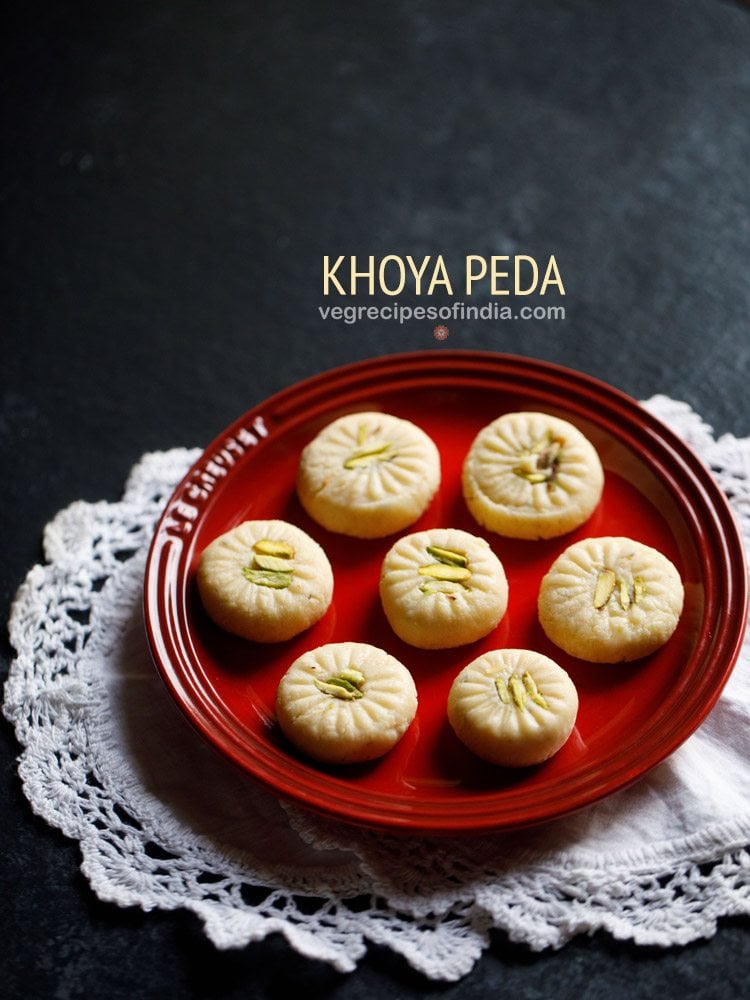
- Enjoy right away or store the milk peda for a few hours at room temperature and then serve later. Refrigerate leftovers in the fridge in an air-tight container for about a week. Peda can be eaten at room temperature or cold. You can also make a large batch and gift them for Diwali or any Indian festival in decorative boxes.
Milk Peda Recipe – Tips & Variations
Forming peda spheres: I suggest you lightly spread some ghee on your hands while forming the round peda balls.Pan type: Use a heavy pan as you do not want the khoya mixture to turn brown or burn. I have here used an enameled cast iron skillet from Le Creuset. As you see in my step-by-step photos, it works nicely. You can also use a heavy steel kadai.Nuts: Use your choice of nuts to make this doodh peda recipe. Pistachios and almonds are classic options.Flavorings: I love to include traditional cardamom powder in these treats. However, feel free to use saffron, rosewater, or a combination of cardamom and your favorite flavorings.Cooking: If your peda fall flat or lose their shape soon after being rolled or stamped or feel sticky, you likely undercooked the mixture. Gather it all back together in the pot and heat again on low, and cook for another 2 to 3 minutes while stirring. Then repeat the pouring, cooling, shaping and stamping process.
Please be sure to rate the recipe in the recipe card or leave a comment below if you have made it. For more vegetarian inspirations, Sign Up for my emails or follow me on Instagram, Youtube, Facebook, Pinterest or Twitter. Malpua Recipe (Classic Homemade Sweet) Gulab Jamun Recipe(With Khoya & Milk Powder) Gujiya Recipe (Fried & Baked) Barfi Recipe | Khoya Barfi | Mawa Barfi This peda recipe from the archives, first published in October 2013 has been updated and republished on 30 October 2021.


title: “Peda Recipe Doodh Peda Milk Peda " ShowToc: true date: “2024-09-15” author: “Kelly Bracken”
What is Peda
Peda is a fairly general term that refers to a wide variety of spherical or round, delicious milk-based fudge treats. Typically they are made with a combination of dried milk solids (khoya or mawa), sugar and milk, and any preferred flavoring spices. The mixture is simmered on the stovetop until reduced to a thick consistency, which is then cooled and shaped. They are also offered to the deities during religious occasions and ceremonies. Sometimes in temples you are also offered peda as a prasad. Peda can be made two ways. Either you make peda by cooking milk till it thickens, condenses to khoya (which take hours) or use packaged khoya. Some instant peda recipes also use milk powder and condensed milk. This soft fudgy sweet has many variants. Walk into any Indian sweet shop and you will find many varieties of peda. Few popular varieties have originated in certain Indian regions and are a speciality of that area.
Different Types of Peda Recipes
Basically the core ingredients remain the same when you make traditional peda which are – khoya, sugar and flavorings. Some recipes call for cooking the khoya more until it becomes brown and this does not give a milky taste but a more richer, caramelized taste to the peda. A few more variations are achieved by adding some dried fruits, chopped nuts, fragrant spices, coconut and make a different version of peda. Thus there are so many versions of peda! Although I love all the different kinds of wonderful add-ins that you can put in the sweets, I must admit the classic Doodh peda and Dharwad peda are my favorite.
About Doodh Peda
The word “doodh” means milk. Doodh peda refers to the sweet made with milk. Hence also known as milk peda. While khoya is used to make milk peda, but know that – khoya is nothing but thickened, reduced and condensed milk. Making khoya from scratch takes a lot of time. If you have time, make your own or opt to make this Instant Khoya that also works like charm to make this doodh peda recipe. My traditional doodh peda recipe features khoya as the main ingredient. It also includes cardamom, which really compliments the light sweetness of the khoya. I also top the rolled and shaped peda with sliced pistachios for a great crunch that balances the luscious texture of the milk fudge. Make a batch of delicious milk peda in only 15 minutes for your next holiday gathering or special occasion or for festivals like Diwali or Holi. They add a tasty and lovely touch to any celebration!
How to Make Peda Recipe
Make Khoya Mixture
- First grate 200 to 205 grams (about 7.05 oz) of homemade or store bought khoya. You will need 1 cup tightly packed grated khoya. Add this to a deep pan or kadai. Use a heavy and thick bottomed pan so that the khoya mixture does not brown or burn at the bottom.
- Add ½ cup sugar (125 grams) and ½ teaspoon cardamom powder.
- Set the heat to low. Then mix in the khoya with the sugar.
- Mix evenly and very well.
- Now add 2 to 3 tablespoons milk.
Cook Peda Mixture
- Mix well. You will see the sugar melting and the mixture becomes more of a liquid.
- Simmer the mixture on low heat while stirring continuously.
- You have to stir non-stop so that the mixture does not get browned or stick to the bottom of the pan with a wooden spatula.
- Soon the mixture will start to bubble as you stir.
- Continue to stir and cook until the mixture thickens, and starts to pull away from the side of the pan.
- In the below photo you can see how the mixture has thickened, condensed and leaves the side of the pan. The color will also change.
Cool Doodh Peda Mixture
- Immediately pour the entire molten peda mixture onto a steel plate or tray. It should be thick but still spread a bit. Be sure that you do not overcook the peda before attempting to pour, or the fudge will become chewy.
- Let the mixture cool to room temperature.
- In the below photo the mawa peda mixture has become lukewarm.
Shape Peda
- Now take small portions from the lukewarm peda mixture and roll them into small-to-medium balls. They should be about the size of a small to medium lime.
- Place a few slivered pistachios or almonds on top of each milk peda ball.
- With a peda maker or peda press, gently press each ball to flatten and shape the milk fudge. If you don’t have a peda maker you can simply use a flat-bottomed bowl or a small steel glass to press them into a thick disc shape. You can also roll the mixture in balls between your palms and then flatten them. Press lightly a few almonds or pistachios on top in the center.
- You can also top with additional nuts, if you like.
- Enjoy right away or store the milk peda for a few hours at room temperature and then serve later. Refrigerate leftovers in the fridge in an air-tight container for about a week. Peda can be eaten at room temperature or cold. You can also make a large batch and gift them for Diwali or any Indian festival in decorative boxes.
Milk Peda Recipe – Tips & Variations
Forming peda spheres: I suggest you lightly spread some ghee on your hands while forming the round peda balls.Pan type: Use a heavy pan as you do not want the khoya mixture to turn brown or burn. I have here used an enameled cast iron skillet from Le Creuset. As you see in my step-by-step photos, it works nicely. You can also use a heavy steel kadai.Nuts: Use your choice of nuts to make this doodh peda recipe. Pistachios and almonds are classic options.Flavorings: I love to include traditional cardamom powder in these treats. However, feel free to use saffron, rosewater, or a combination of cardamom and your favorite flavorings.Cooking: If your peda fall flat or lose their shape soon after being rolled or stamped or feel sticky, you likely undercooked the mixture. Gather it all back together in the pot and heat again on low, and cook for another 2 to 3 minutes while stirring. Then repeat the pouring, cooling, shaping and stamping process.
Please be sure to rate the recipe in the recipe card or leave a comment below if you have made it. For more vegetarian inspirations, Sign Up for my emails or follow me on Instagram, Youtube, Facebook, Pinterest or Twitter. Malpua Recipe (Classic Homemade Sweet) Gulab Jamun Recipe(With Khoya & Milk Powder) Gujiya Recipe (Fried & Baked) Barfi Recipe | Khoya Barfi | Mawa Barfi This peda recipe from the archives, first published in October 2013 has been updated and republished on 30 October 2021.
