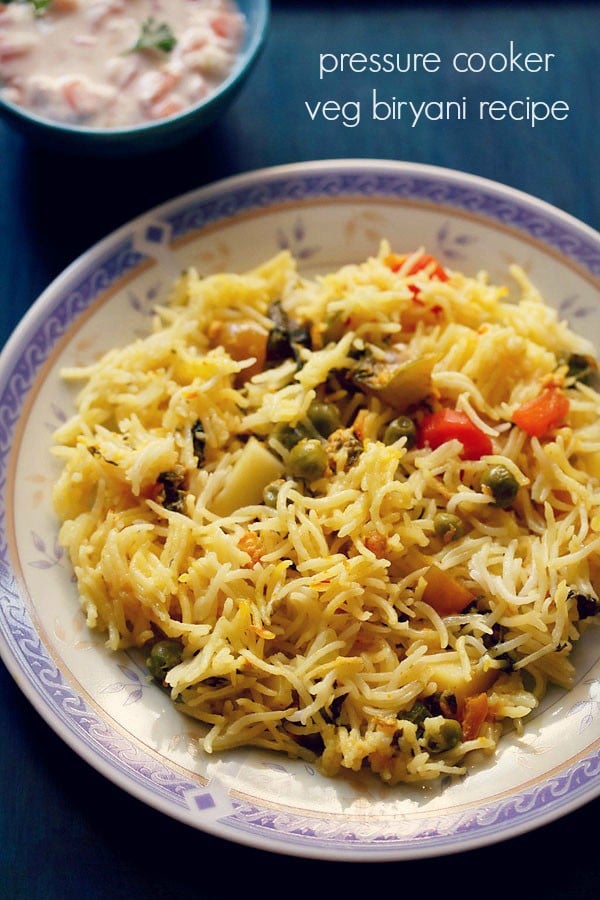
Why This Pressure Cooker Biryani Is A Winner
This vegetable biryani recipe is too good for a pressure-cooked version and does not taste like a Pulao at all. It is not like you put everything in a cooker and pressure cook for 2 whistles and call it a biryani. This preparation has the full flavors of biryani and it tastes just as awesome. An important and popular question that is always asked is that is it possible to make a lovely layered biryani in a pressure cooker? One that does not taste like a pulao or a mishmash of spiced rice with vegetables, but comes very close to the taste of biryani. And where you do not have to pre-cook the rice or veggies and yet get a distinct flavorful biryani? YES, is the answer to all the above questions. With this Pressure Cooker Biryani recipe, you will be able to make one, with ease at home. The method that I have shared here is a result of a lot, lot of trials. The recipe posted here is too good and I have also adapted this recipe to make my variations of Mushroom and Paneer Biryani in the pressure cooker. You can savor the flavors of this Pressure Cooker Biryani with your choice of raita or salad or a side gravy or curry.
Why Pressure Cook a Biryani
Basically, when one is looking or searching for a Pressure Cooker Biryani, it means one wants to save time in the entire biryani making process and yet make a really good flavorsome dish. Making a biryani takes time and what better than to get a recipe which gives maximum taste with minimum efforts. Since the time I have been getting a lot of requests for a Pressure Cooker Biryani, I have been trying different ways of making it using a pressure cooker. With freshly ground biryani masala powder, with cooking the vegetable gravy first and then adding the rice and pressure cooking, so forth and so on. However, the end result would always be a tasty spiced pulao, and not a classic biryani. I did not want to share such a recipe method as I thought it is not right for me to name it as a biryani because the taste and texture does not even come close to a biryani. So then, I began my next round of developing the recipe for a Pressure Cooker Biryani. A recipe that comes close to the taste and texture of biryani. I was pleased that finally, I made a pressure-cooked vegetable biryani, with flavors similar to an authentic biryani and not a pulao. This is a fool proof recipe. Why so? As I have tried it a couple of times and it has always given me excellent results. The various biryani elements are easy to assemble and cook. Only soaking the rice for 30 minutes, sautéing onions and chopping the vegetables, etc take time. Once all these are done, all you need to do is assemble the layers, add water and pressure cook.
How Is It Made
In this Pressure Cooker Biryani,
The veggies are not pre-cooked. The rice is not pre-cooked. There are layers made of the vegetable mixture and rice. The biryani is made in a pressure cooker and cooked for 20 to 25 minutes. Fried onions (birista) are added to give that typical biryani flavor.
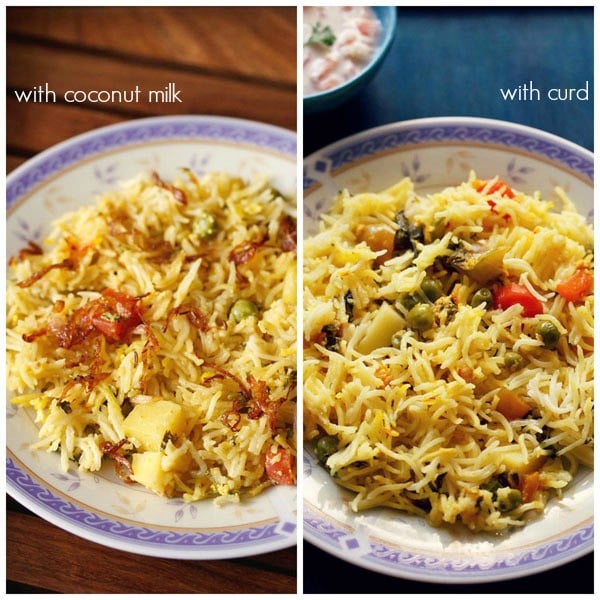
So, basically, you just need to sauté the onions, and not the vegetables or the rice. This way, half the work is reduced. The taste of this Pressure Cooker Biryani recipe is very close to the biryani which is slow-cooked (dum-cooked) traditionally. Not similar or exact, but close. So, if you want an easy method, try this pressure cooker method. And if you want the real deal, then take some time out to make this authentic dum cooked Veg Biryani or this restaurant-style Vegetable Biryani. For the veggie layer, you can use 2 main base ingredients – thick coconut milk or fresh curd. I have made this recipe with both of them. In this recipe post, I have used coconut milk, but I have also shared a few pictures of the vegetable mixture with curd. Like most mixed veg recipes, even here, you can use your choice of veggies. You can add nuts and dry fruits too. Best is to use fresh thick coconut milk as otherwise, the coconut milk can curdle while the biryani cooks. If you are using a store-bought one, then make sure the coconut milk is in its shelf-period and is thick. The recipe I have followed is the way I make my usual Veg Biryani recipe. The Pressure Cooker Biryani made with coconut milk will be rich, slightly sticky and greasy as you can see in the pictures. The one made with curd or yogurt will not be greasy and sticky.
How to make Pressure Cooker Biryani (With Coconut milk)
Soak and Marinate Rice
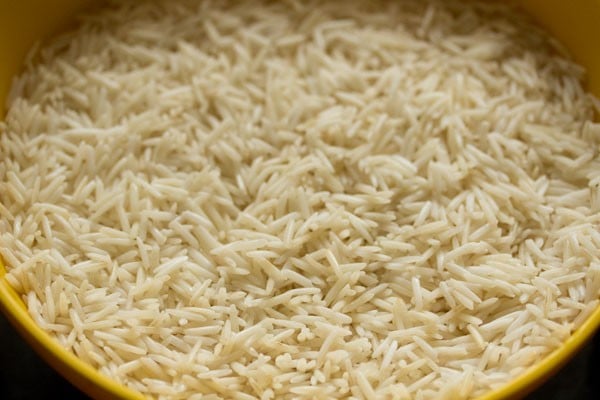
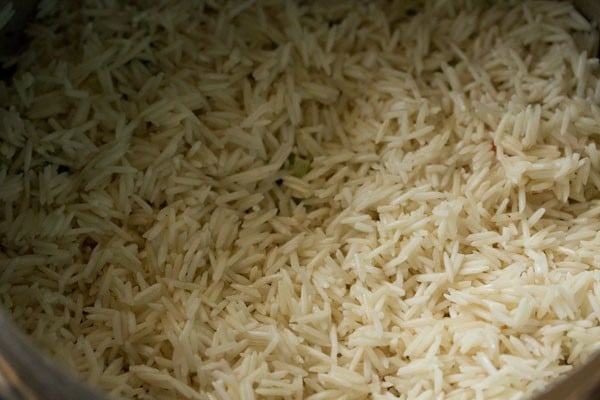
- Rinse 1 heaped cup basmati rice (190 grams) in water many times, until you see the water clear of starch. Then, soak the rice in enough water for 30 minutes.
- After 30 minutes, drain the water very well from the rice.
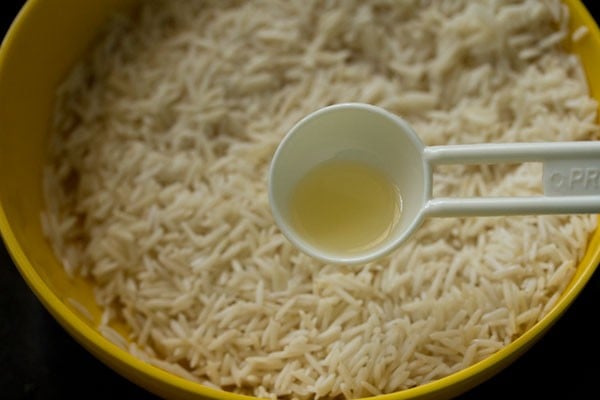
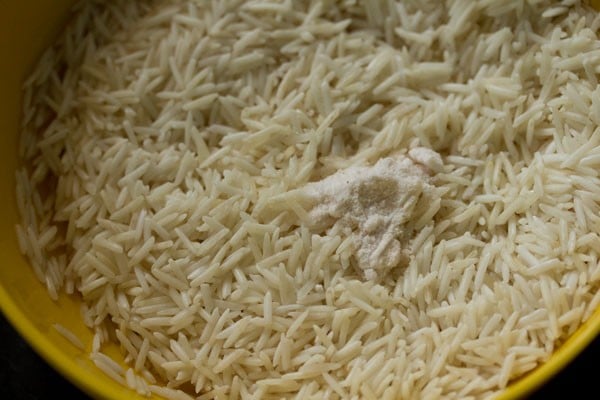
- Pour 1 teaspoon oil in the rice.
- Add ½ teaspoon salt.
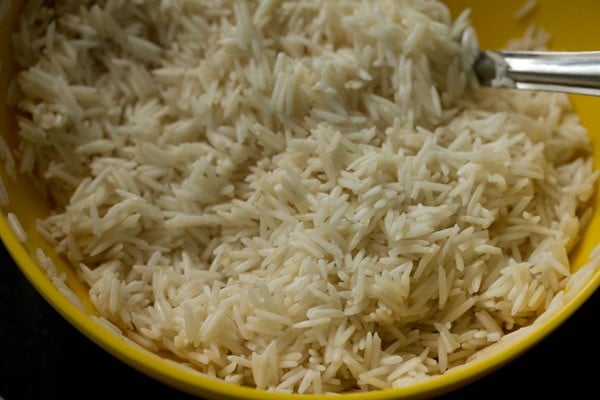
- With a spoon or with your fingers, mix the salt and oil evenly with the rice grains. Set aside.
Mix Vegetables With Coconut Milk
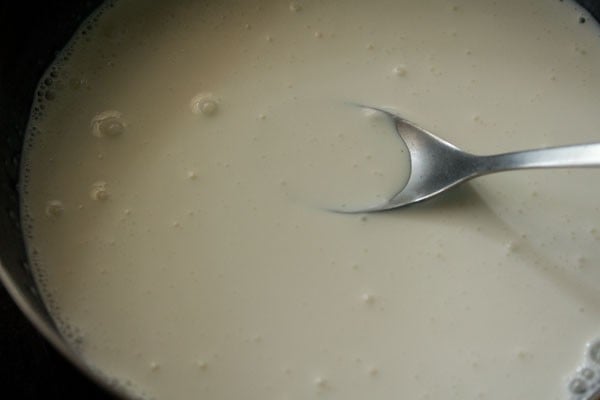
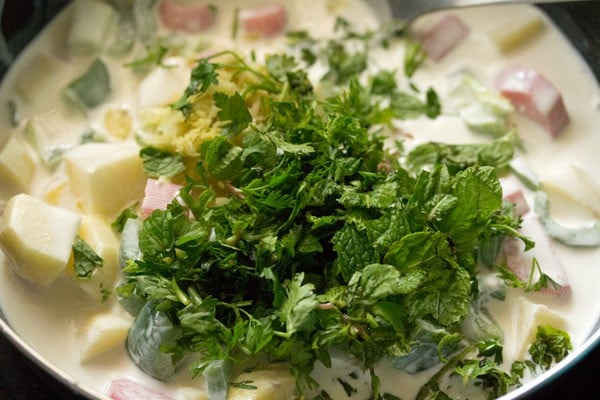
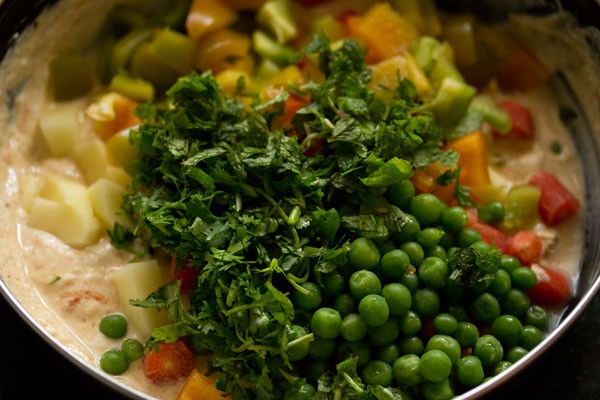
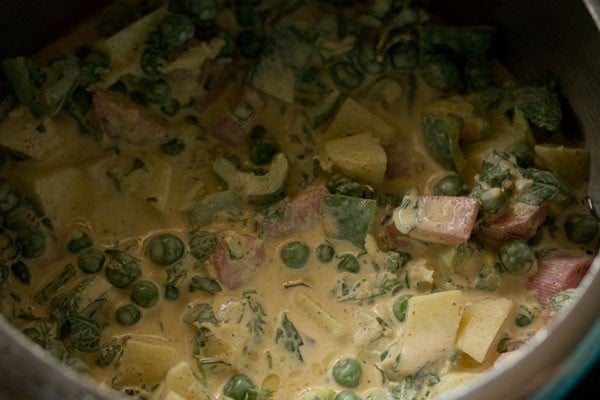
- While the rice is soaking, chop and prepare the vegetable mixture. Take 1 cup thick coconut milk in a pan or large mixing bowl.
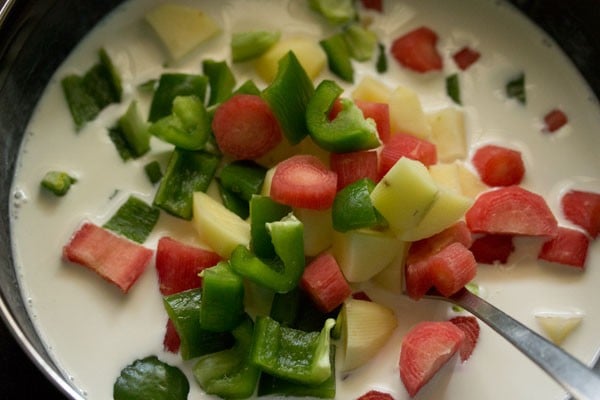
- Add 1½ to 2 cups chopped mixed vegetables. Chop the vegetables into small sizes so that they cook well.
- Add ½ tablespoon ginger-garlic paste, 3 tablespoons chopped coriander leaves and 3 tablespoons chopped mint leaves.
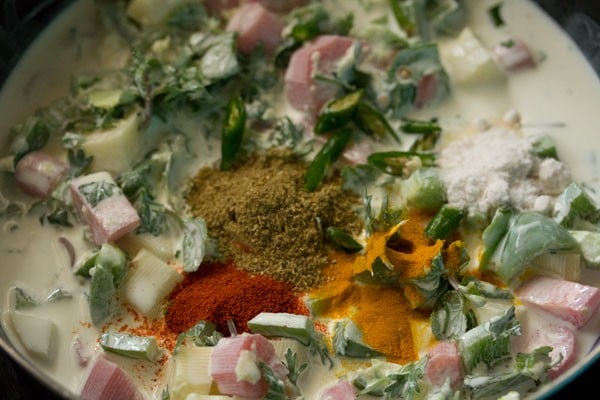
- Add 1 to 2 chopped green chilies and the below listed spice powders and seasonings:
½ teaspoon turmeric powder ½ teaspoon red chili powder 1 teaspoon coriander powder ½ teaspoon garam masala powder (optional) salt as per taste
- I forgot to add ⅓ cup green peas. So, adding in this step.
- Mix very well and set aside. If you prefer, you can even marinate for 15 to 30 minutes. Check the taste and add more salt, if required.
Or Marinate Vegetables With Curd
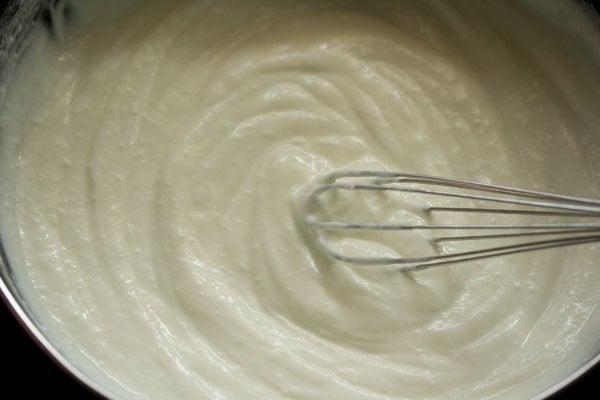
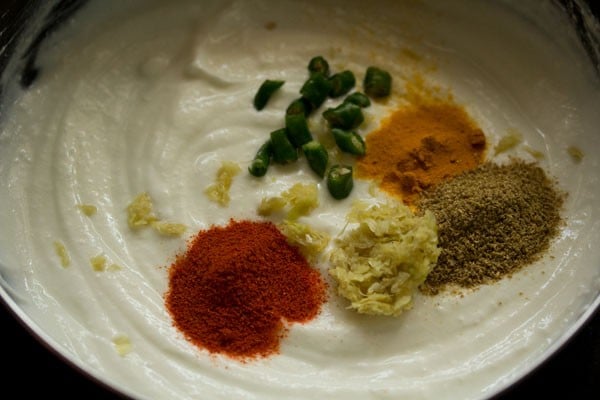
- Take 1 cup curd or yogurt in a bowl and whisk it till smooth.
- Then, add the ground spice powders, chopped green chilies and ginger-garlic paste.
- Next add the chopped vegetables, chopped coriander leaves, chopped mint leaves and salt.
- Mix very well. You could also set aside to marinate for 15 to 30 minutes.
Sauté Spices & Onions
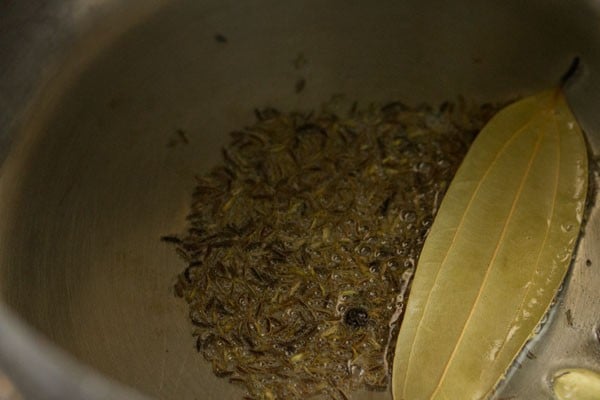
Make sure to use the same volume/litres of pressure cooker as I have used. If you make this recipe in a smaller or larger pressure cooker than 3 litres, you may need to add less or more water. 16. Heat 3 tablespoons oil in a 3-liter stovetop pressure cooker. Then, add the whole spices listed below and sauté till they crackle and turn fragrant:
1 inch cinnamon 3 cloves 3 green cardamoms 1 black cardamom 2 thin single strands of mace ½ teaspoon shahi jeera (caraway seeds) 5 to 6 black peppercorns
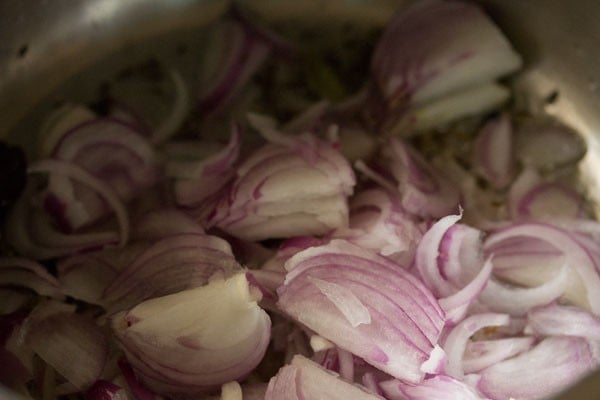
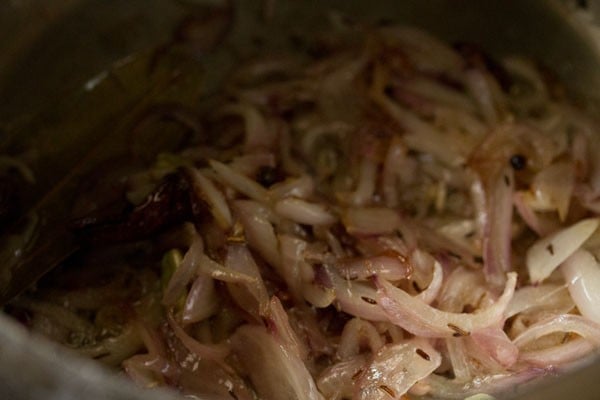
- Next, add 1 cup thinly sliced onions.
- Stir and begin to sauté the onions on low to medium heat.
- Cooking onions does take some time. So, add a pinch of salt to quicken the cooking process.
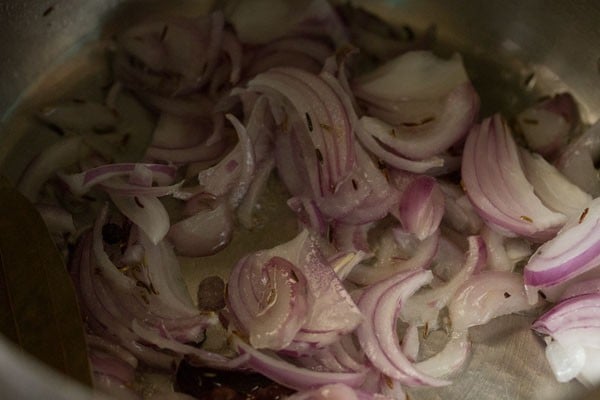
- First, the onions will turn light golden. Continue to cook them further.
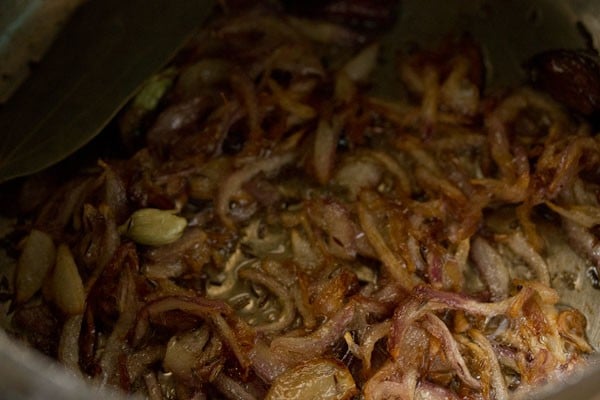
- When the onions turn golden, turn off the heat.
- Remove the cooker from the stovetop and place it on the kitchen tabletop or countertop.
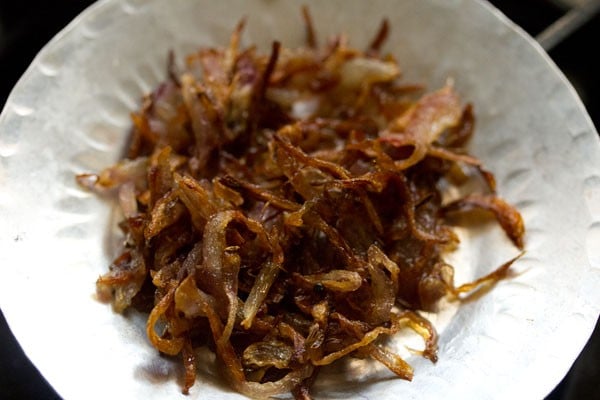
- Remove half of the fried onions on a plate. Set this aside. Some caraway seeds will also come with the fried onions. But it is fine. Do not take the other whole spices from the browned onions. Keep them in the cooker.
Layer and Make Pressure Cook Biryani
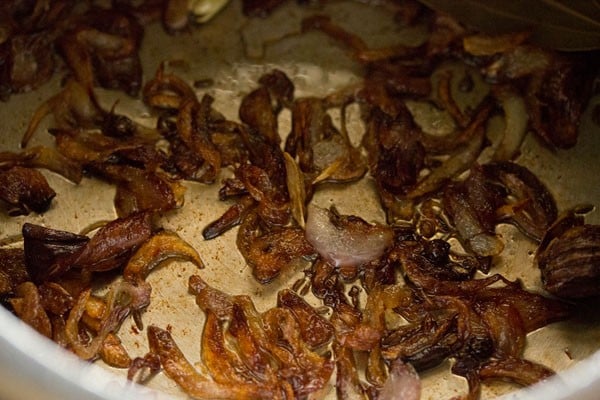
- With a spoon, evenly spread the fried onions which are in the cooker.
- Now with a spoon, pour the vegetable mixture evenly; whether you have made it with coconut milk or curd.
- Make an even layer of all the vegetable mixture.
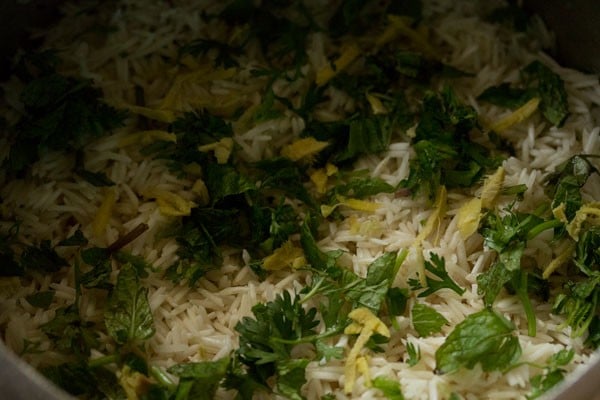
- Next, spread all the rice evenly on the vegetable mixture layer.
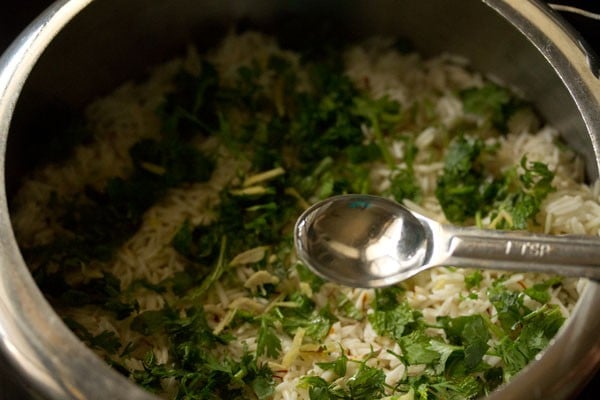
- Add 2 tablespoons chopped coriander leaves, 2 tablespoons mint leaves and chopped ginger or ginger juliennes evenly all over the rice. At this step, add the fried onions also on the layer. I forgot to add and thus used them as a garnish later. You can also dot the rice with some a few teaspoons of oil or ghee, if you like.
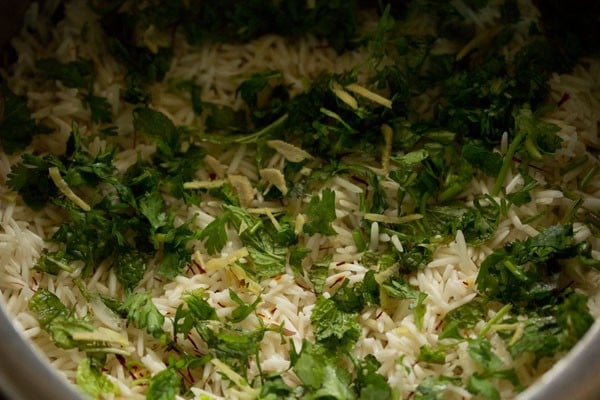
- Sprinkle a generous pinch of crushed saffron strands all over.
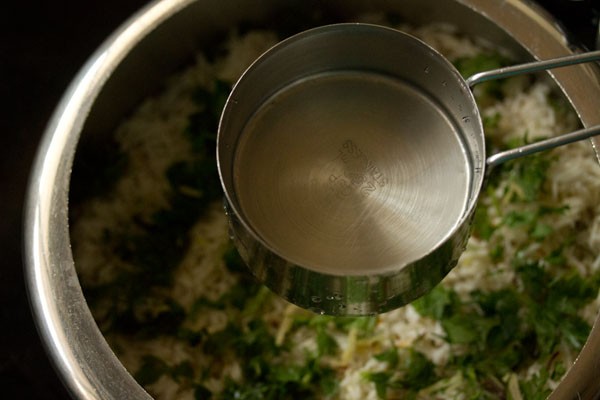
- Now, drizzle 1 to 2 teaspoons rose water or kewra water evenly all over.
- Next, pour 1 to 1¼ cups water gently all around along the sides of the cooker. Don’t add water in the center. Note that 1¼ cups water will make the rice grains more soft.
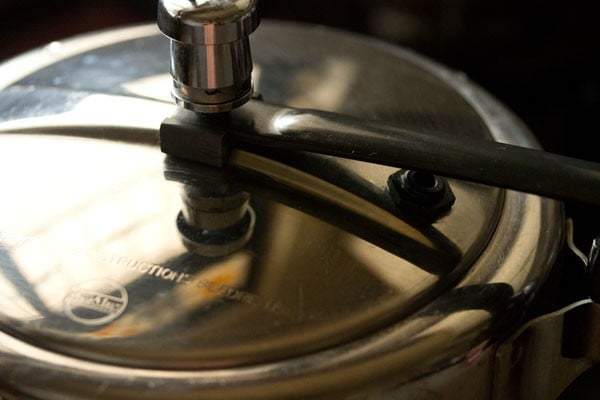
- Cover the cooker with its lid with the vent weight/whistle attached to the lid. On low heat, cook the biryani in the pressure cooker for about 20 to 25 minutes. If the pressure cooker whistles, then its fine. 33. Once the pressure settles down on its own, then open the lid.
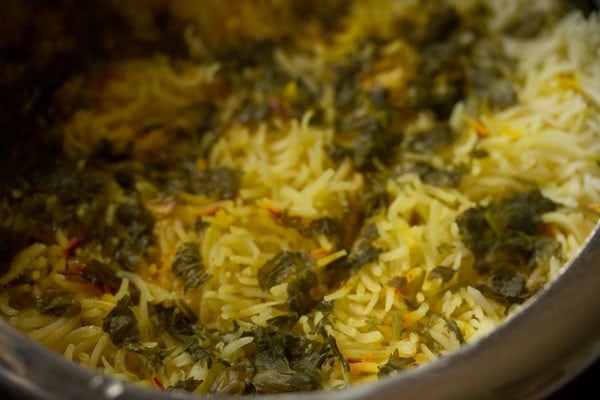
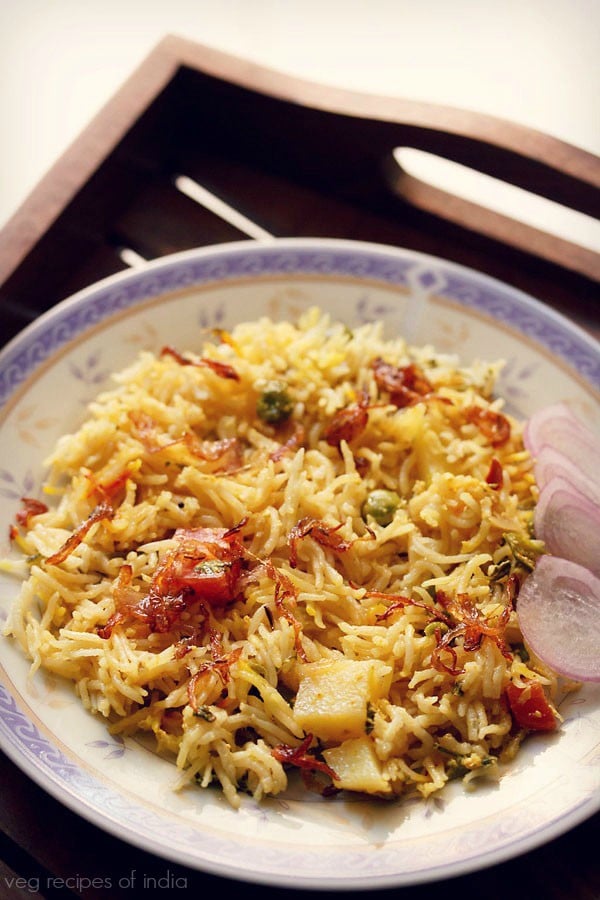
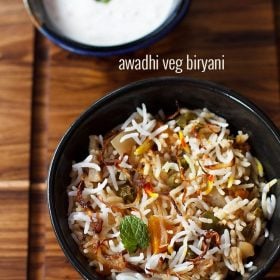
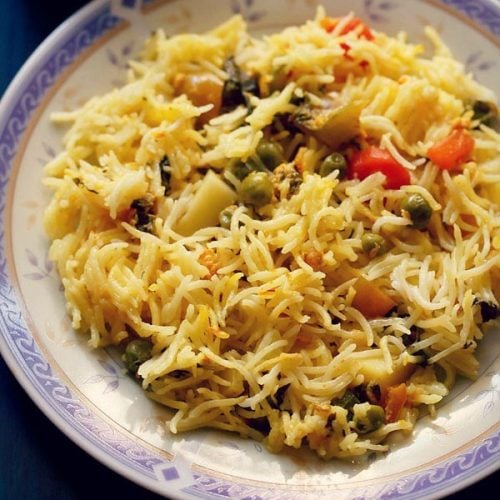
- Garnish with the remaining fried onions and serve Pressure Cooker Biryani with your favorite raita or salad or a side gravy like biryani shorba or Mirchi ka Salan. Please be sure to rate the recipe in the recipe card or leave a comment below if you have made it. For more vegetarian inspirations, Sign Up for my emails or follow me on Instagram, Youtube, Facebook, Pinterest or Twitter. Lucknowi Biryani | Awadhi Biryani (Veg) Mughlai Biryani Cooker Cake (Eggless) Pressure Cooker Chocolate Cake This Pressure Cooker Biryani recipe from the blog archives was first published on February 2016. It has been updated and republished on May 2024.